¶ Printer Screen Operation Guide
The functions of the buttons on the home page are as follows:

¶ 1.Home Page
① Home Button: Returns to the home page.
¶ 2.Back
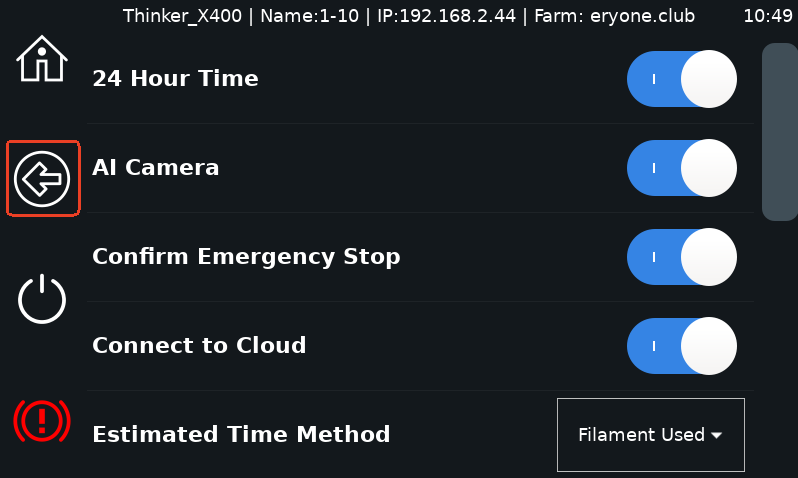
② Back Button: Returns to the previous page.
¶ 3.Shut Down
③ Shutdown Button: Powers off the system.
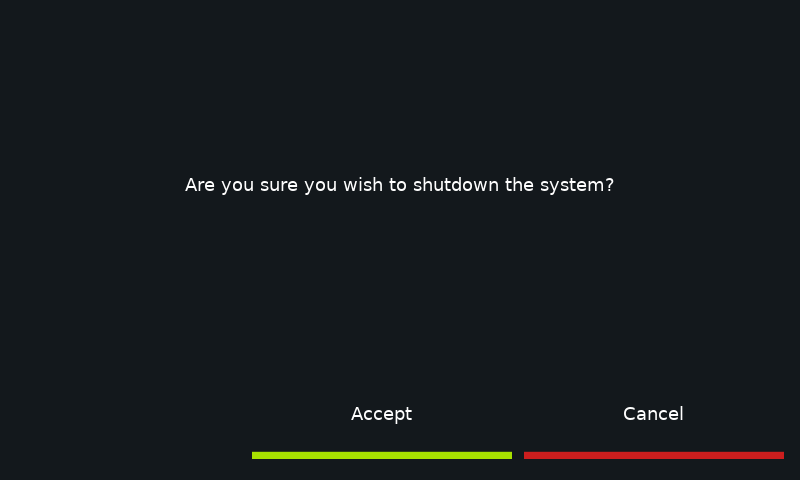
Note: After shutdown, press the emergency switch on the printer’s right side. To restart, rotate the emergency switch back.
(This shutdown button is designed to reduce the risk of the machine malfunctioning, similar to the hot-plugging of a USB flash drive. Of course, you can also shut down the machine directly by tapping the emergency switch on the right side of the machine. We simply recommend that you do the above to turn off the printer.)
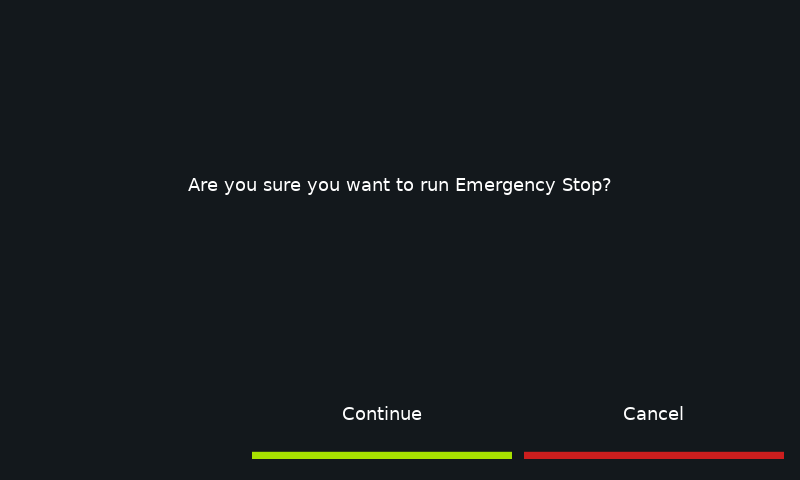
¶ 4.Emergency Stop
④ Emergency Stop Button: Halts printer operation.
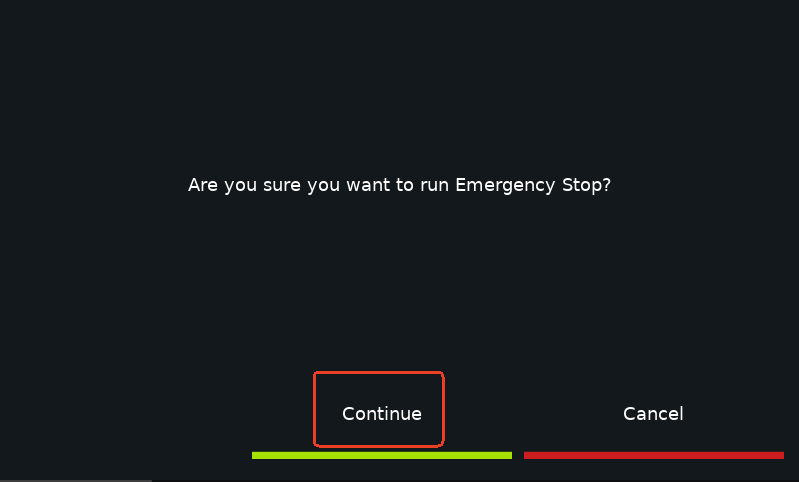
After clicking on it, wait for a while, then you can go back to the main interface.

¶ 5.Nozzle Temperature Setting
⑤ Nozzle Temperature Button: Sets the nozzle temperature (max 300°C).
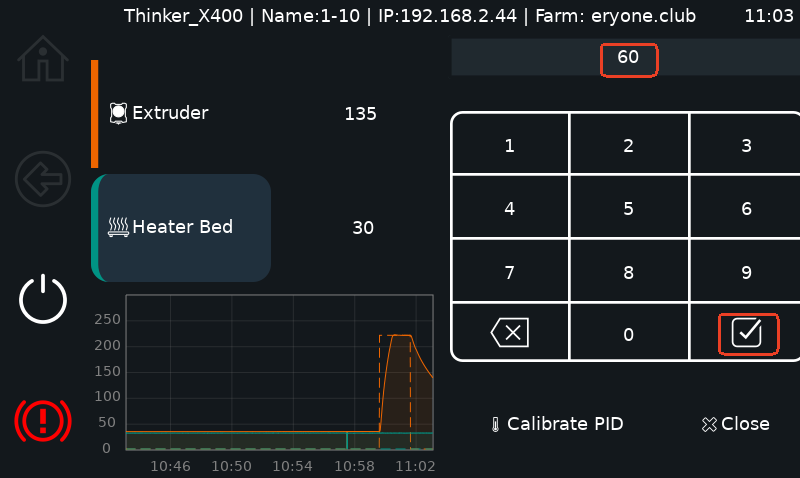
¶ 6.Heated Bed Temperature Setting
⑥ Heated Bed Temperature Button: Sets the bed temperature (max 120°C).
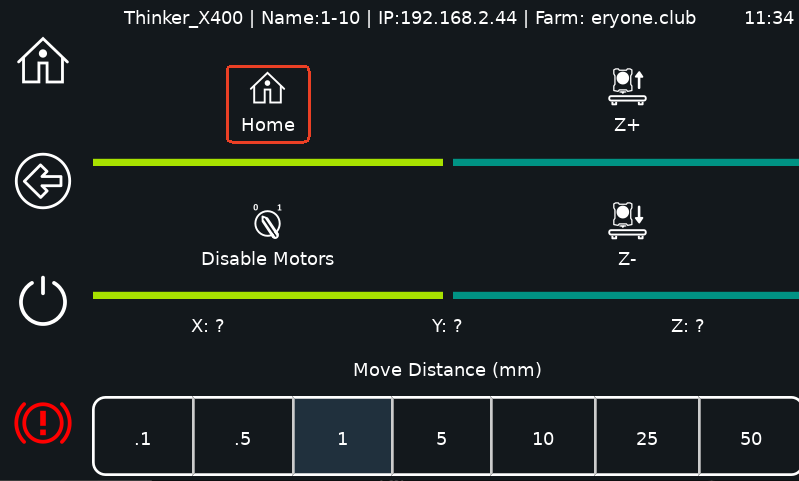
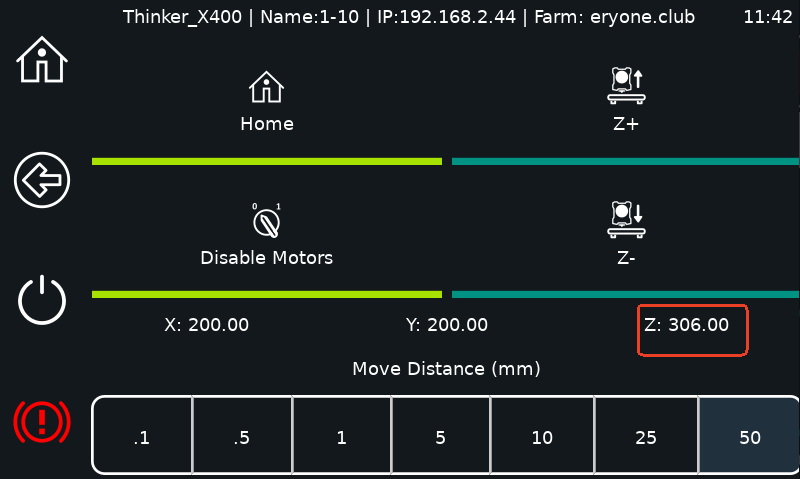
¶ 7.Movement
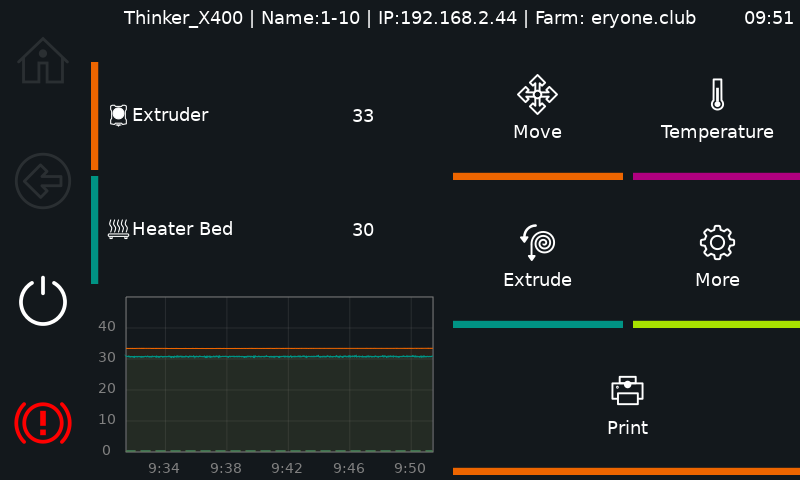
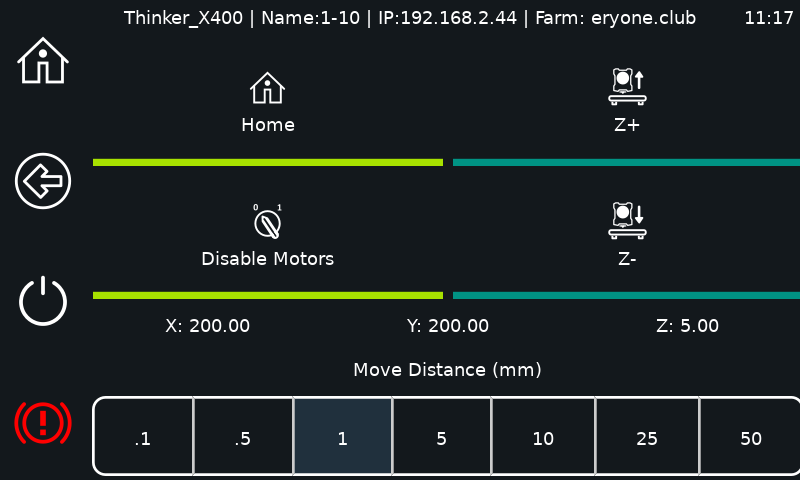
⑦ Click "Move" jump to the move page
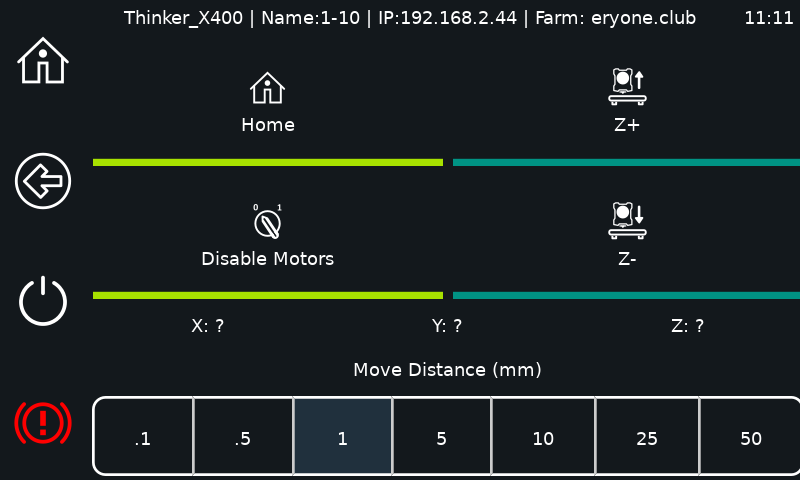
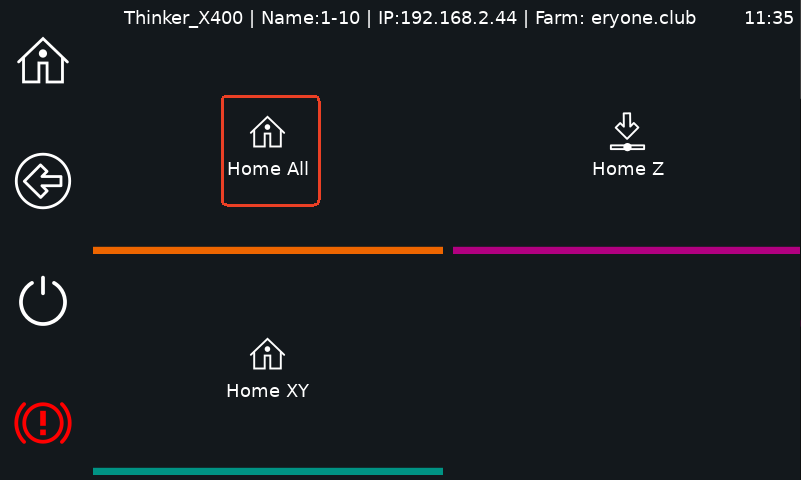
Home (click "Home" jump to the home page)
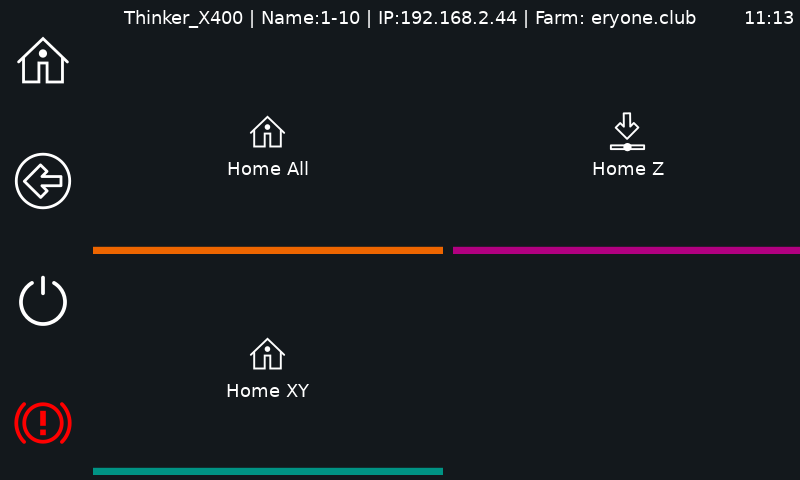
Home All: this function moves the X, Y, and Z axis to their predefined home positions. (X: 200, Y: 200, Z: 3).
Home XY Axis : This function moves the X and Y axes to their predefined home positions. (X: 400.04 Y: 400.00 Z: 0)

Home Z-axis : This function will move the Z axis to its predefined home position. (X: 400.04 Y: 400 Z: 3), The Z-axis can only be homed after the X and Y axes have been homed.

Note: For the above operation, if there is no other command during the two-minute period, the printer will automatically shut down the motor.
Shut down the motor: click on shut down to manually move the extruder in the X and Y axis direction.
Z+: Adjusts the extruder height. Please click the number next to "Z", then click "Z+" to raise the nozzle height.
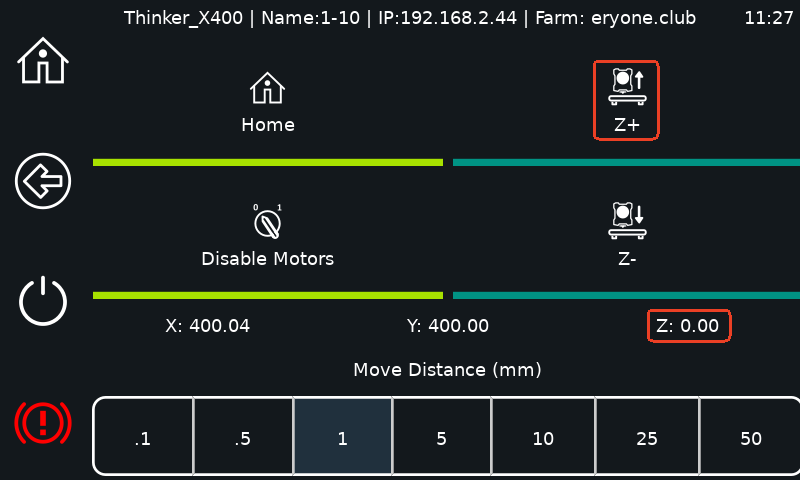
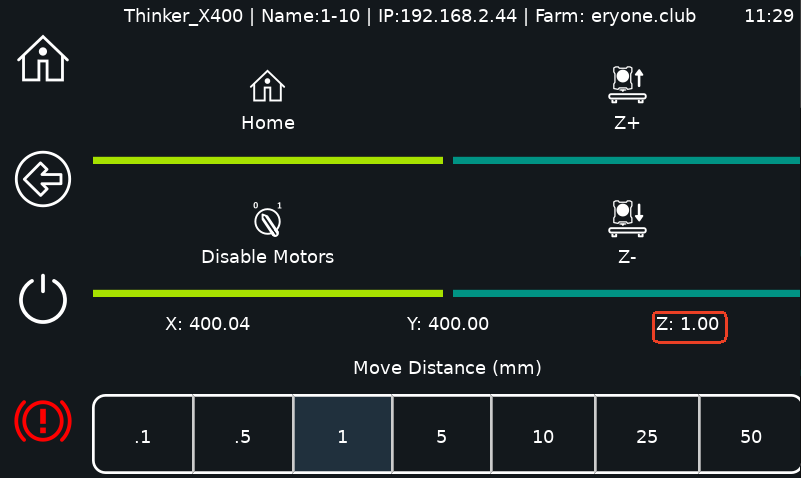
Z-: Please click the number next to "Z", then click "Z—" to decrease the nozzle height.

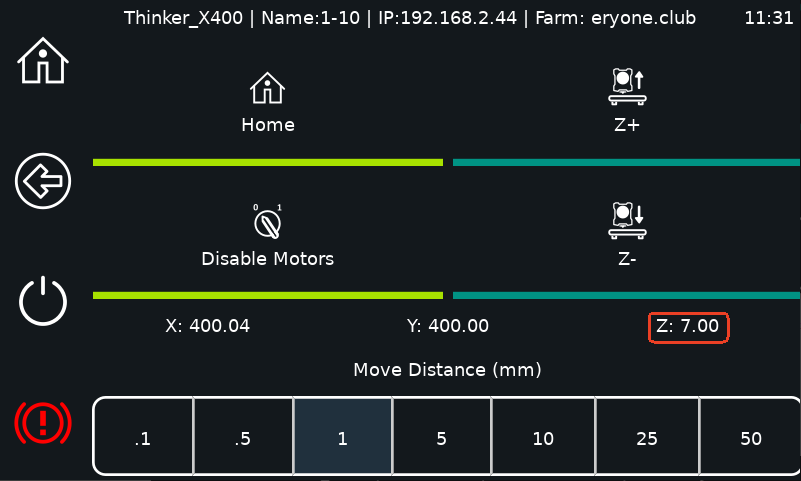
Note: If you need to adjust the extruder raised position, please perform a home operation first, and then click “Home All”.

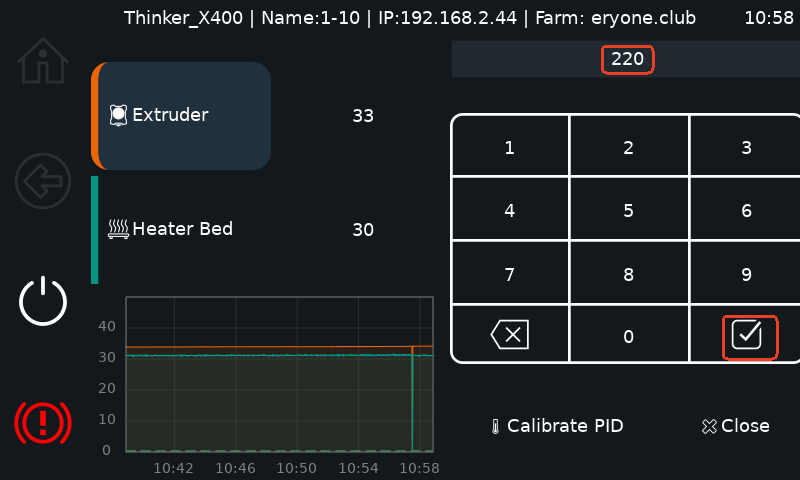
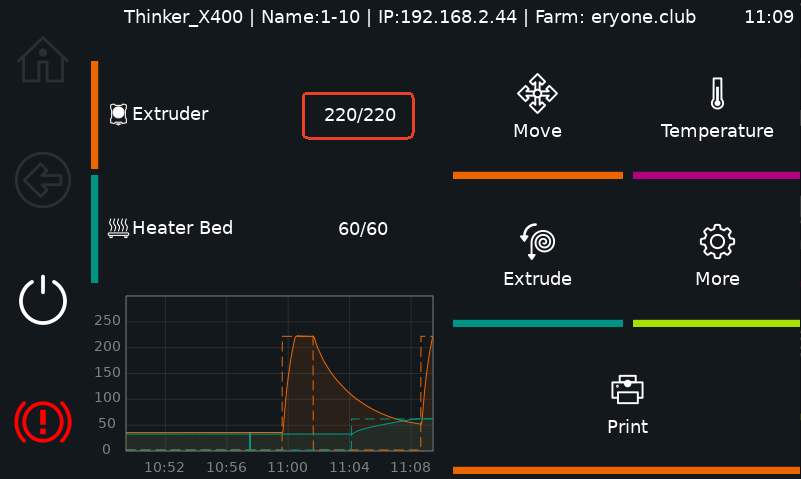
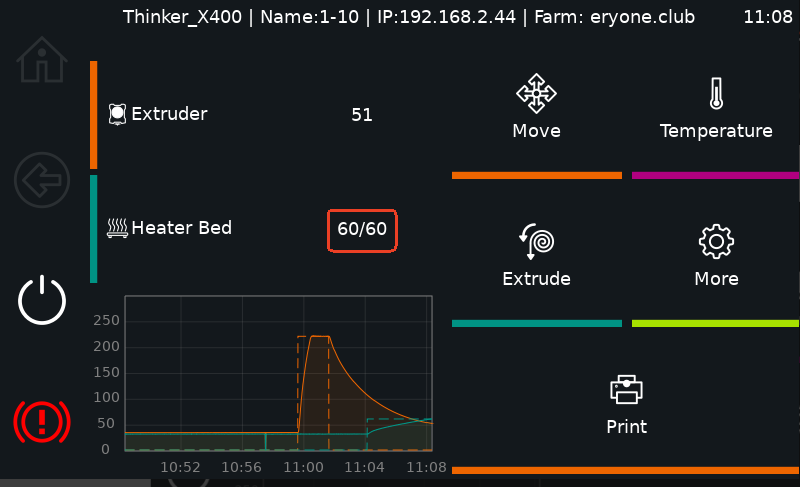
¶ 8.Temperature
⑧ Temperature Button: Adjusts nozzle and bed temperatures.
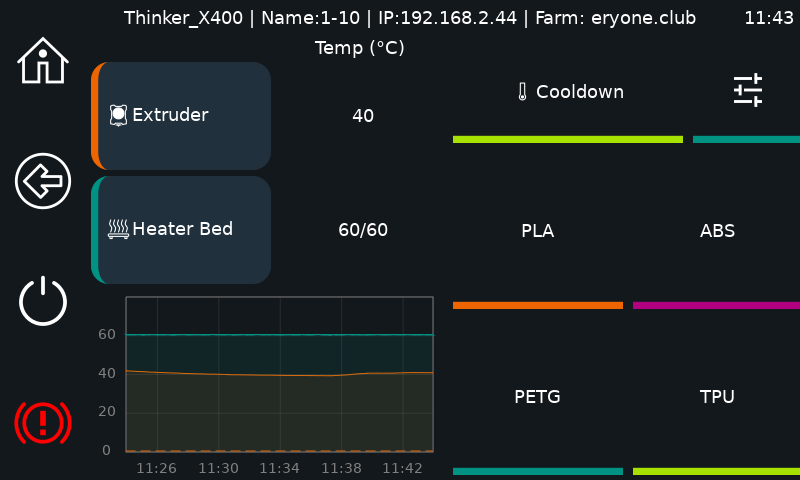
Cooldown: Gradually reduces temperatures to ambient levels.
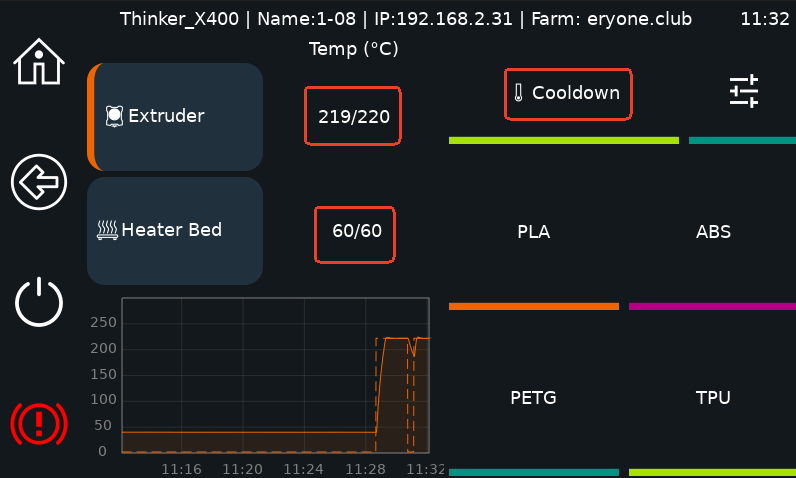
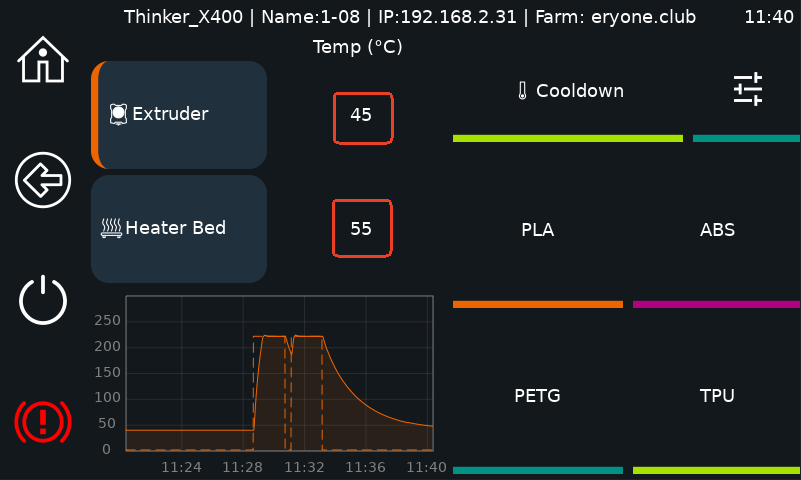
 :Adjust the temperature of the nozzle and the heatbed ( Select the temperature you want to adjust, select the value you need to adjust in the lower right, and finally click on the “+” and “-” button.)
For example: to heat the nozzle to 50℃, you need to click 2 times “+” button.

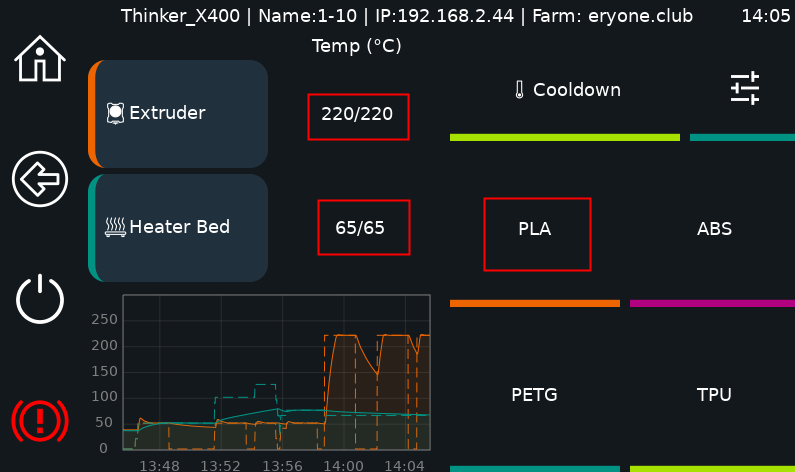
PLA: Nozzle heated to 220°C, heatbed heated to 65°C.
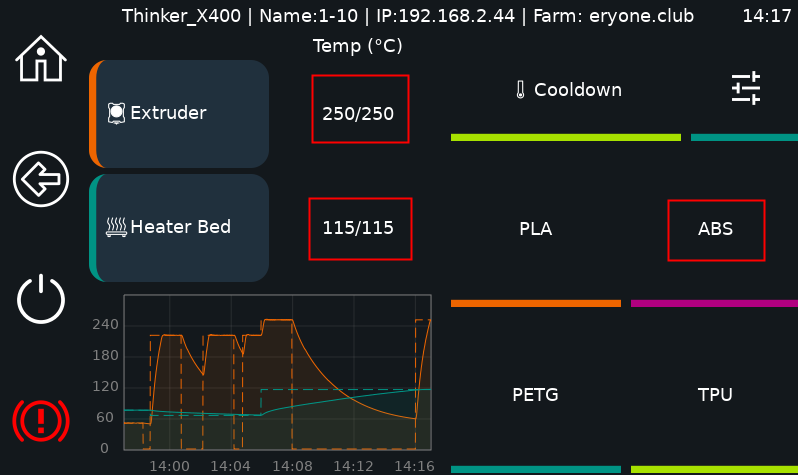
ABS: nozzle heated to 250°C, heatbed heated to 115°C.
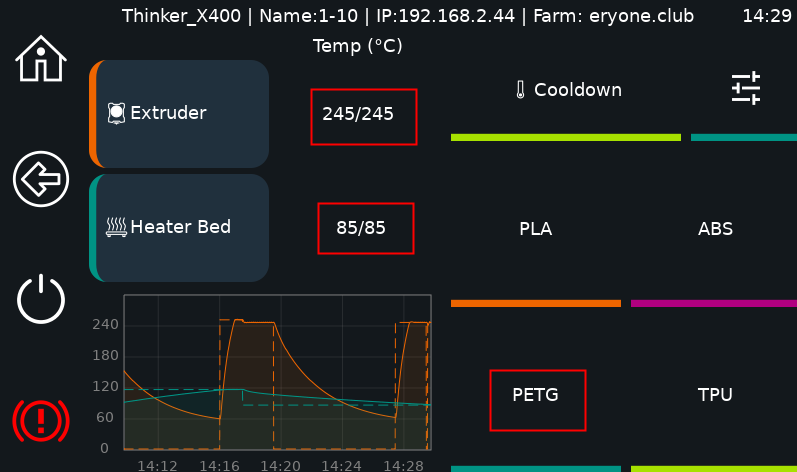
PETG: nozzle heated to 245°C, heatbed heated to 85°C.
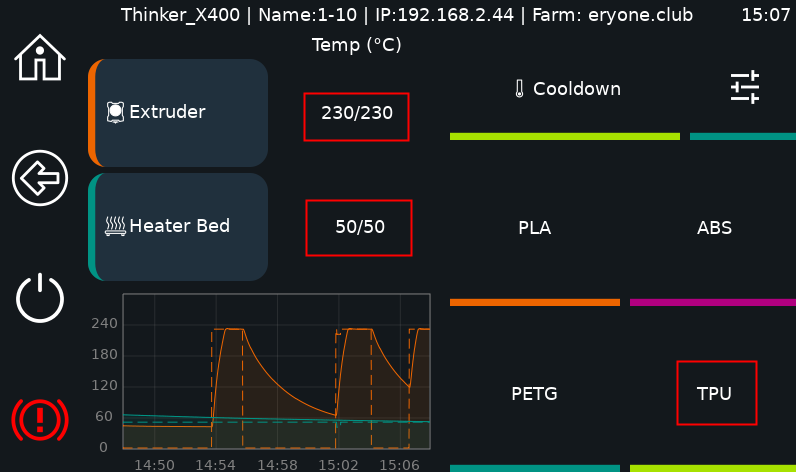
TPU: nozzle heated to 230°C, heatbed heated to 50°C.
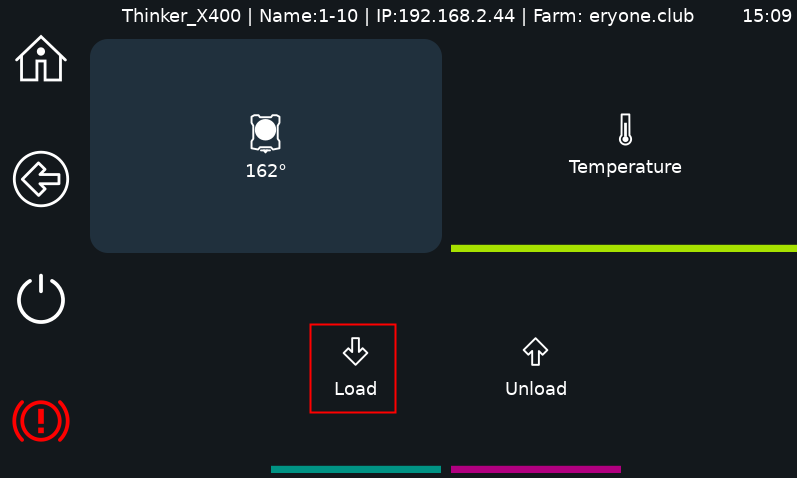
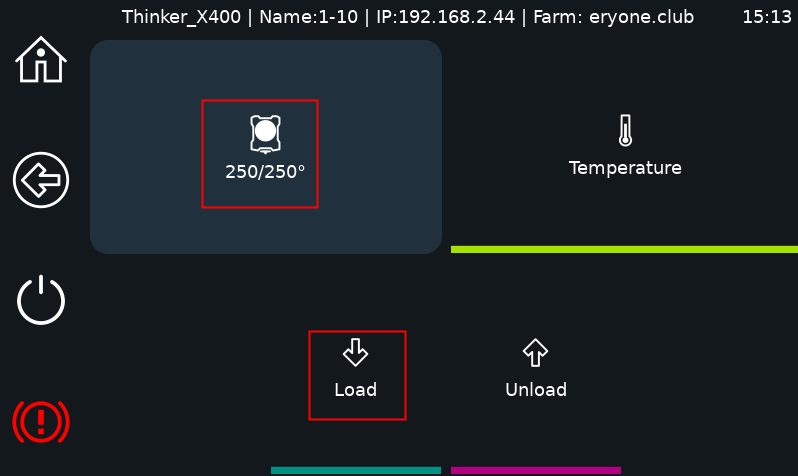
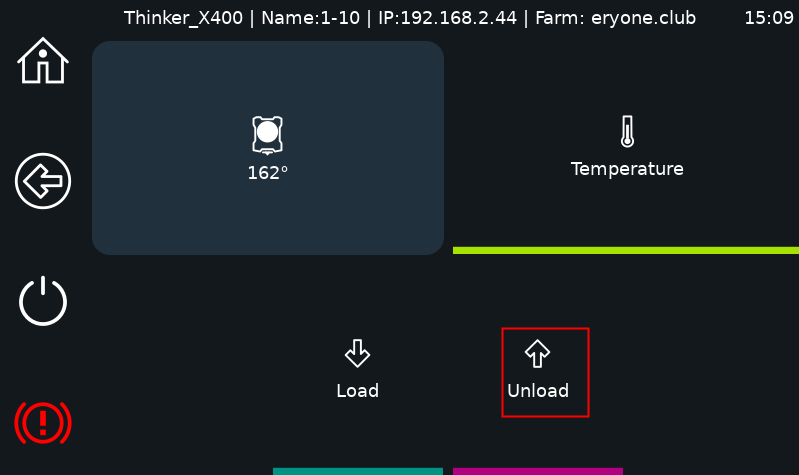
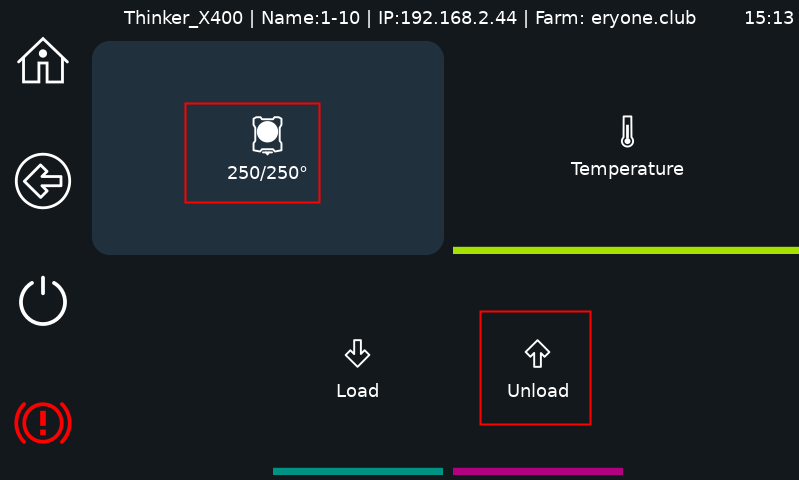
¶ 9.Extrusion
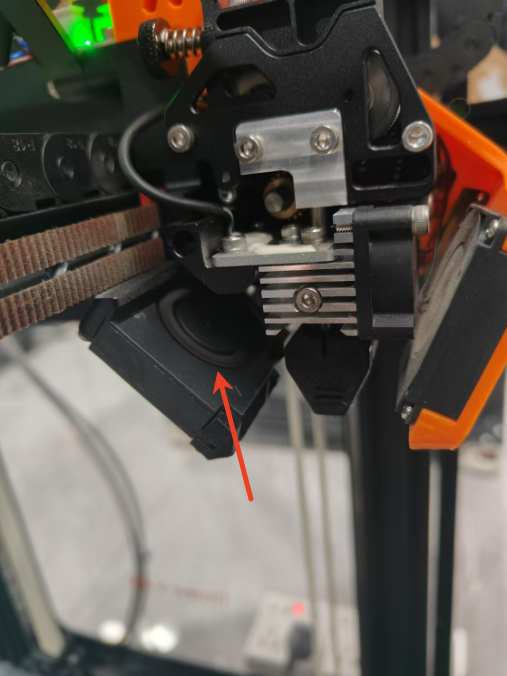
⑨ Extrude: Loads or unloads filament.
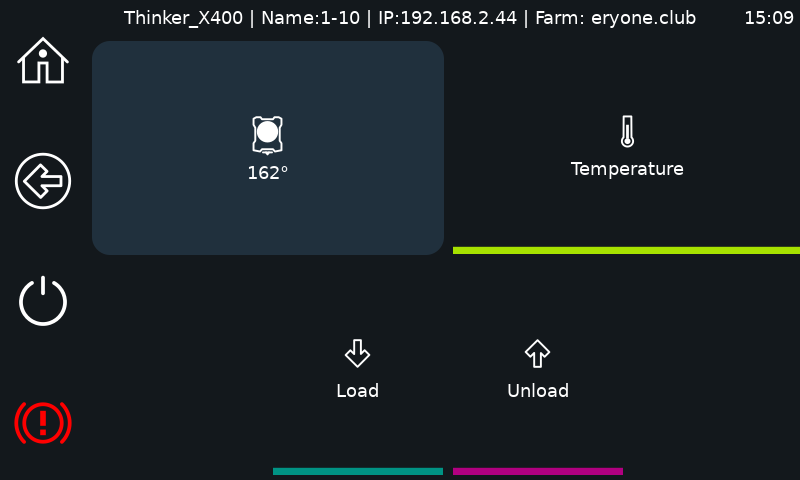
Load filament: nozzle heated to 250°C for loading.
Unload filament: nozzle heated to 250°C to unload.
¶ 10.More Settings
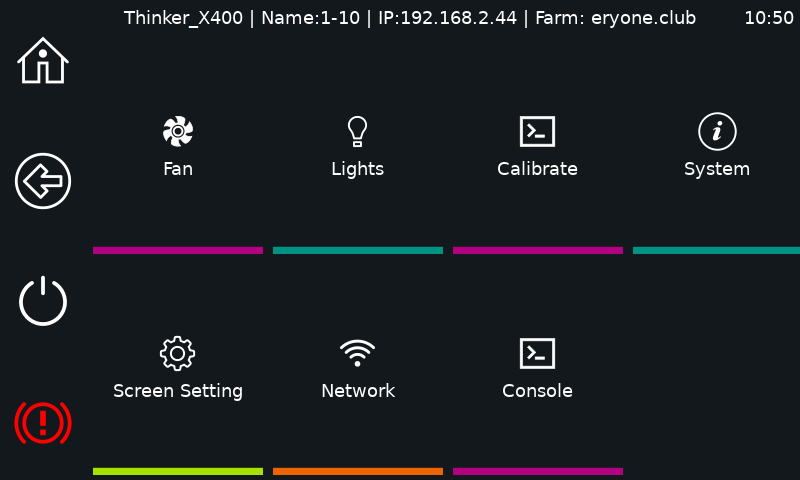
⑩ More Settings Button: Accesses advanced options.
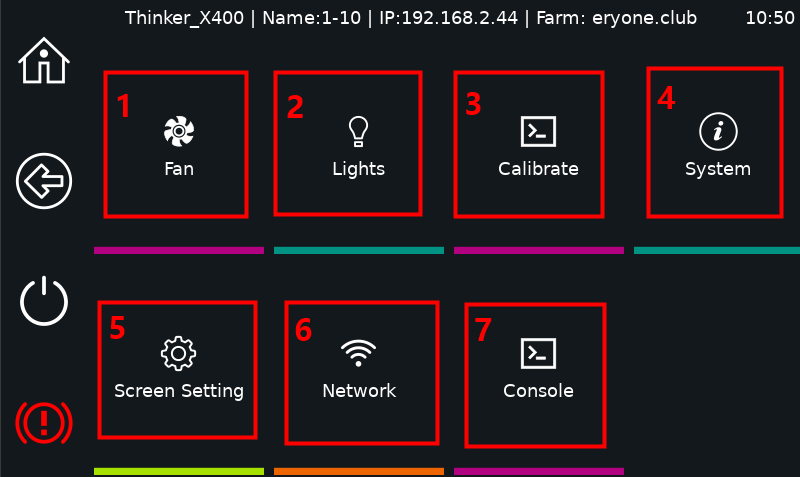
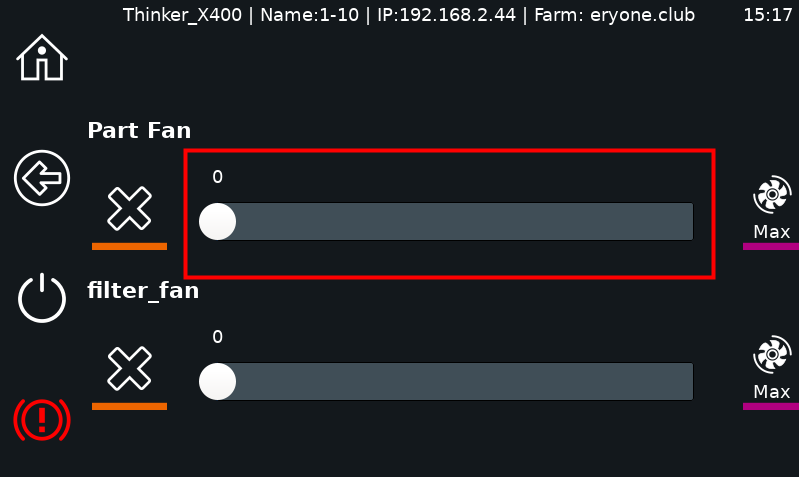
10.1 Fan
1.Fan Control: Adjusts fan speed.

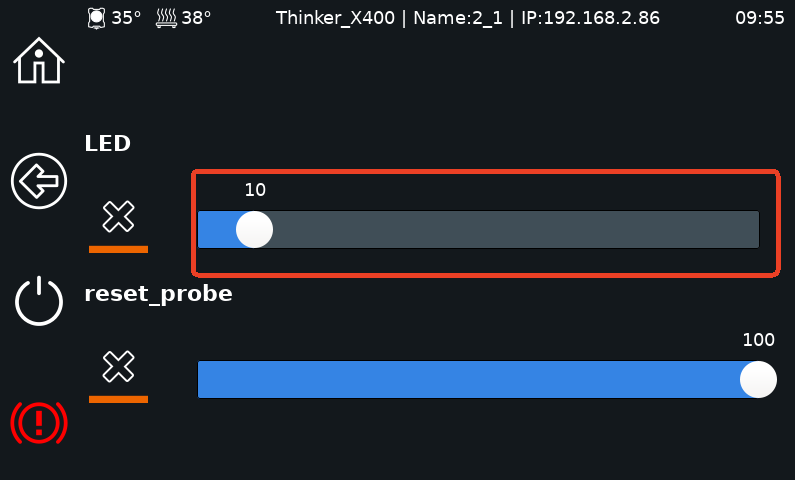
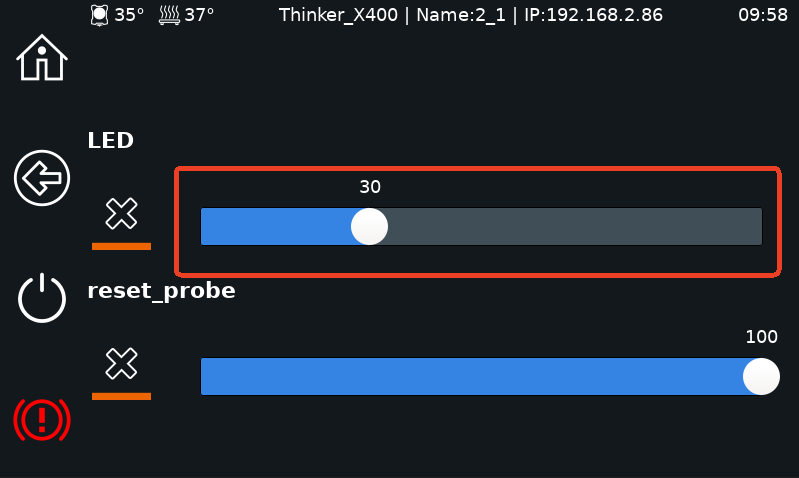
10.2 LED
2.LED Brightness: Adjusts light intensity.
10.3 Calibration
Calibration: Performs nozzle, bed, and resonance tests.
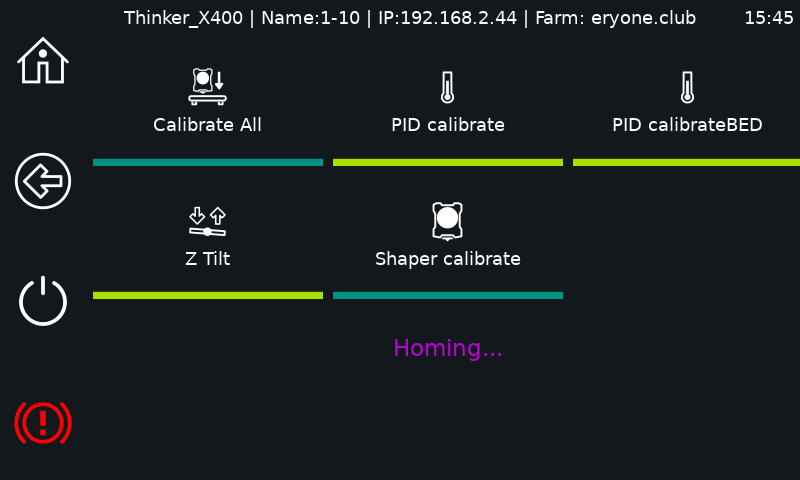
Calibrate All: Click to perform Resonance Calibration, Heating PID Calibration, Heating PID Calibration BED, and Z-axis Tilt Calibration tests.
PID calibrate: calibration test for nozzle extrusion temperature, can be performed when the extrusion temperature is unstable.
PID calibrateBED: calibration test to stabilize the temperature of the heat bed, can be performed when the heat bed is unstable.
Z Tilt: Z-axis leveling test for the nozzle to detect the height of the PEI metal plate Resonance Calibration: resonance test for X and Y axis, can be performed when the vibration pattern of the printed model is obvious. Z-axis leveling test for metal plate height.
Shaper calibrate: Resonance test for X and Y axes, can be performed when the vibration pattern of the printed model is obvious.
10.4 System
Firmware Update: Updates the printer’s firmware.
It takes about 5-10 minutes to update the firmware.
Wait 5-10 minutes after clicking to complete the update.
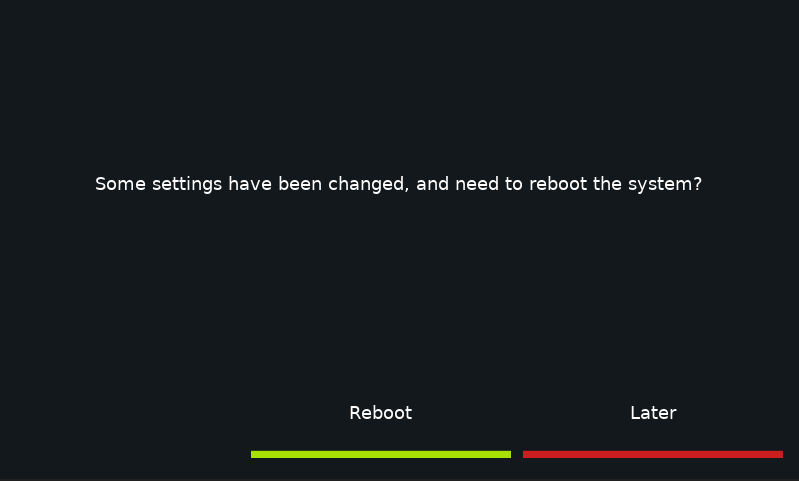
Note: After updating the firmware, a prompt box to roboot the printer will appear when you return to the main interface, and the system will be the latest version after rebooting, otherwise, the version will remain as the previous state.
10.5 Display Settings
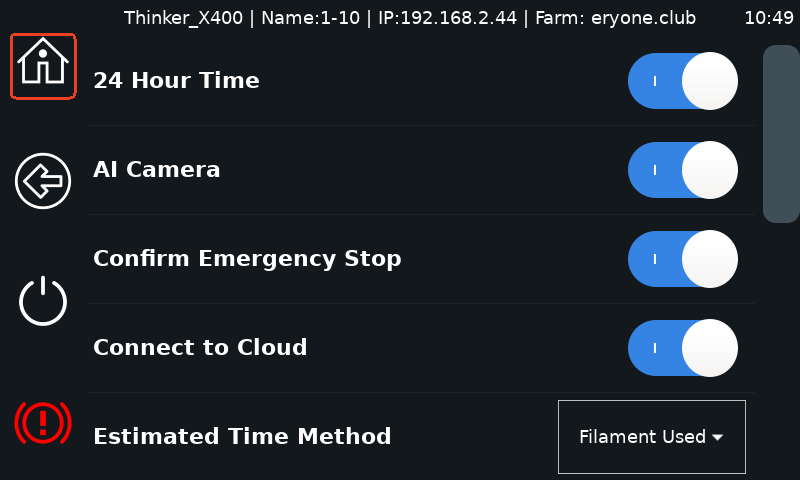
1.24 Hour Time: 24-hour day is used to display the time.
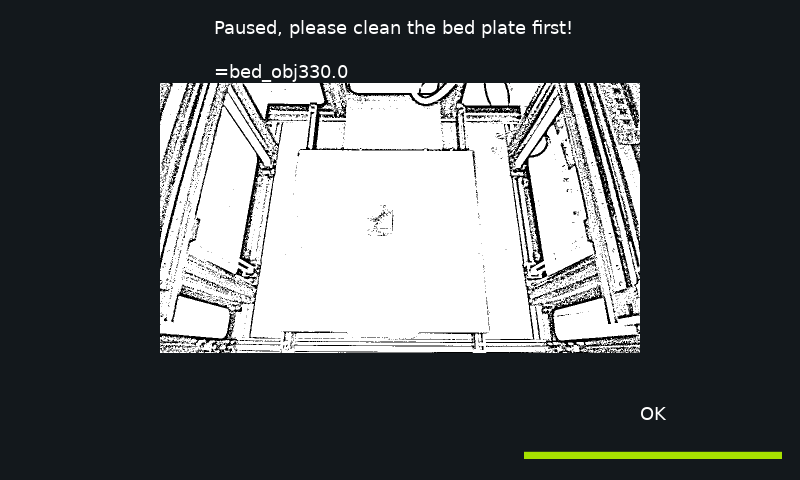
2 AI Camera: When the model on the PEI sheet is not removed and the printer starts a new print job, the AI Camera recognizes the model through the camera and pauses the print job while a picture of the model appears on the printer screen.
3.Chamber heating:Click to toggle the chamber heating module.
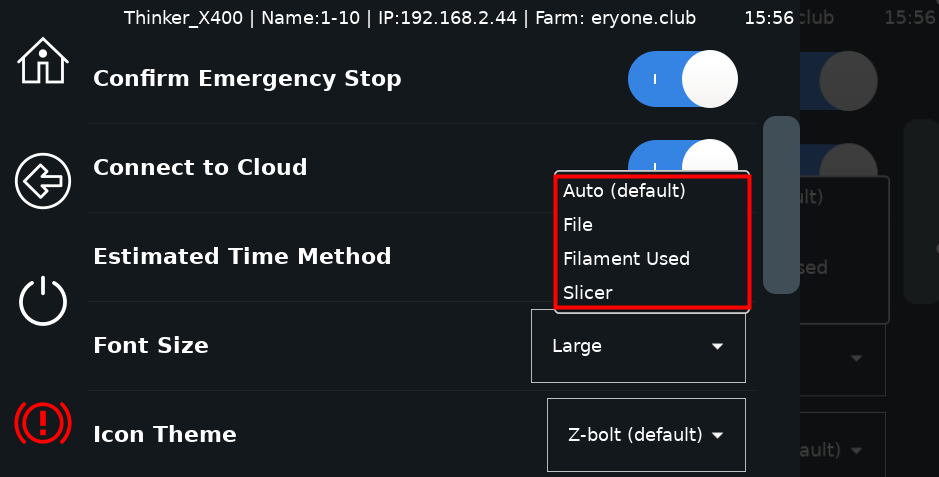
4.Emergency stop to be confirmed: click on the emergency stop button to receive a pop-up message after turning it on.
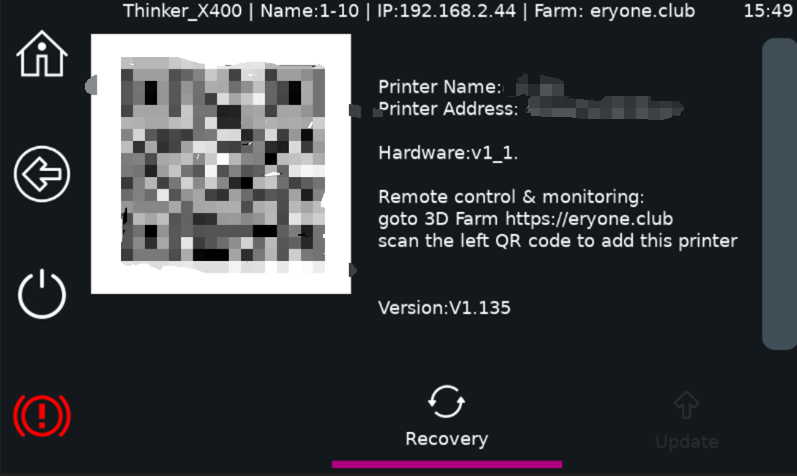
5.Connect to Cloud:Click to connect to eryone.club
6.Estimation of remaining time: 4 types: “Auto”, ‘File’, “Used Supplies”, “Slice File”. 4 calculation methods to predict the remaining printing time.
7.Font size: Change the font size.
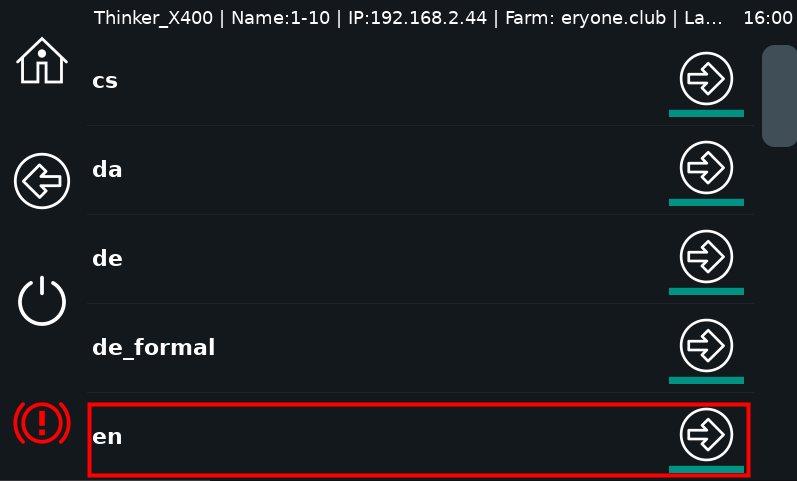
8.Language: Select the interface language according to your own preference.
For example: English
9.Macro shortcut on sldebar: Show Sidebar Shutdown Button.
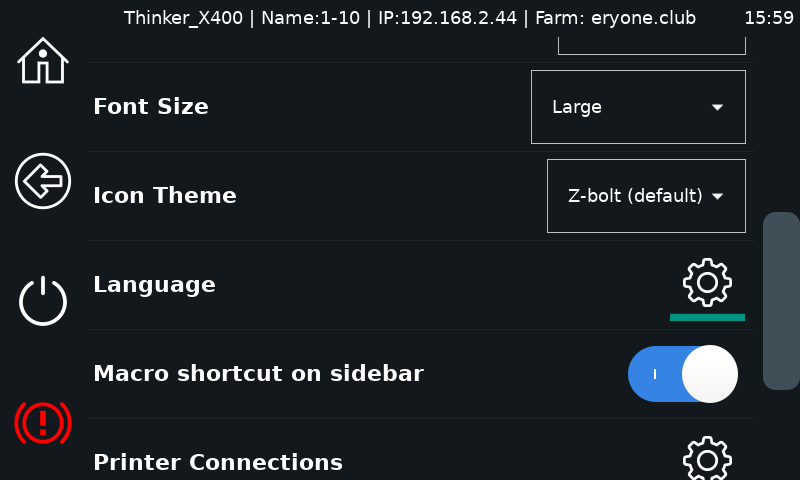
10.Printer Connections:multiple network printers can be added per LCD.
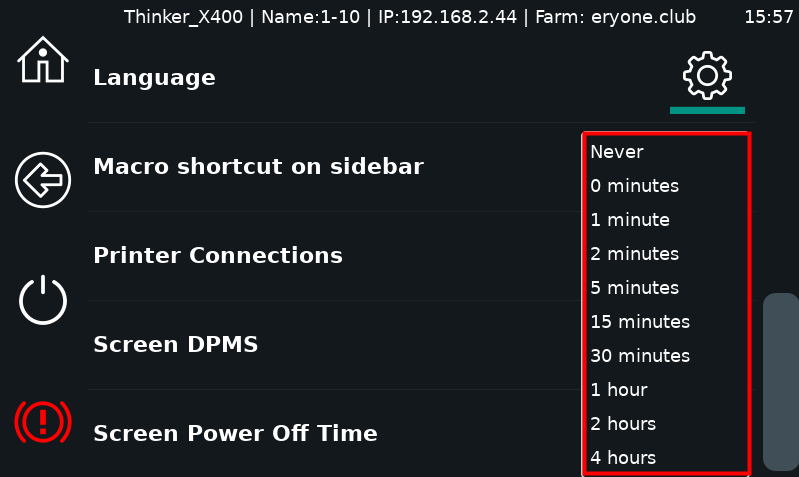
11.Screen DPMS:Turn on the LCD will automatically black screen standby.
12:Screen Power Off Time:selectable screen hibernation time.
10.6 Network Settings
Configures Wi-Fi (2.4GHz only)
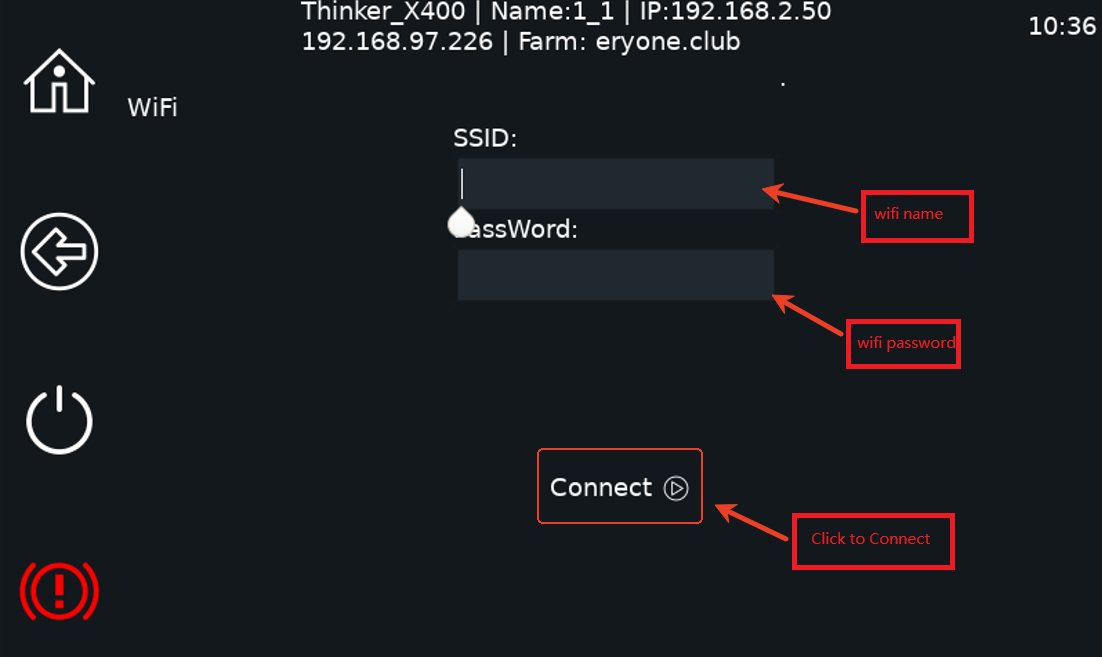
Note: The Wifi name cannot be entered in Chinese characters.
10.7 Console
Displays detailed print information and commands.
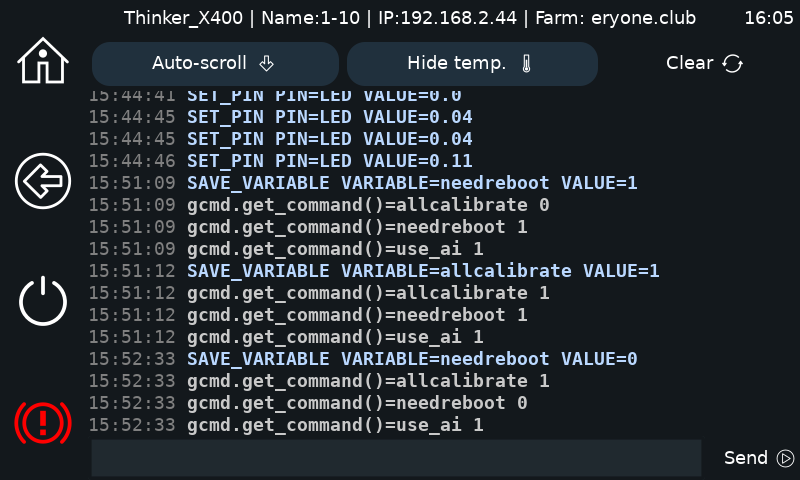
“G28”: Home All
“BED_MESH_CALIBRATE”: Heatbed Calibration
“UNLOAD_FILAMENT”: Unload Filaments
“LOAD_FILAMENT”: Load Filaments
Modify machine name: “N + the name you want”
¶ 11 Print
⑪(Click to jump to the Print Cache page)
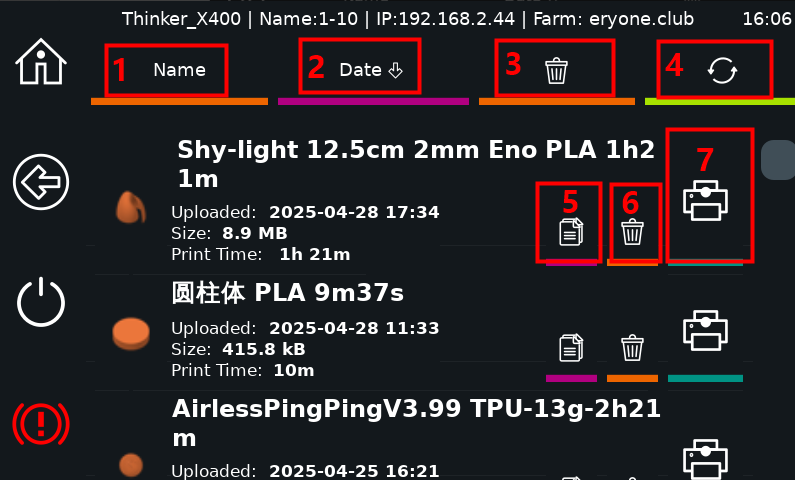
①:Sort by name
②:Sort by date
③:Delete all model files
④:Refresh file
⑤:Modify file name
⑥:Delete files
⑦:Print file