¶ Chamber Heating Module
¶ Installing thermistor wires
Install Thermistor Wiring
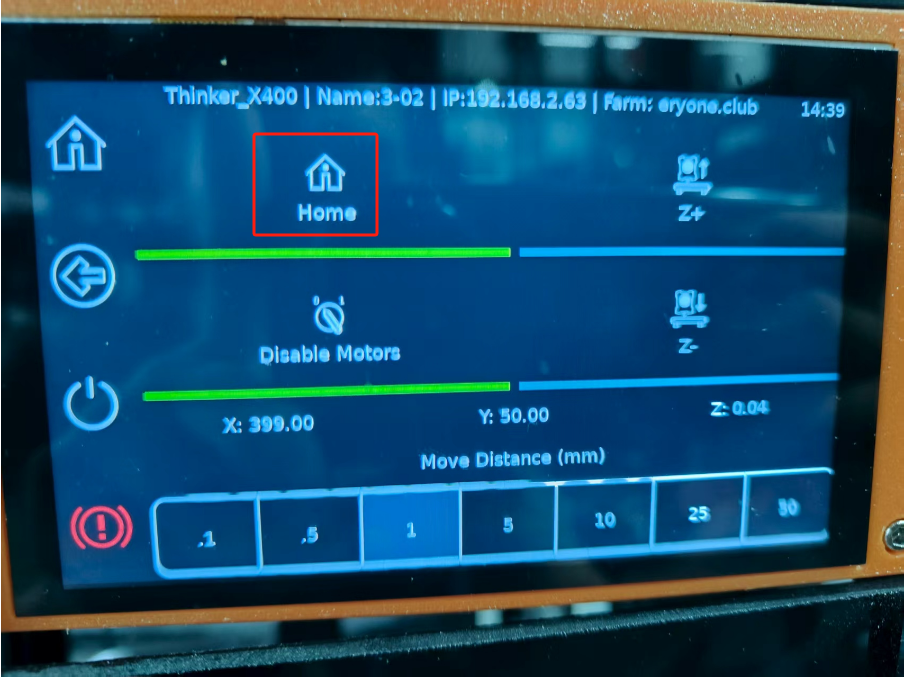
1.Power on the machine and click "Home" on the screen. Wait for the homing operation to complete.

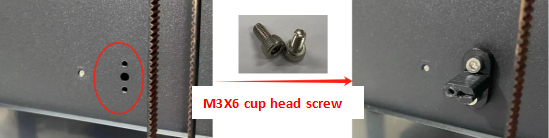
2.Install the mounting bracket on the right-side internal panel as shown in the diagram, using an H2.5 screwdriver.
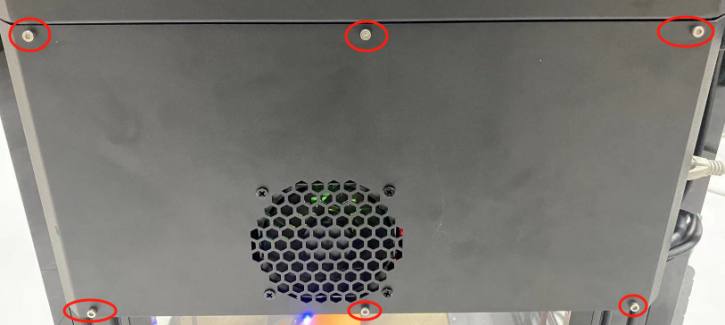
3.Open the mainboard cover on the right side. Note: Disconnect the fan connector on the mainboard cover first.
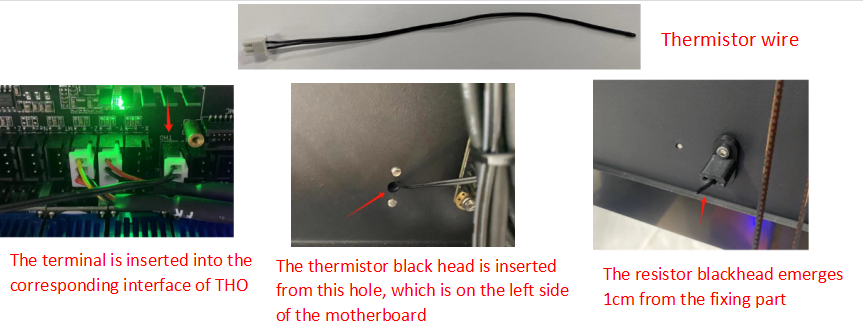
4.Install the thermistor wiring.
¶ Install Chamber Heating Module
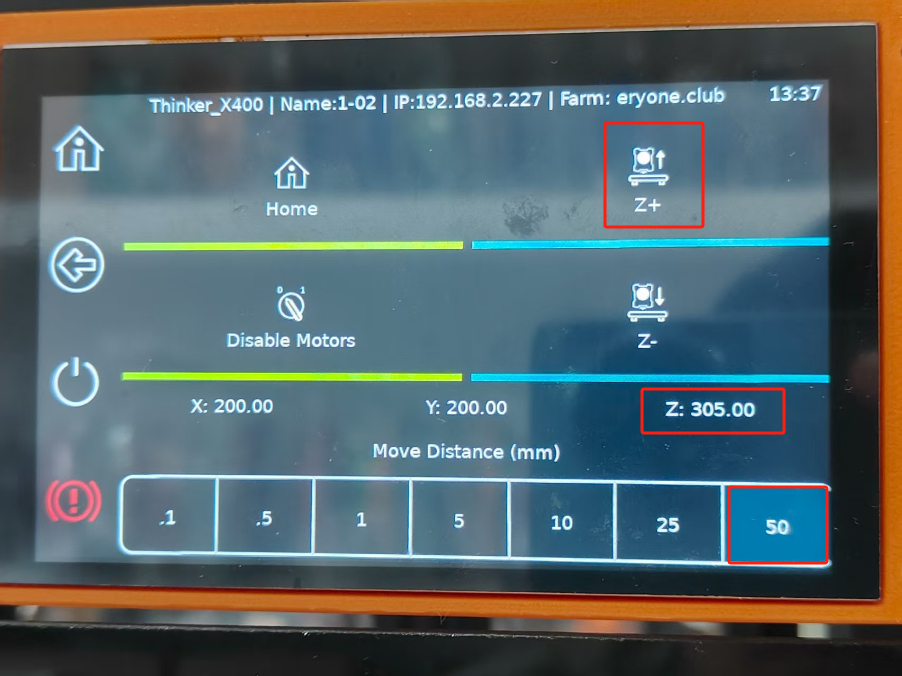
1.Raise the print head to 305mm height and wait for the Z-axis to reach 305mm.


2.Power off the machine and unplug the power cable.
Important: The power cable must be disconnected.

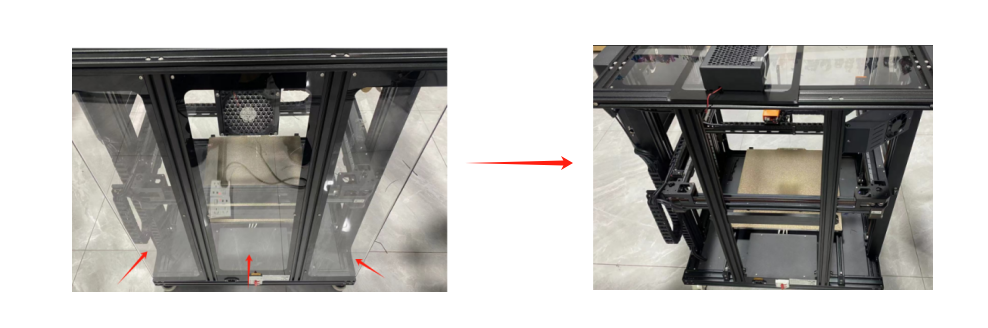
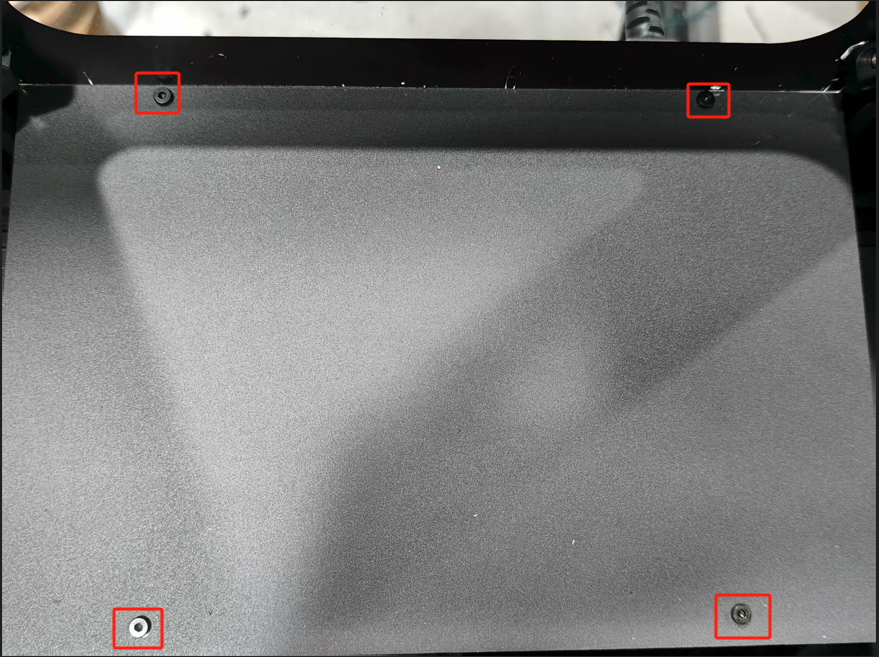
3.Remove screws from the three acrylic panels at the rear of the machine.
Note: The middle panel should be rotated 270° and placed on top of the machine. Use an H2.5 screwdriver. Be careful with the acrylic edges (
they're sharp).
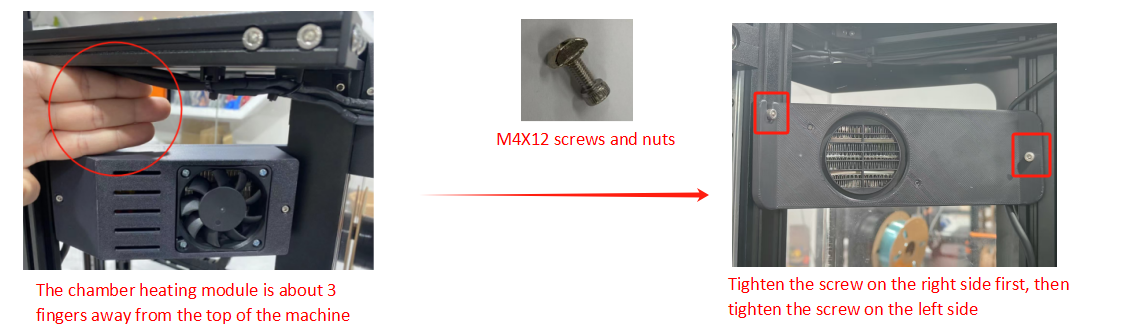
4.Install the chamber heating module.
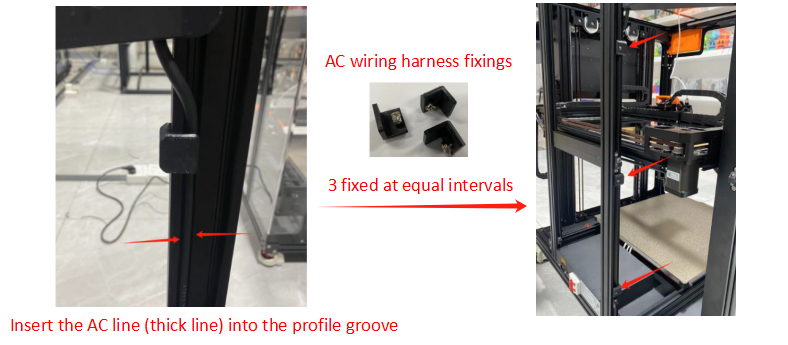
5.Install AC Wiring (thick cable)
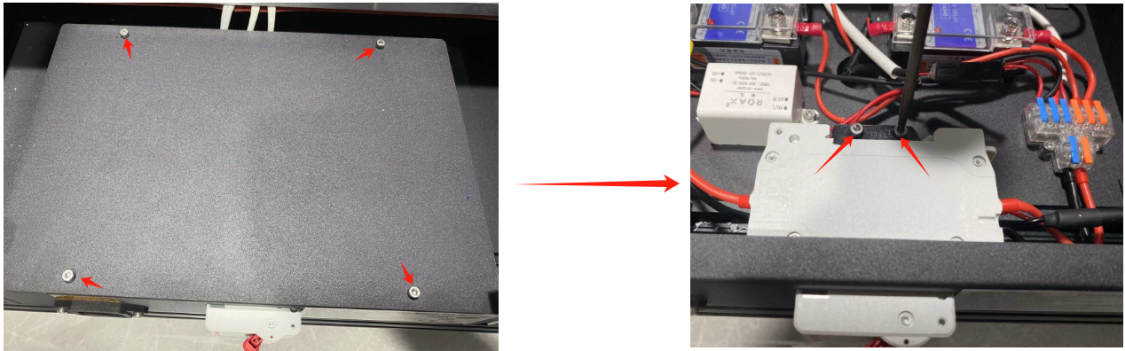
5.1 Open the power box and remove the screws from the circuit breaker bracket using an H2.5 screwdriver.
5.2 Install the AC cable (thick) into the profile slot, securing it at three evenly spaced points as shown in the diagram. Use an H2.5 screwdriver
5.3 Route the AC cable (thick) through the power box hole and connect it to the circuit breaker terminal as shown. Use a Phillips screwdriver.
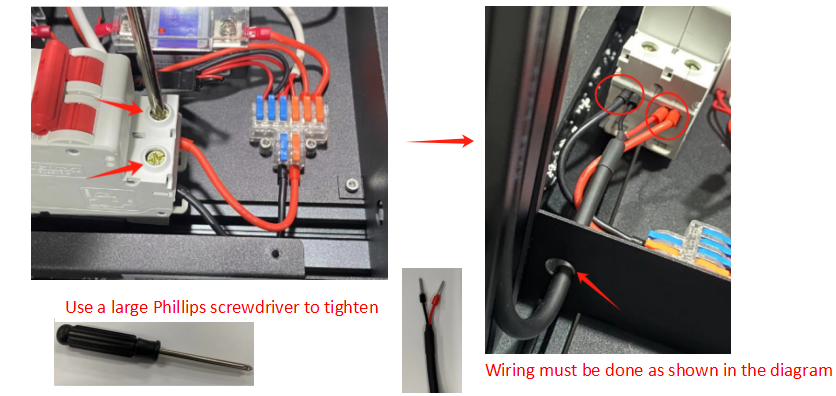
Important: After tightening, the cable should not be pullable.
5.4After completion, install the power box cover back
6.Install Chamber Heater Wiring (thin cable)
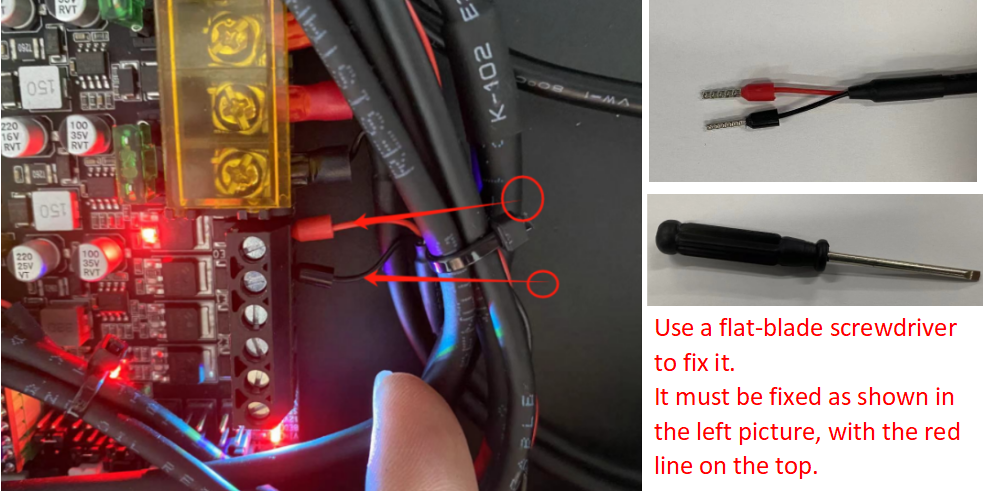
6.1 Route the chamber heater wiring (thin cable).
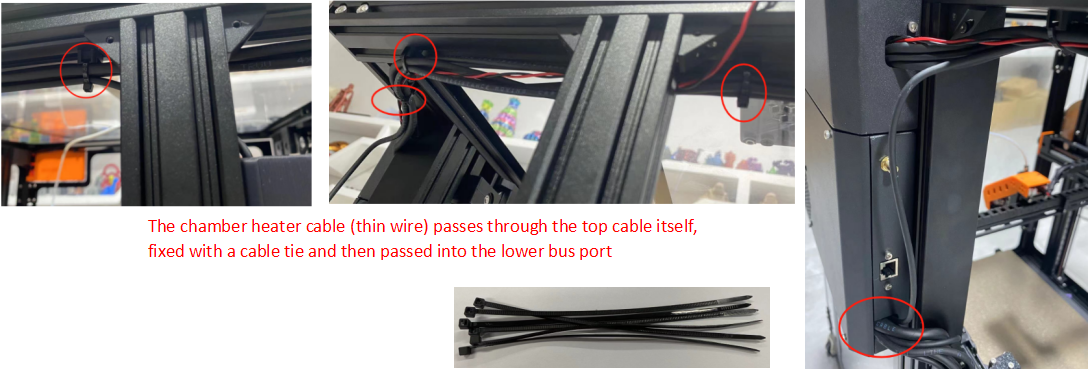
6.2 Connect the chamber heater terminal
6.3 Install the motherboard cover on the right side
6.4Install the back panel acrylic sheet
¶ Enabling the Chamber Heating Function in Software
3.1 Power on the machine and update the printer firmware
First, upgrade the printer’s system firmware.


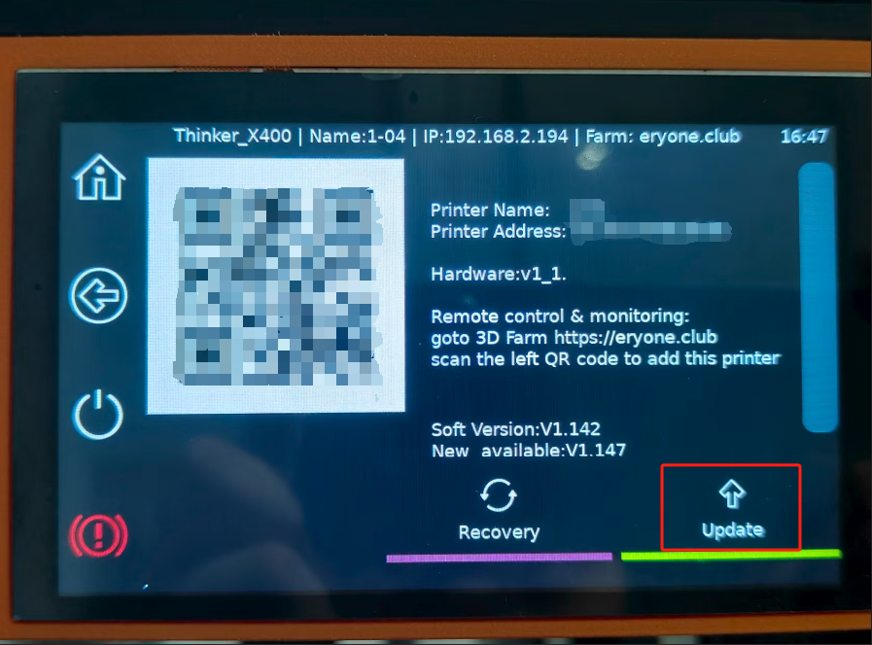
After the update is complete, restart the machine.
3.2 Enable the chamber heating function in the settings menu
Navigate to the settings interface and activate the chamber heating feature.

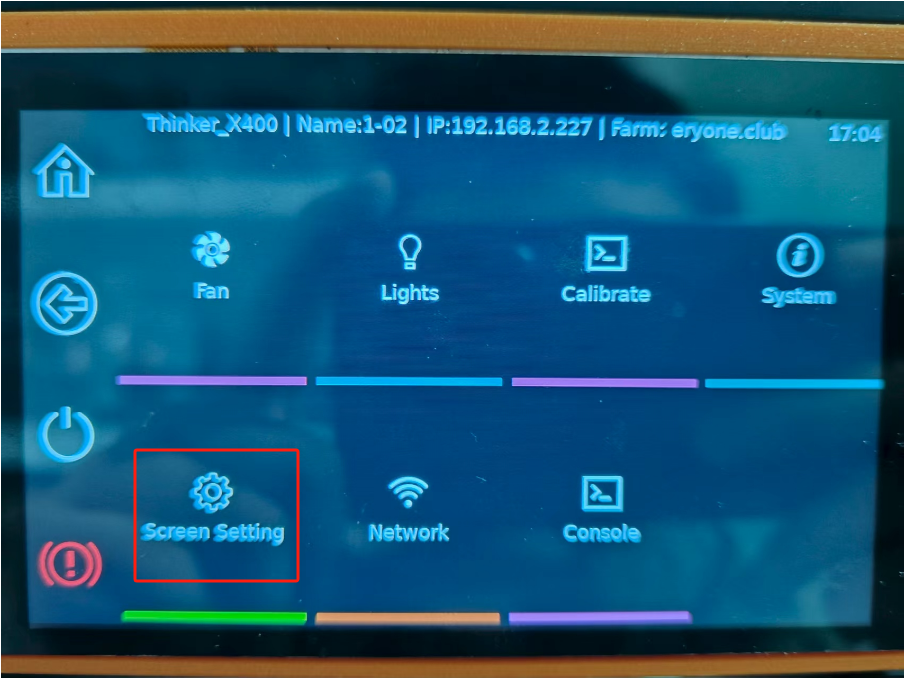

Setup is now complete. The system is ready for use.