¶ FAQ
¶ 1.There's no image from the camera.
A non-functional camera with no image output can be attributed to the following scenarios:
1.Camera Not Enabled: The camera application or service may not be running.
2.Loose Camera Cable: The connection cable might be insecure or partially disconnected.
3.Damaged Camera Cable: The cable itself could be physically damaged or faulty.
4.Faulty Camera Hardware: The camera module may be defective or broken.
Solution:
Method 1:
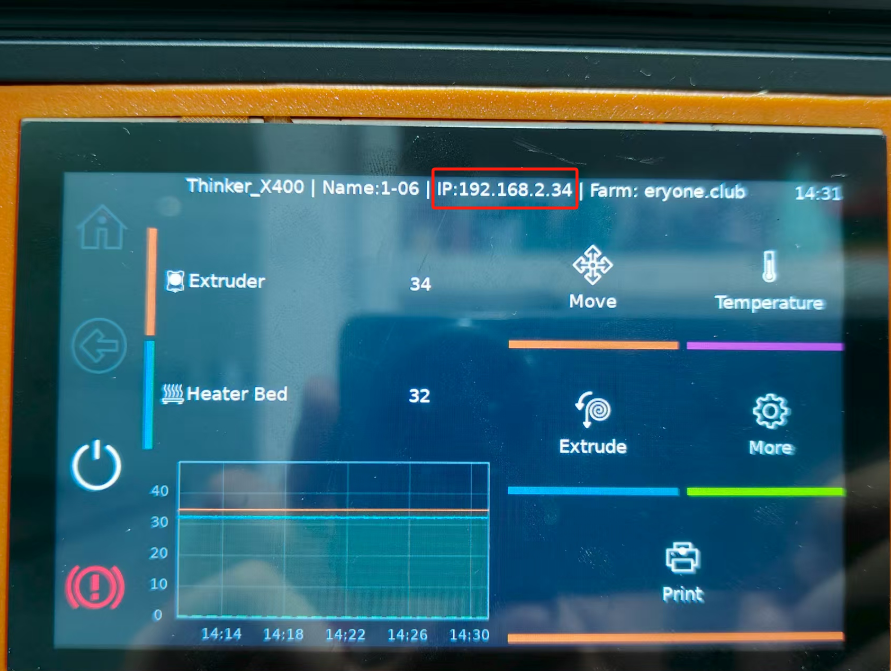
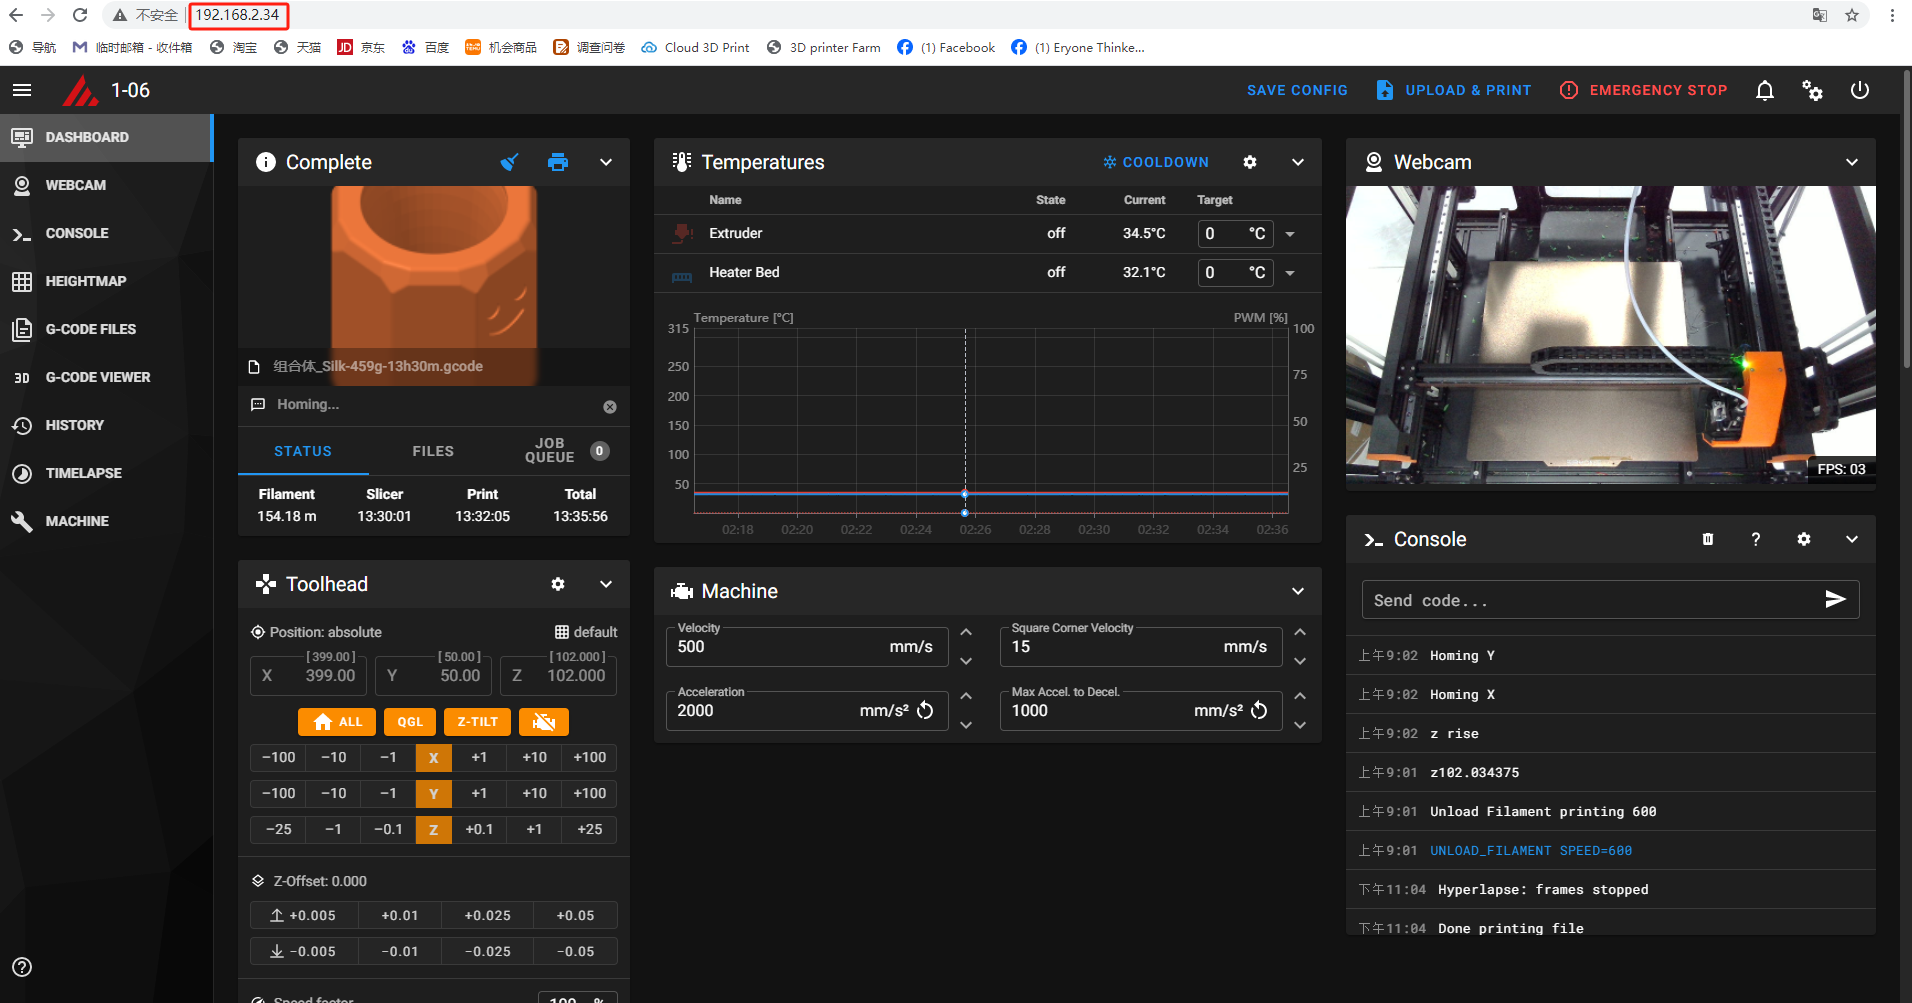
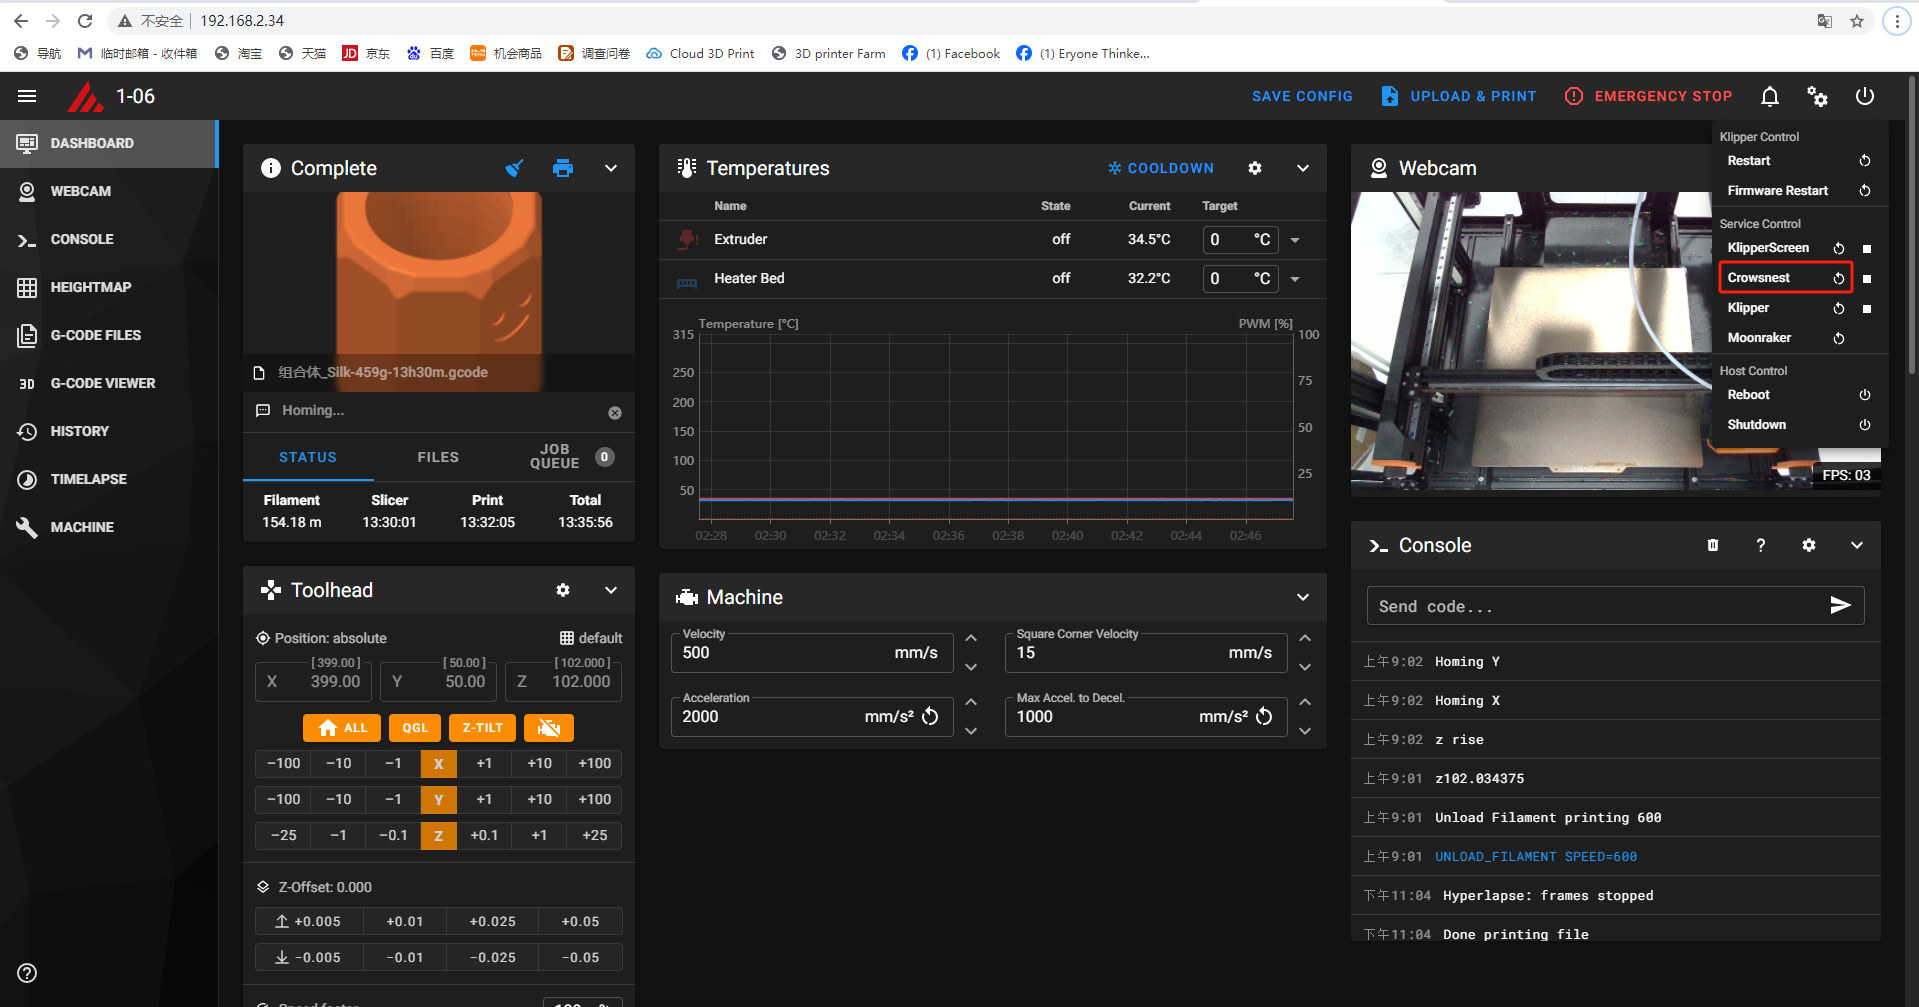
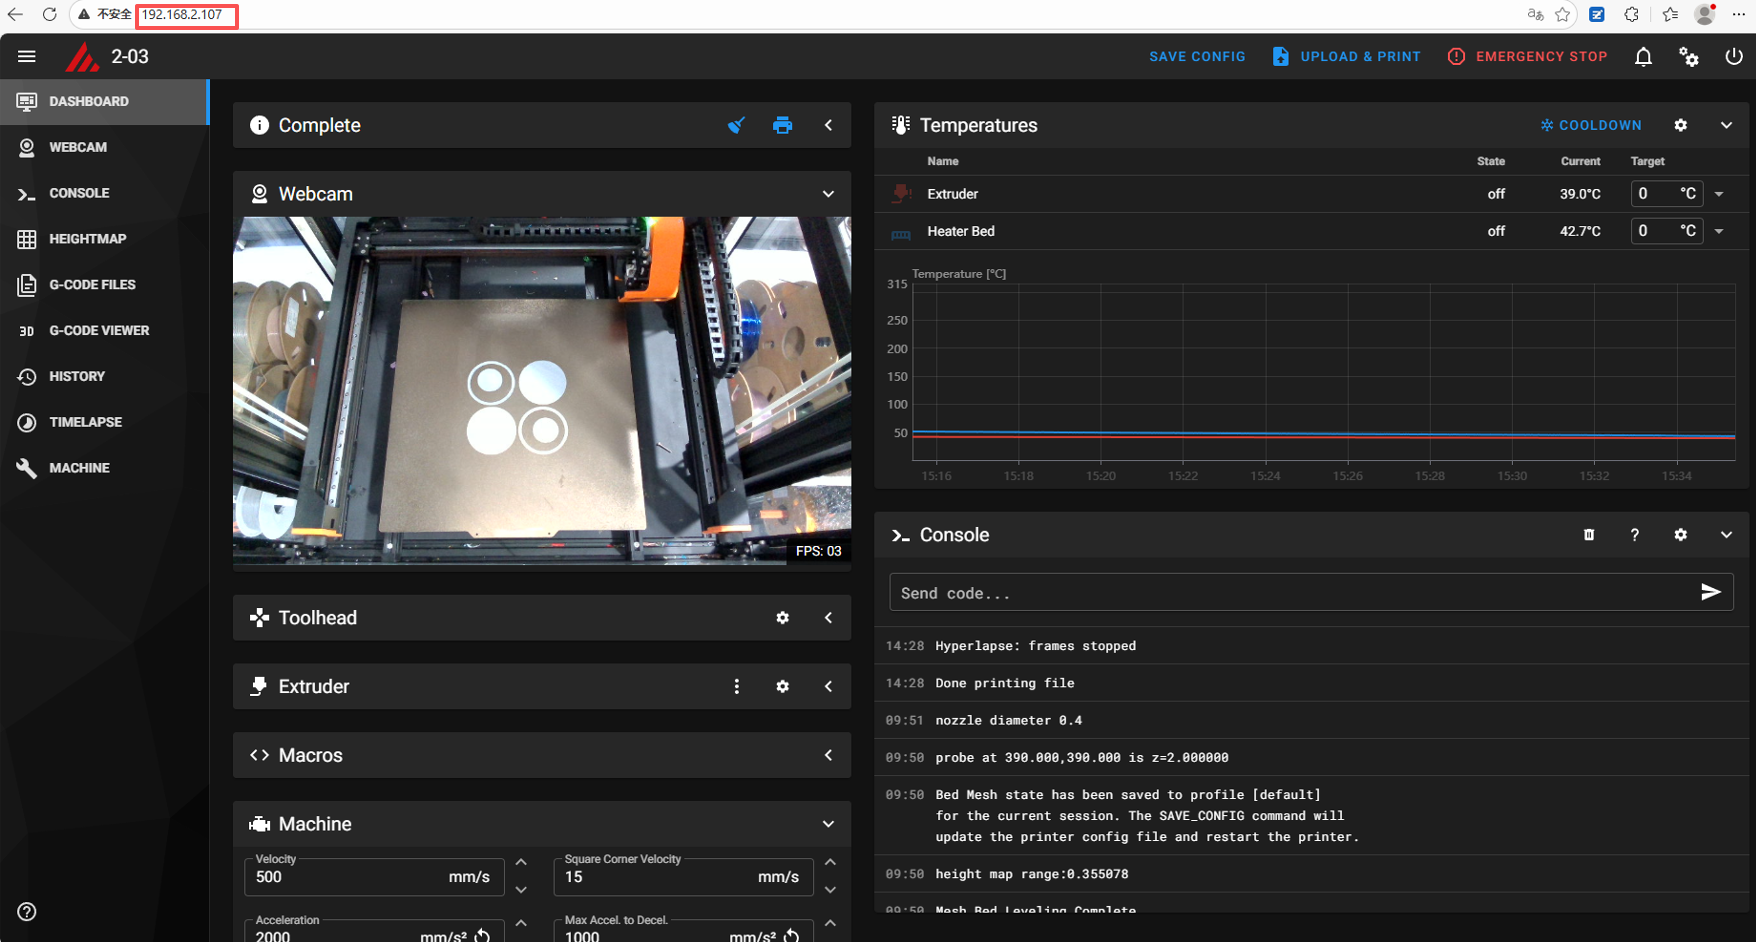
1.After connecting the printer to the network, open a web browser and enter the Thinker X400's IP address.
Notice:Use Ethernet or Wi-Fi to ensure the Thinker X400 is on the same network as your computer.
2.Click the power switch button on the right side.
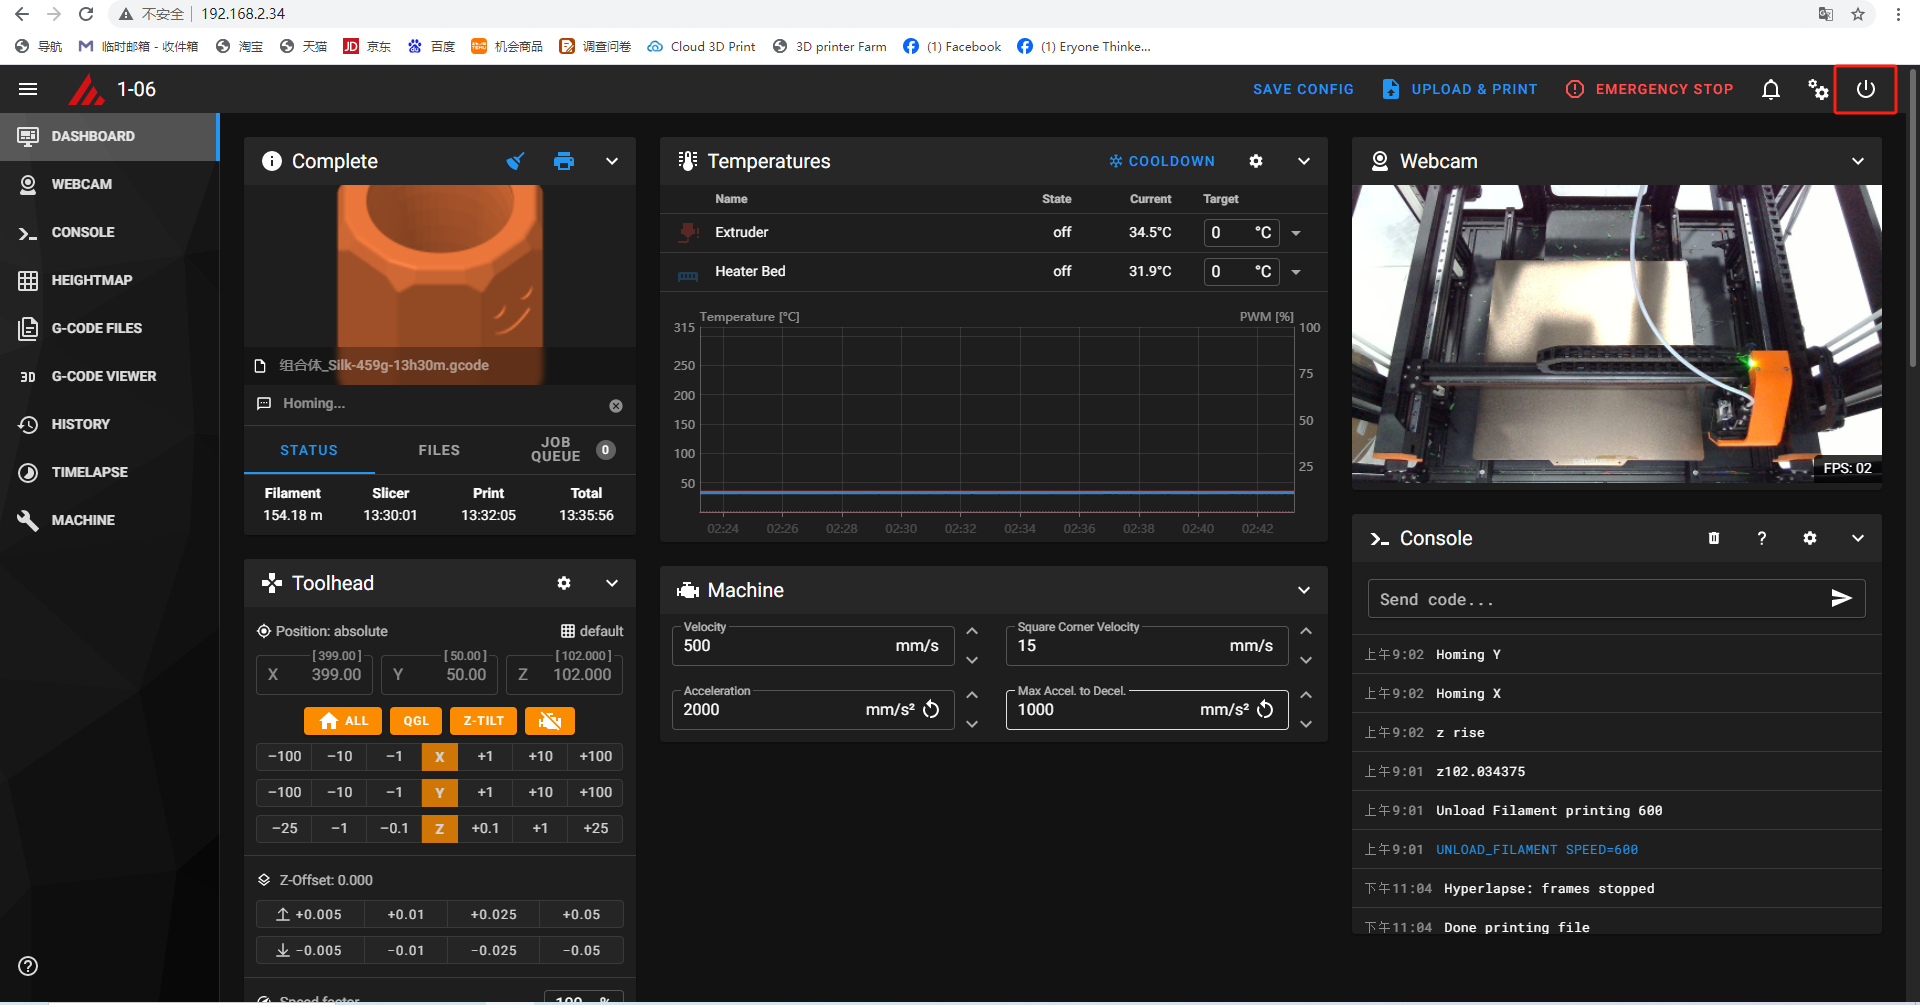
3.After selecting Crowsnest and refreshing, the interface will become active within 3 minutes.
Method 2:
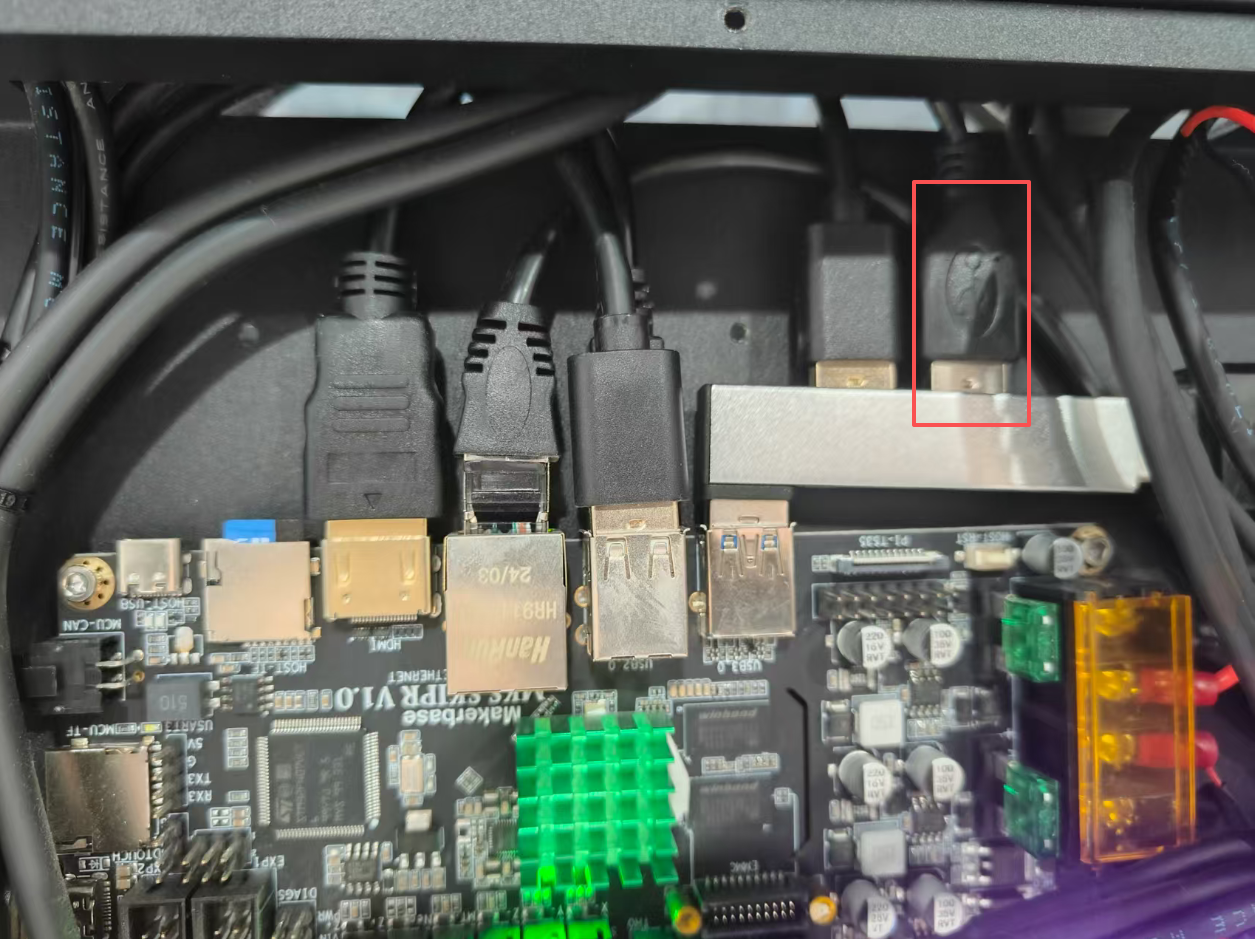
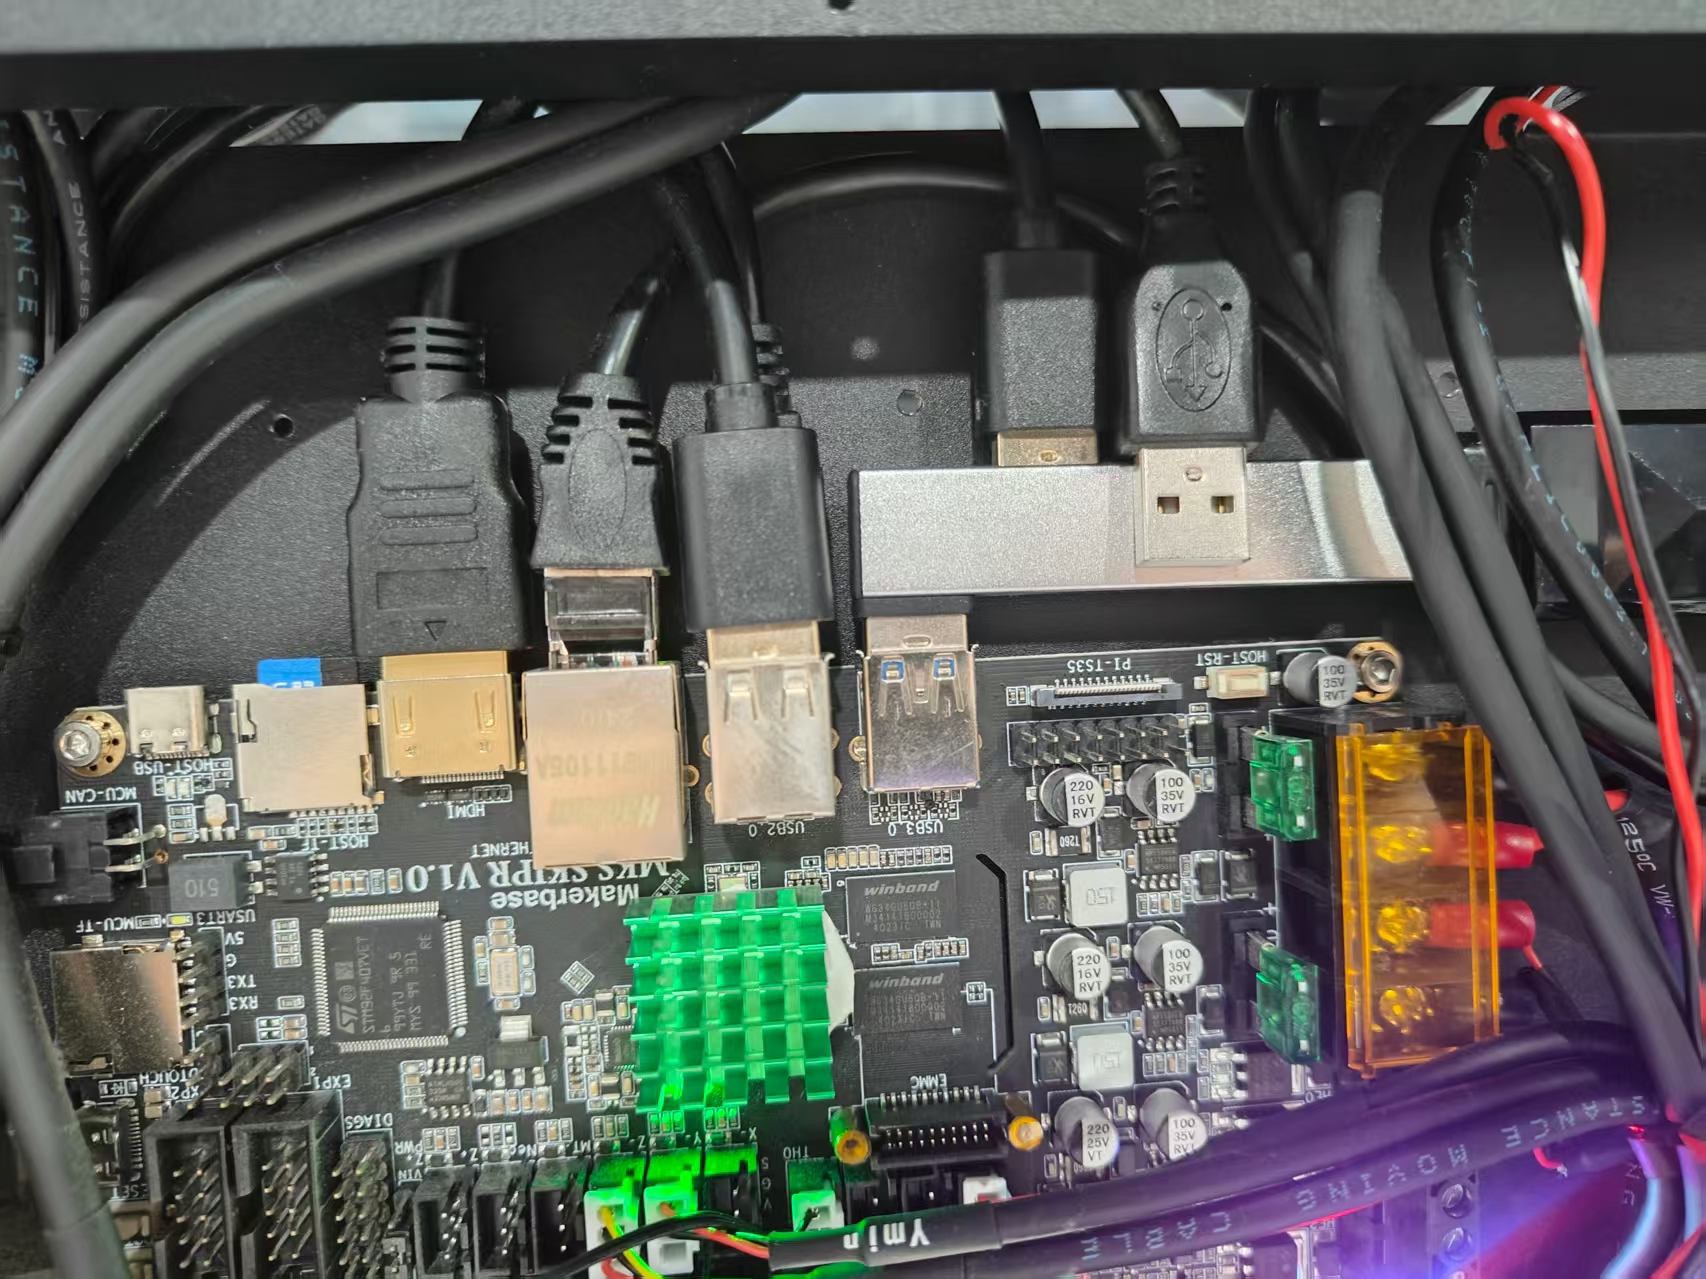
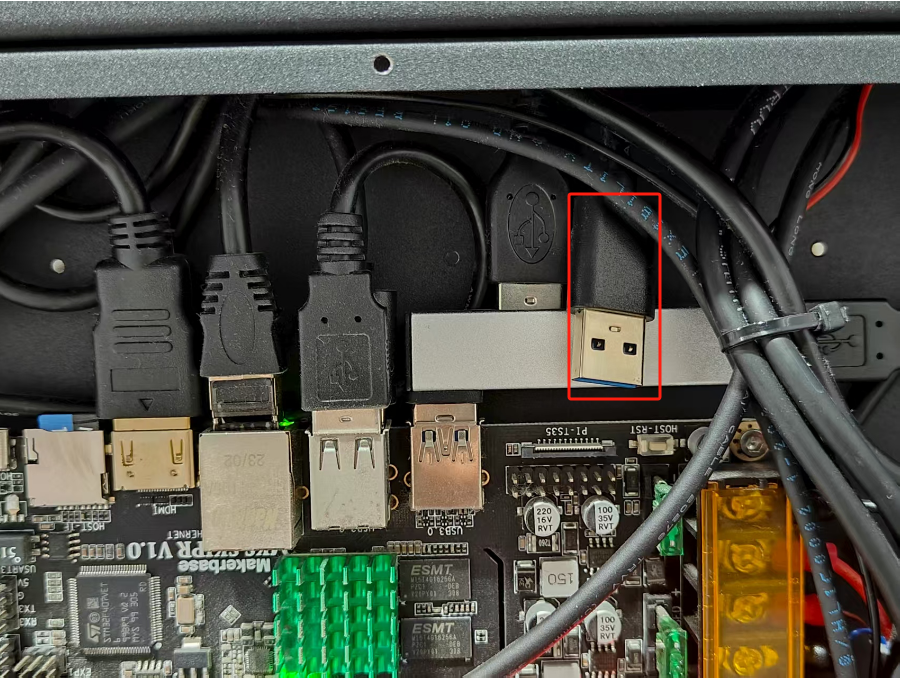
1.Open the right-side motherboard cover and reseat the camera's USB cable.
Method 3:
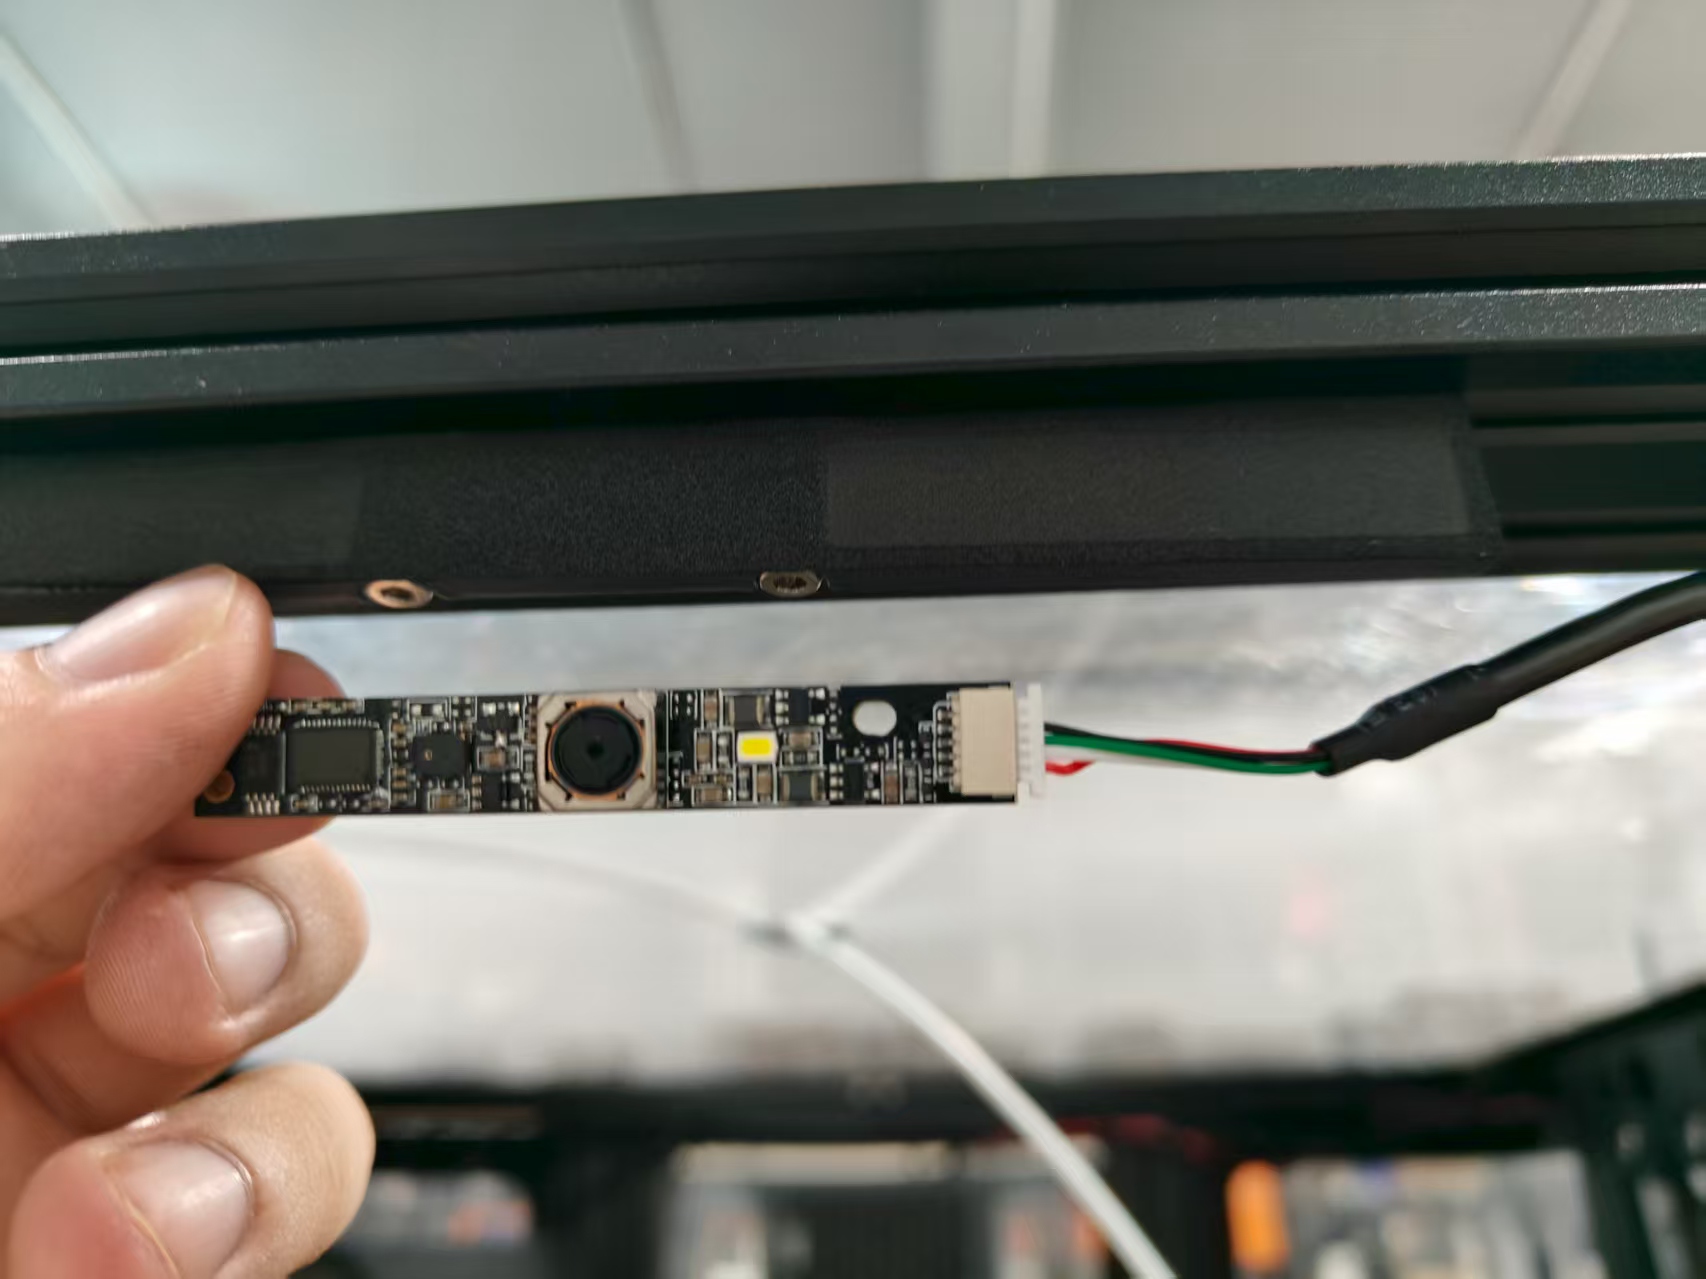
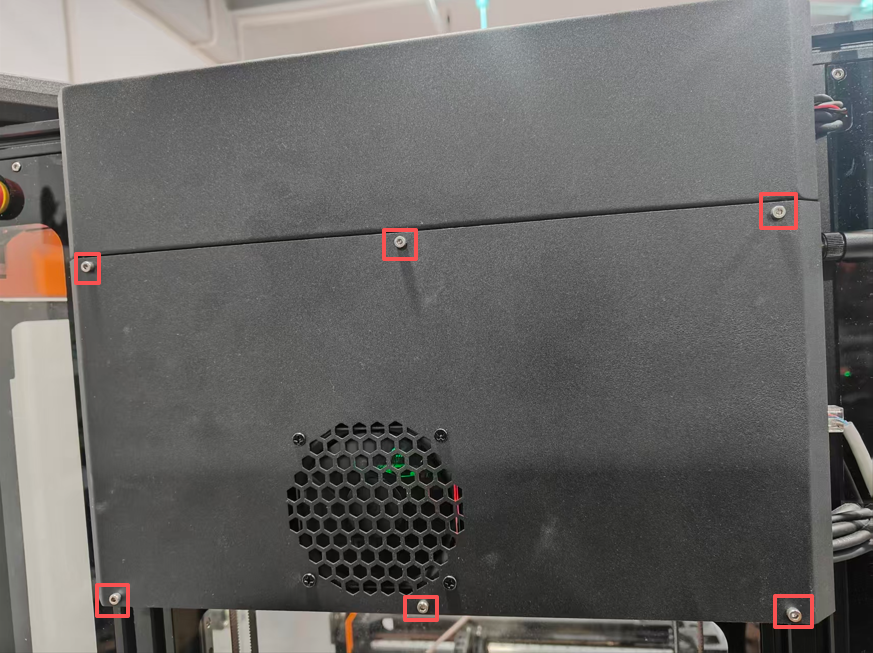
1.Remove the two screws on the casing.
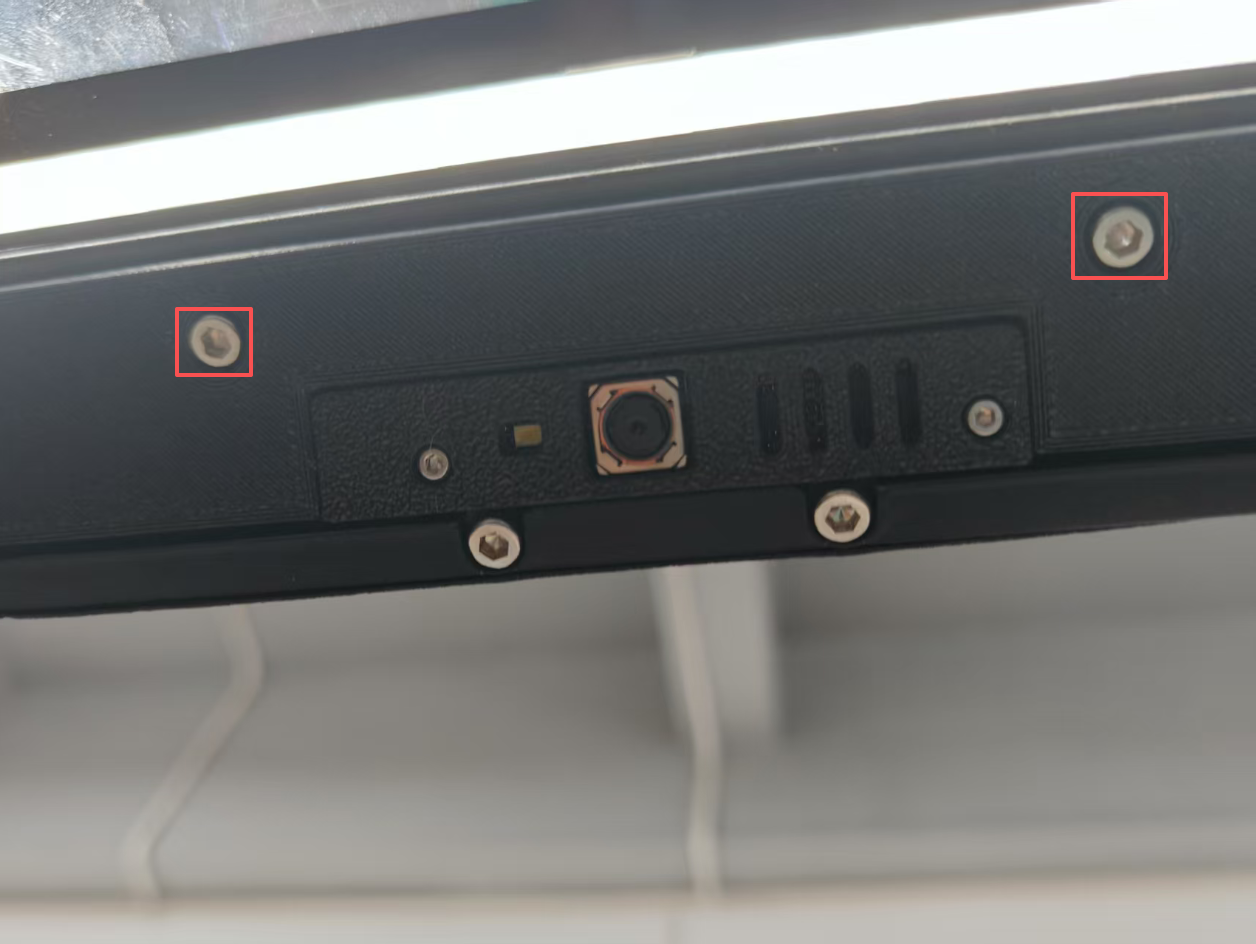
2.Remove the two screws from the camera cover.
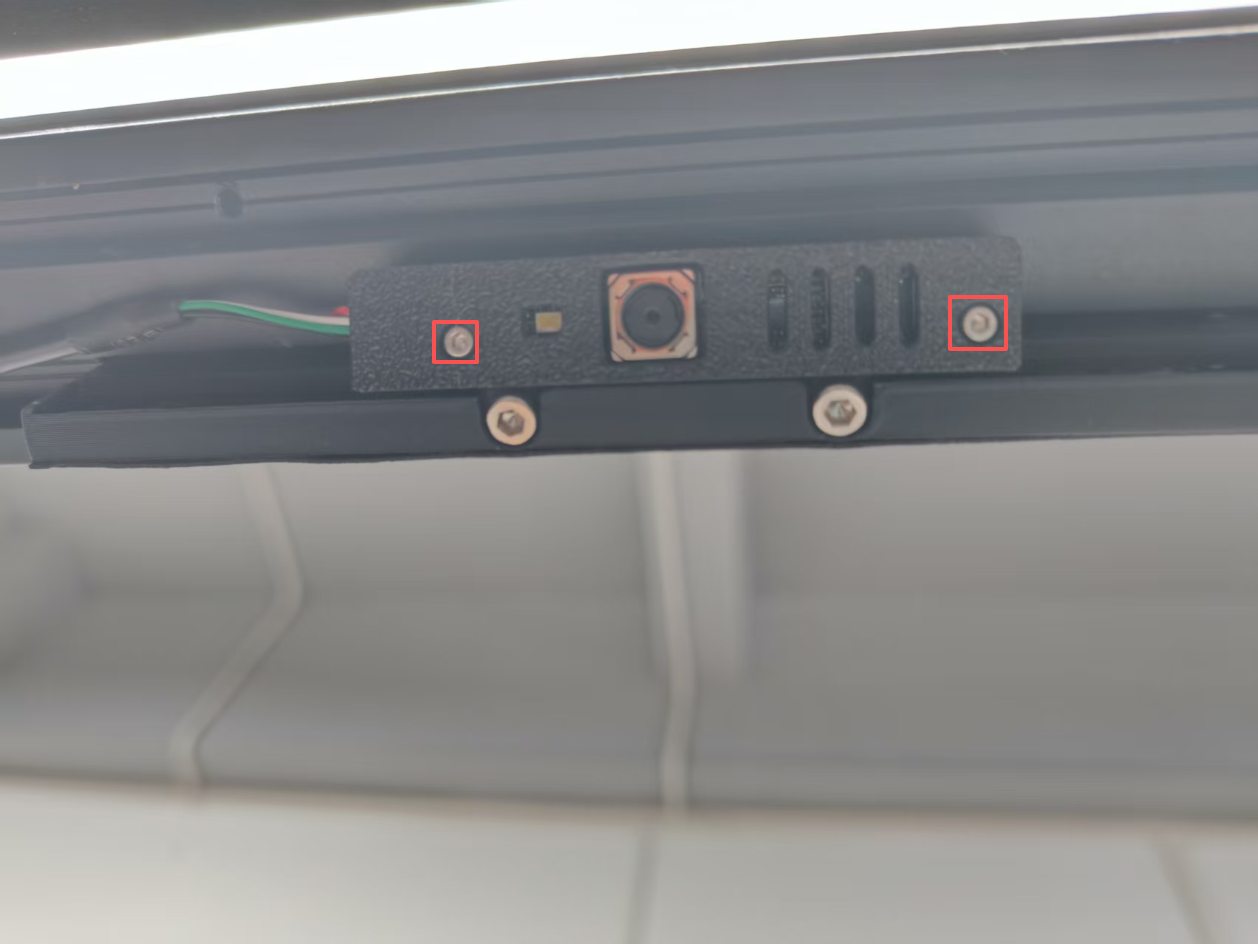
3.Unplug and then replug the camera cable.
¶ 2.MCU‘mcu’shutdown:ADC out of range.
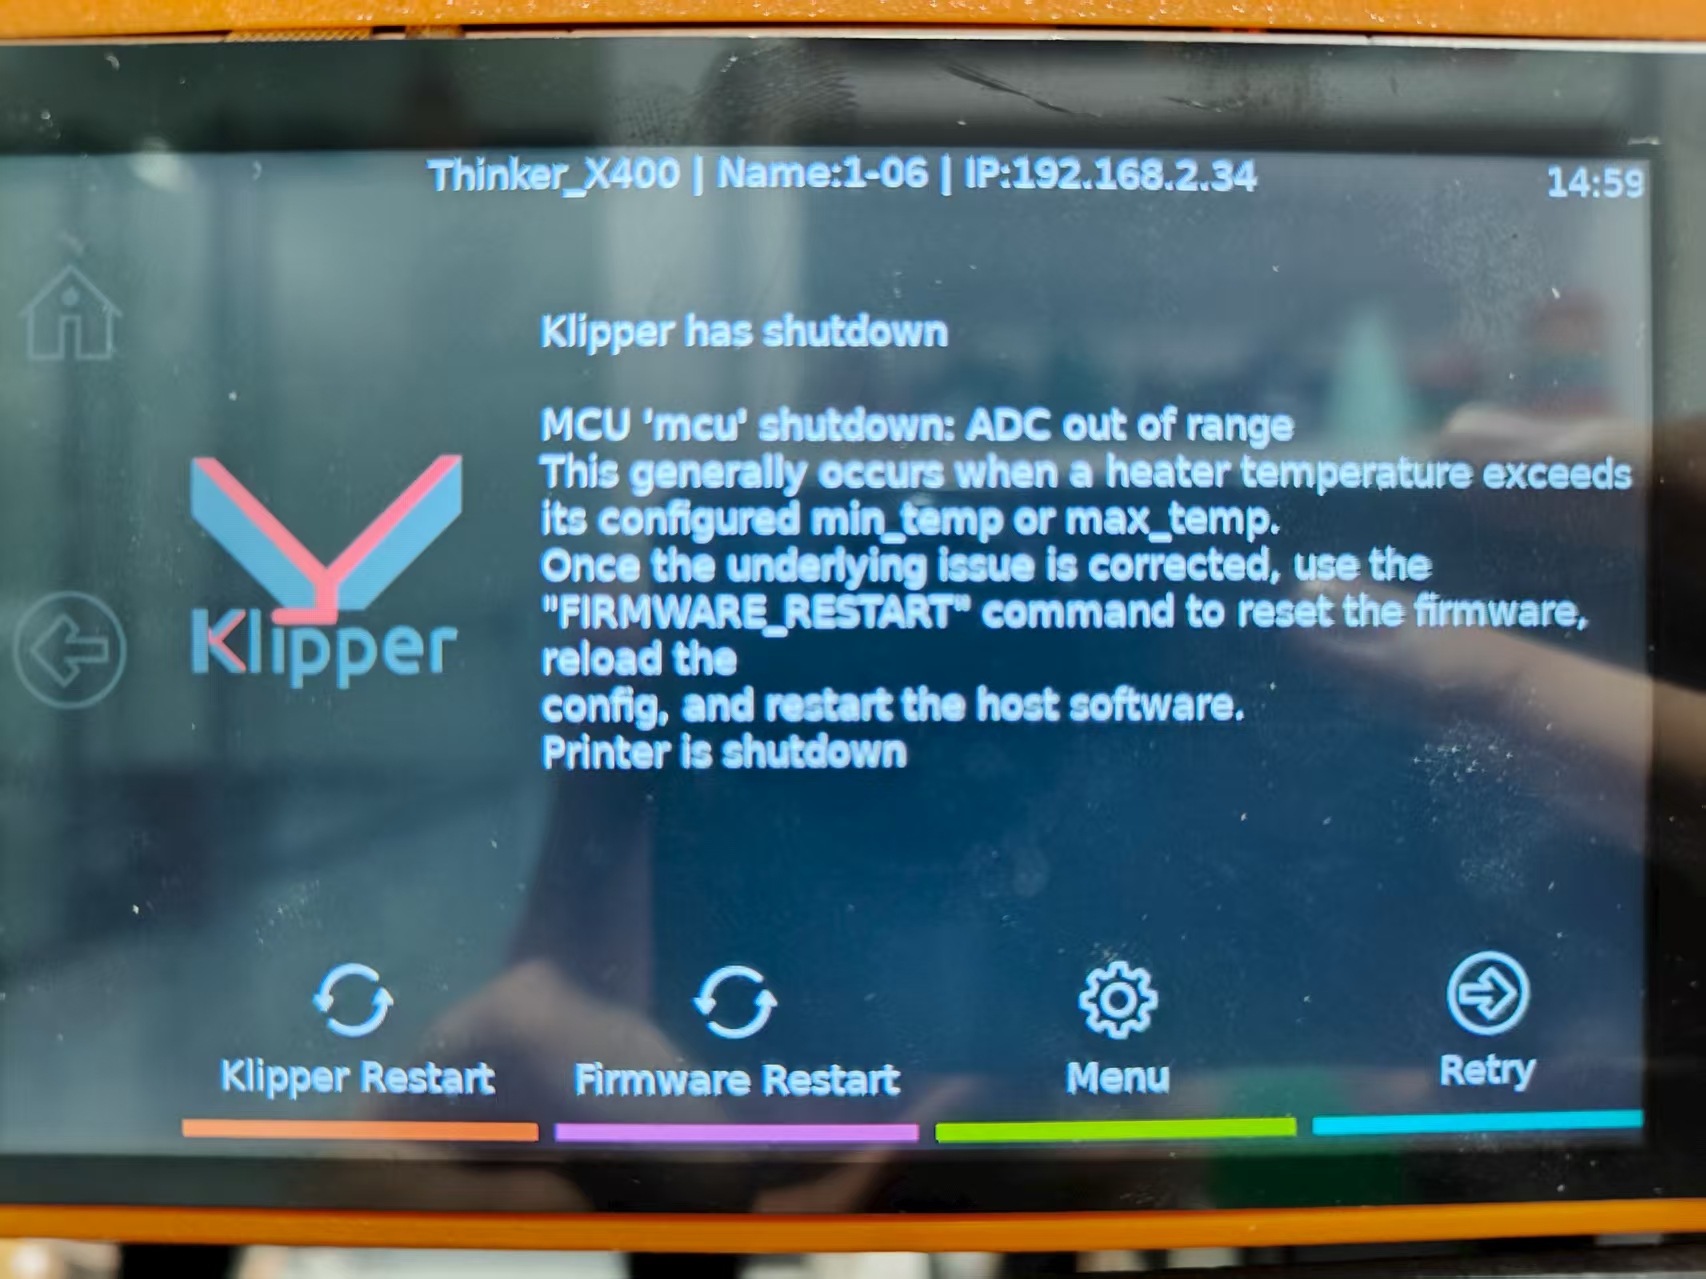
reason:
The issue may occur because Chamber Heating is enabled in settings, but your Think X400 printer is not equipped with this hardware module.
Solution:
1.Click Menu

2.Click Screen setting
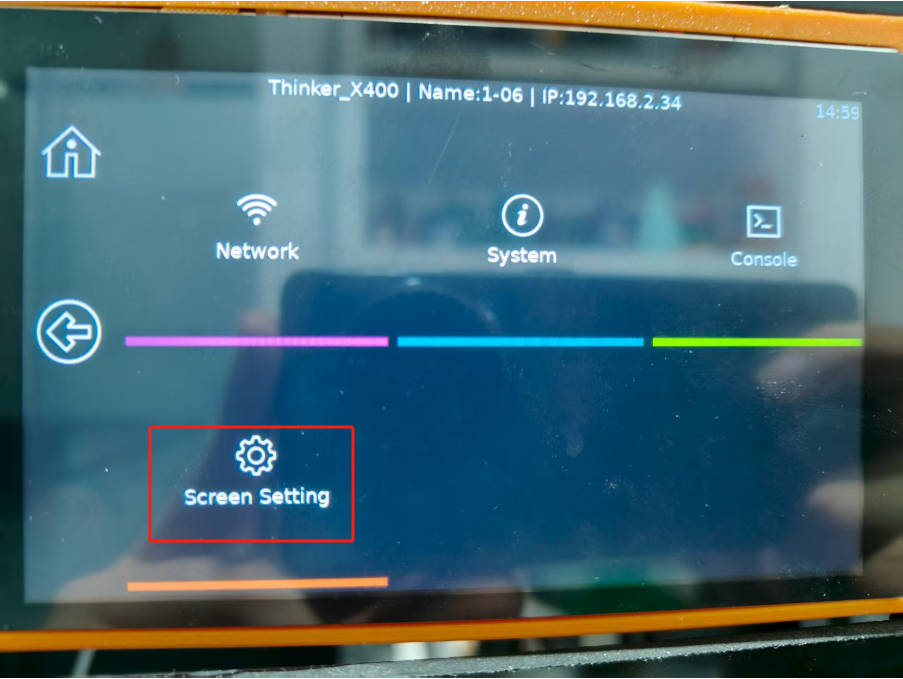
3.Select to turn off Chamber heating
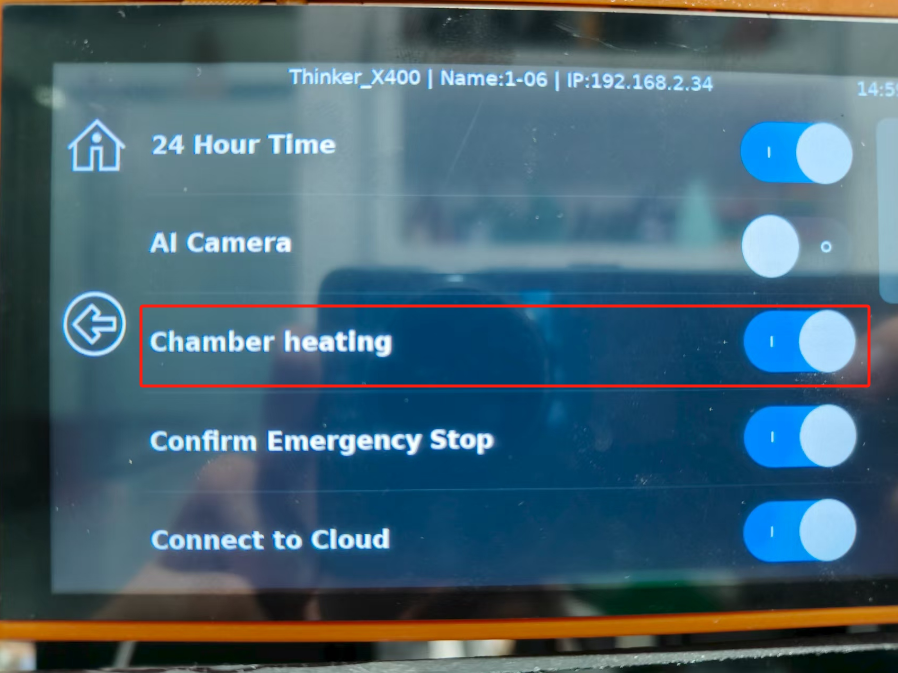
4.Go back to the main interface, click Firmware restart, and wait for a while.

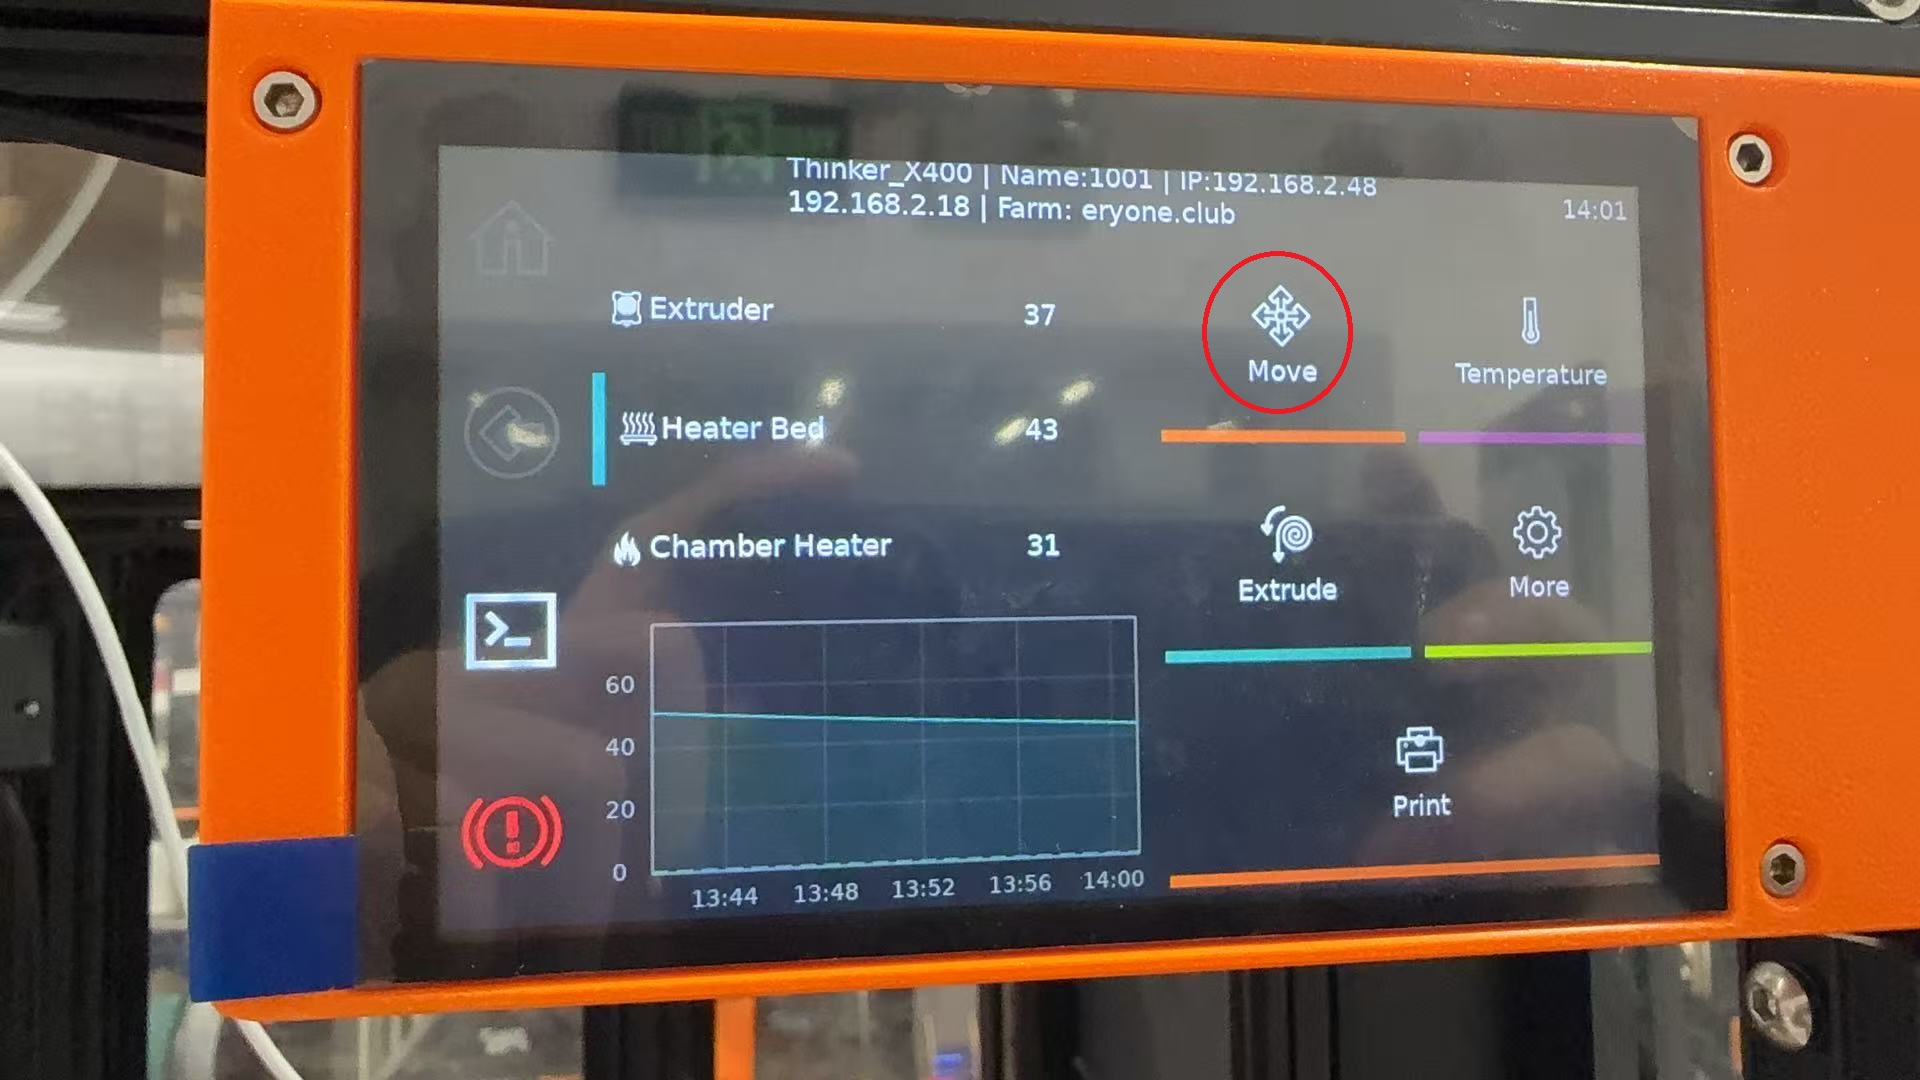
¶ 3.The X-axis movement is obstructed and cannot return to its home position.
reason:
The screws on the X-axis rail have become loose and require tightening.
¶ 4.Unable to click the on-screen button.
reason:
The issue may be caused by a loose screen cable connection.
Solution:
1.Open the right-side motherboard cover and disconnect the fan connector.
2.Disconnect and reconnect the display cable on the docking station.
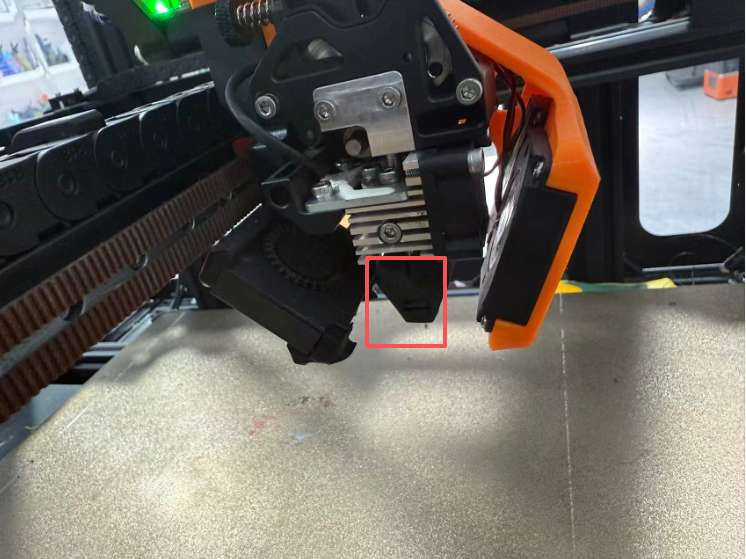
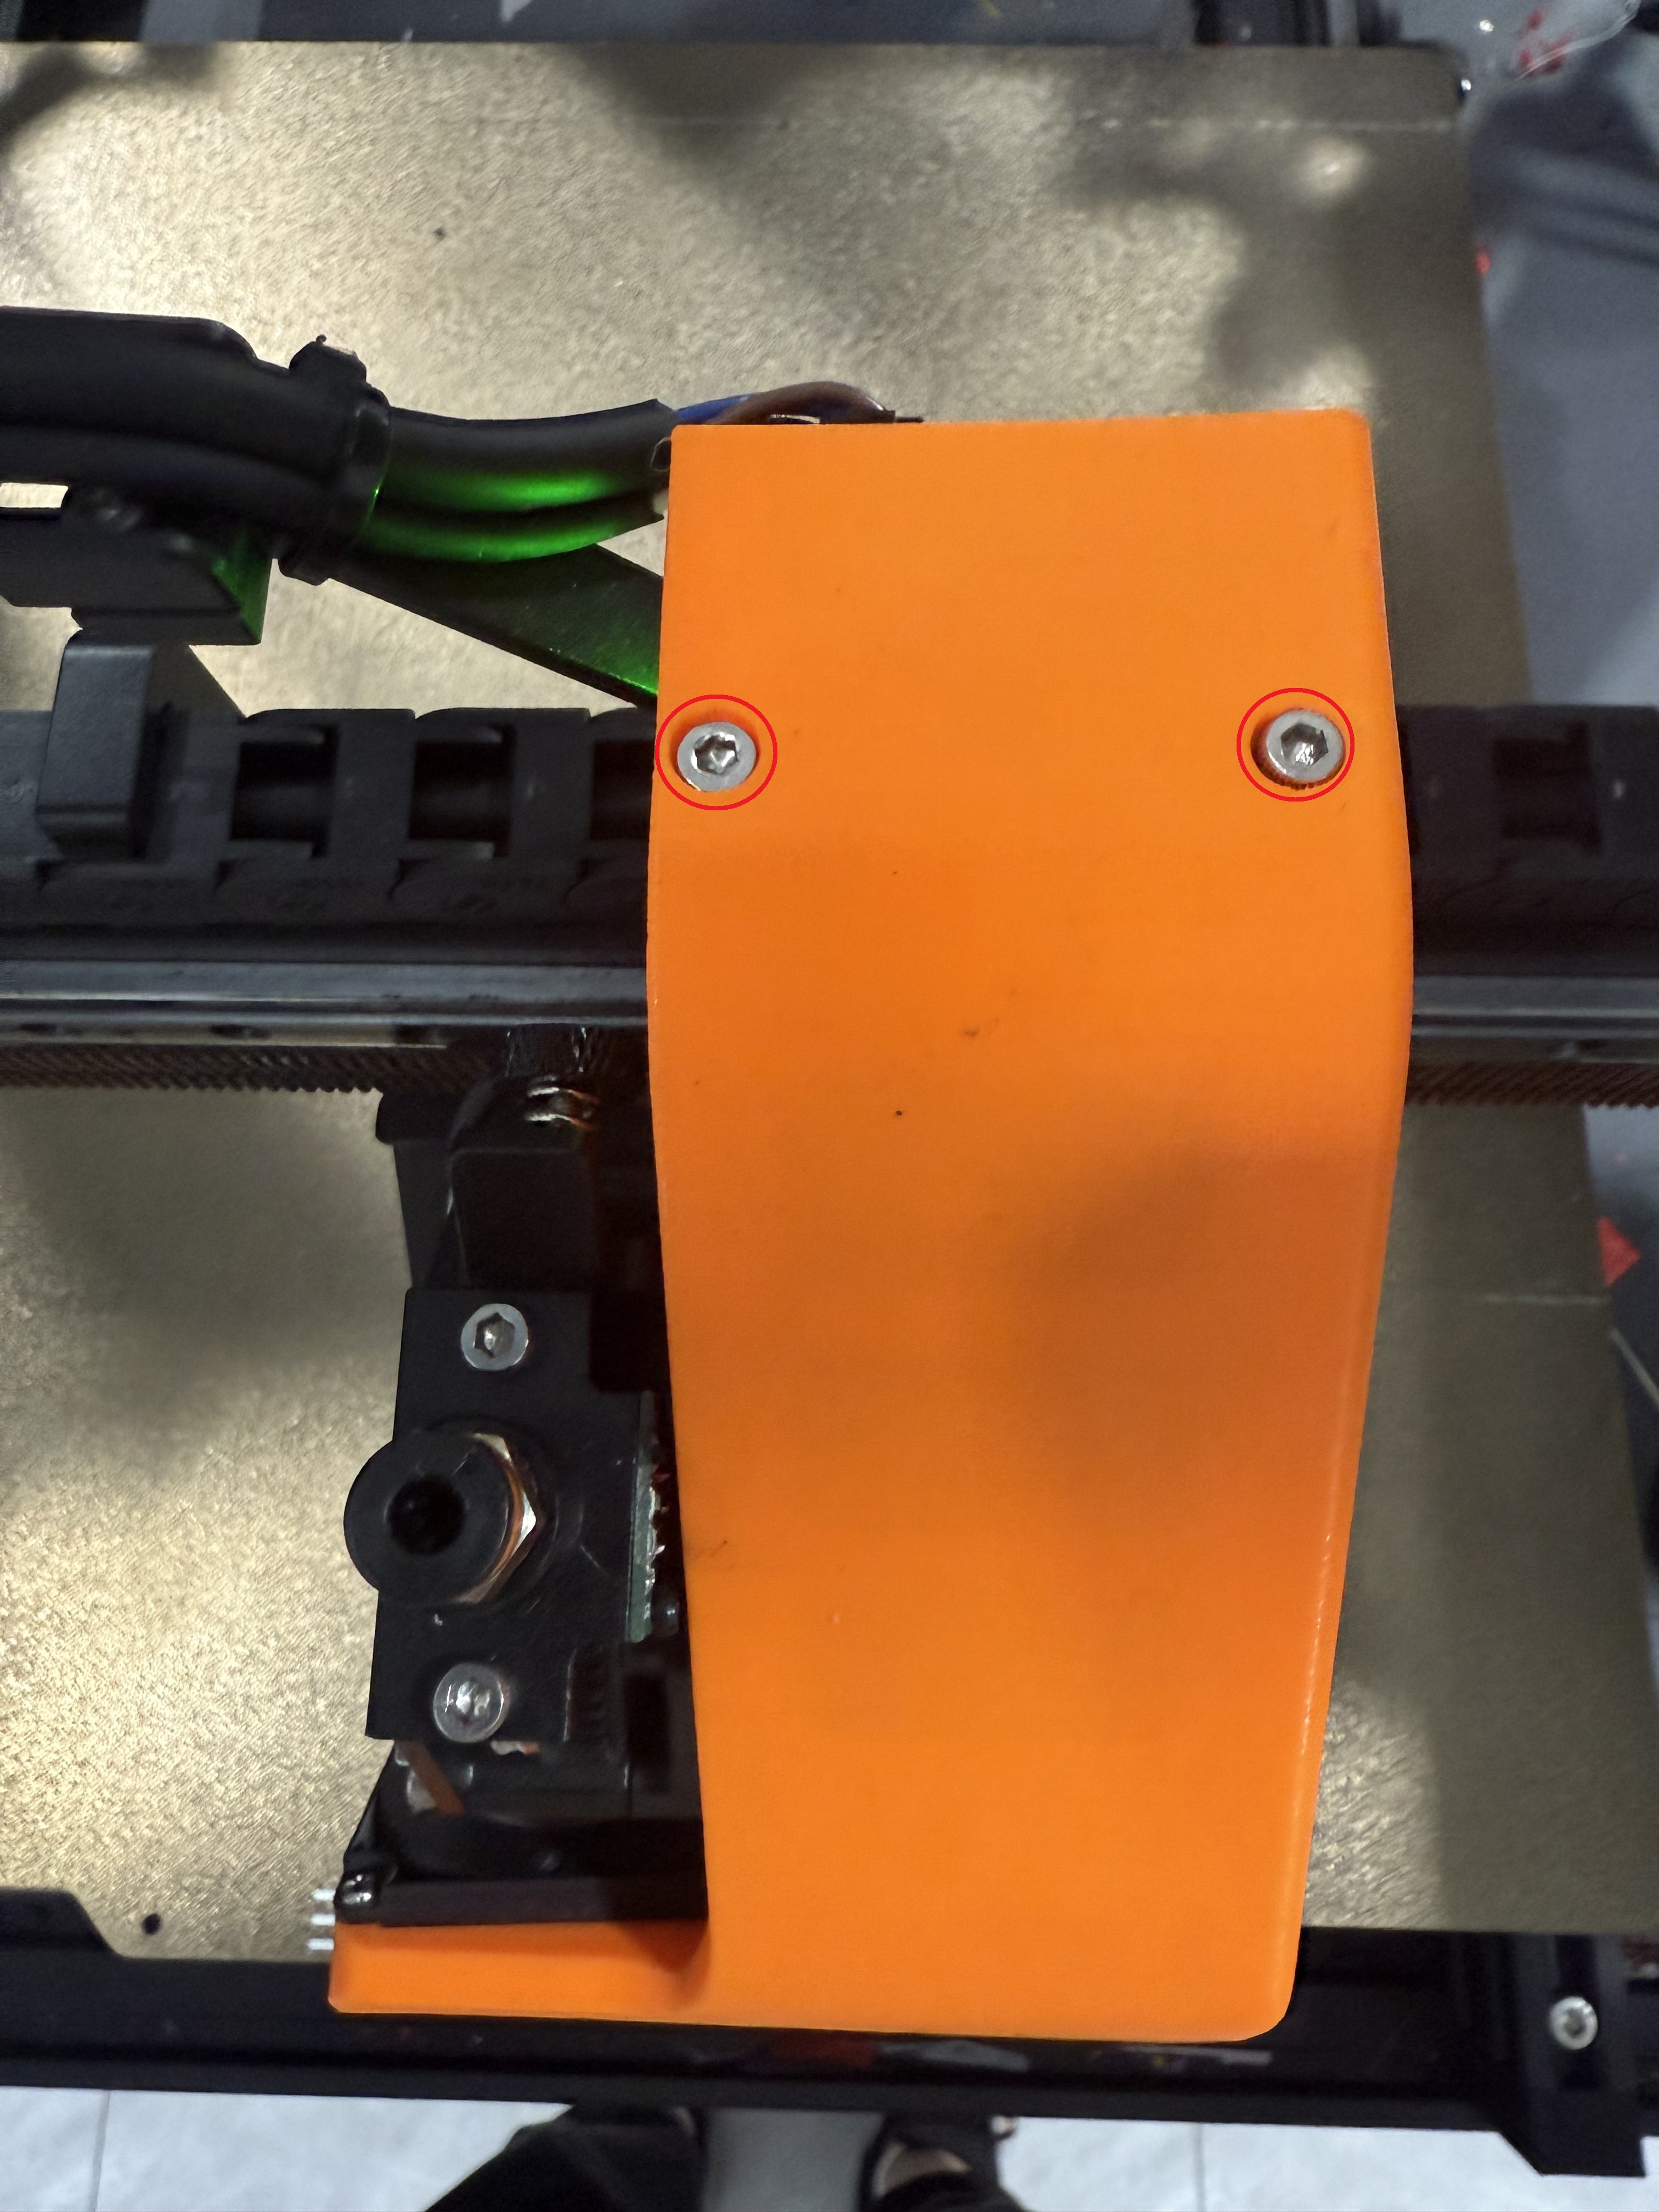
¶ 5.Y-axis homing is obstructed and fails to reset.
Solution:
Please remove the orange printed part from the Thinker X400
¶ 6. No image output when powered on.
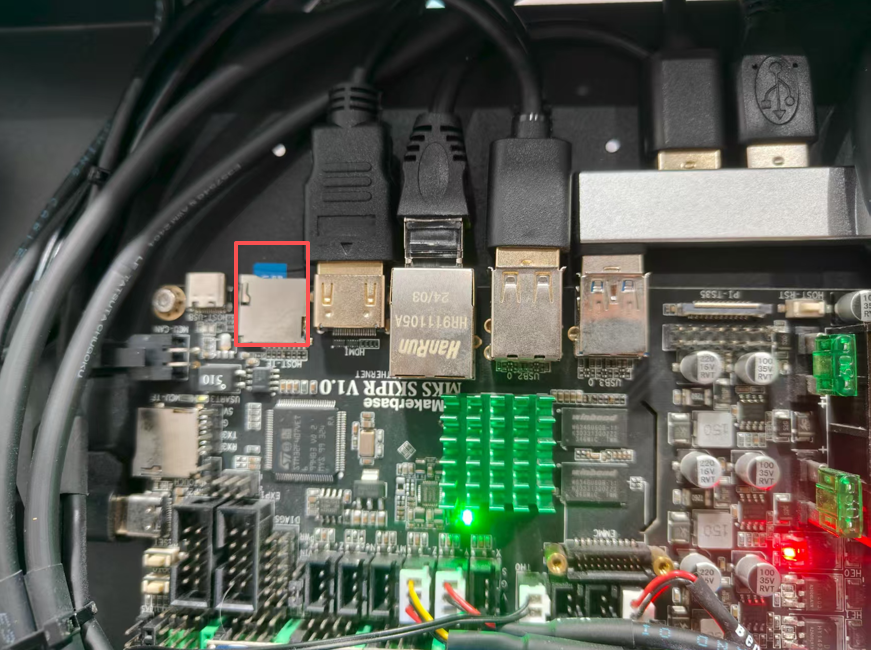
A non-illuminating screen upon startup can be attributed to the following scenarios:
1.Loose SD Card: The SD card may not be seated properly in its slot.
2.Damaged SD Card: The SD card itself could be corrupted or physically damaged.
3.Loose HDMI Cable: The HDMI cable connection might be insecure at either end.
4.Damaged HDMI Cable: The HDMI cable may be faulty or broken.
5.Faulty Screen: The screen/display unit itself could be defective.
Solution:
Method 1:
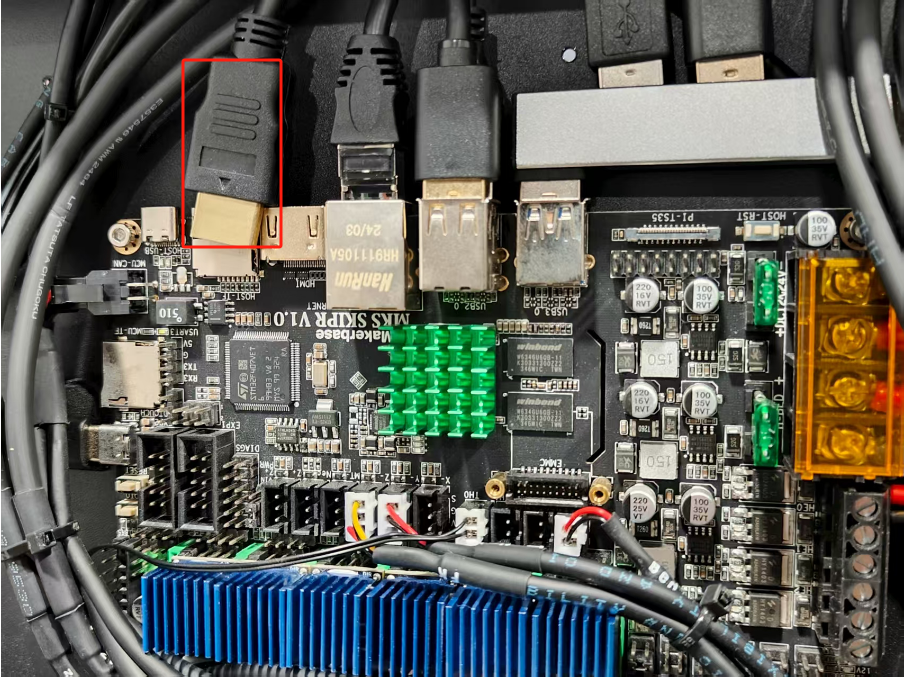
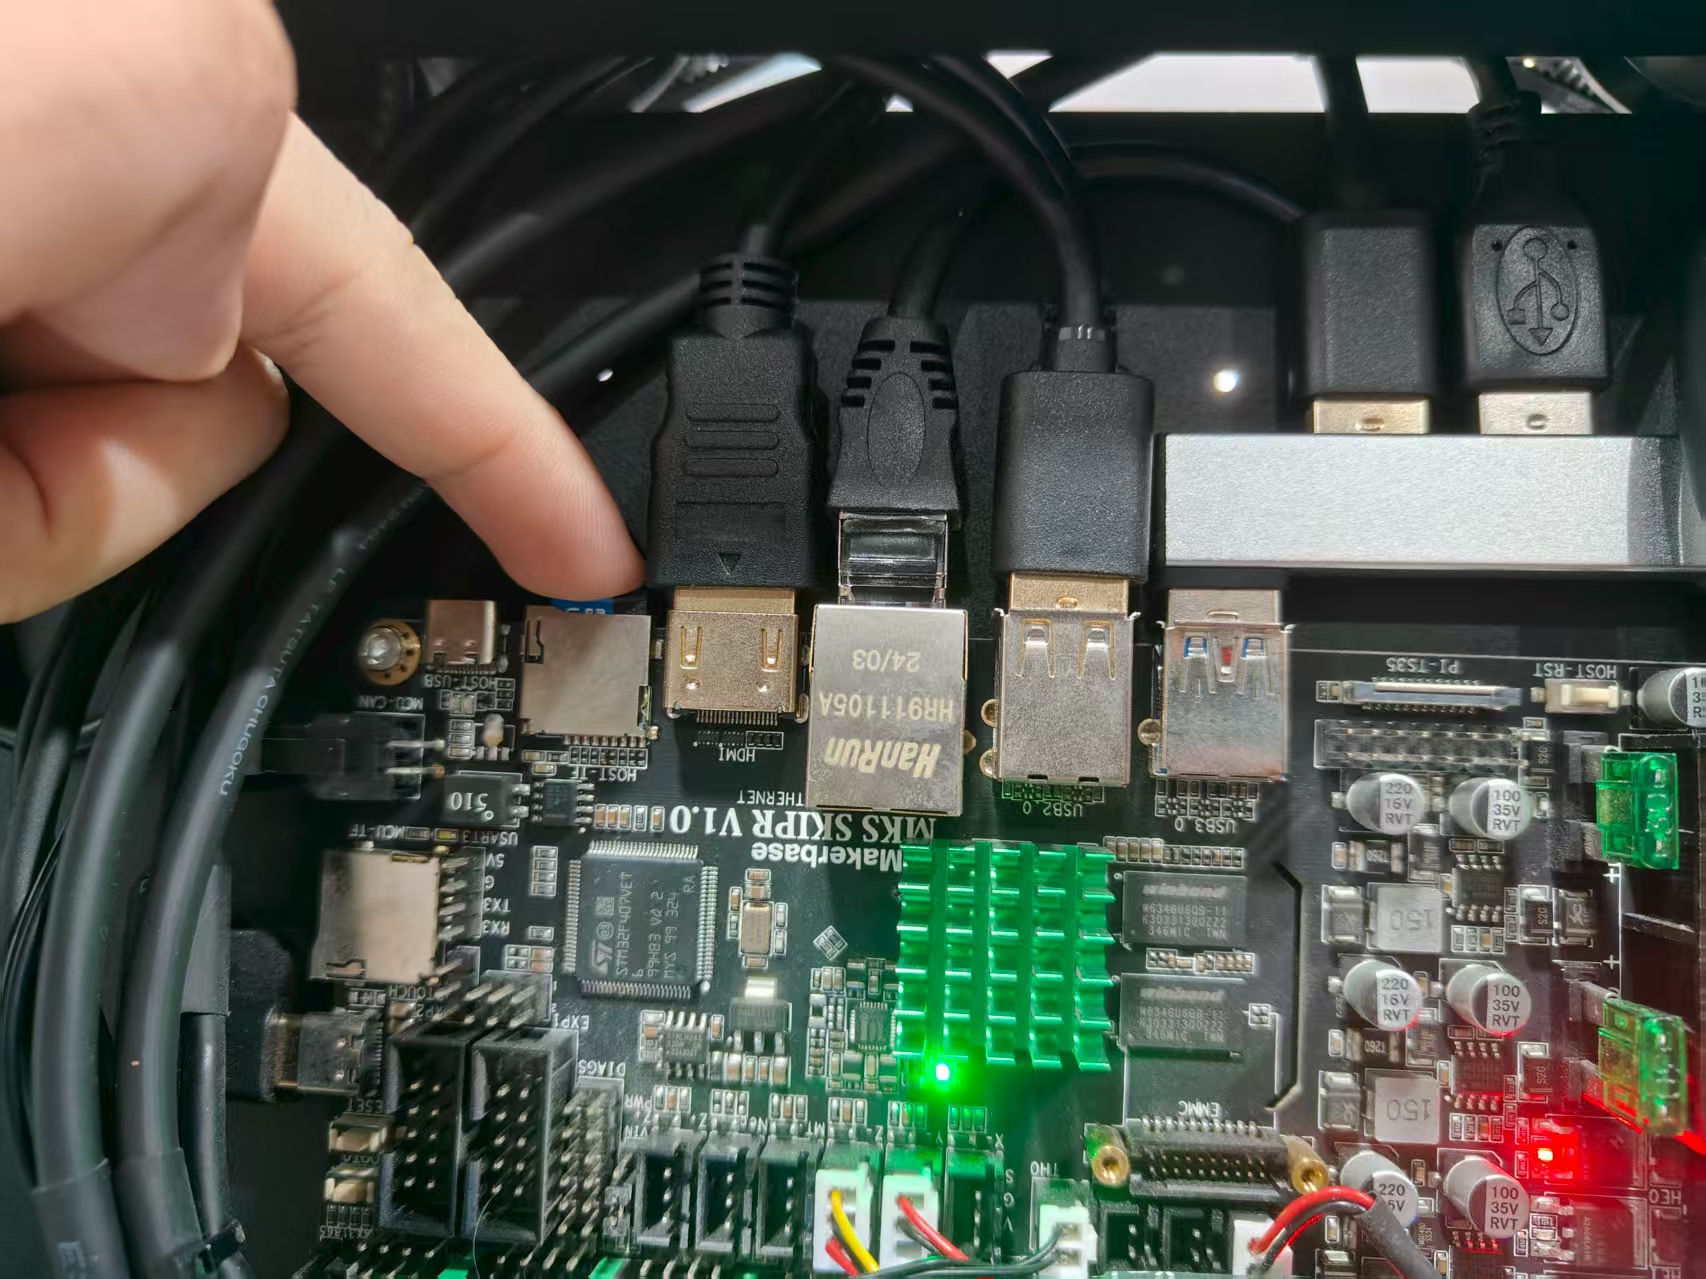
1.Open the right-side motherboard cover and disconnect the fan connector.
2.Unplug the HDMI cable and plug it back in.
Method 2:
1.Press the SD card again

Method 3:
1.Re-flash the SD card
Firmwareinstallation
Method 4:
Replace the HDMI cable with a new one.
Method 5:
Replace the screen with a new one.
¶ 7.WiFi cannot connect.
reason:
1.The WiFi signal might be too weak.
2.Only accepts 2.4GHz frequency band network
Solution:
1.Remove the right side motherboard cover and motherboard fan

2.Remove the wiring harness barrier.

3.Remove the WiFi module.
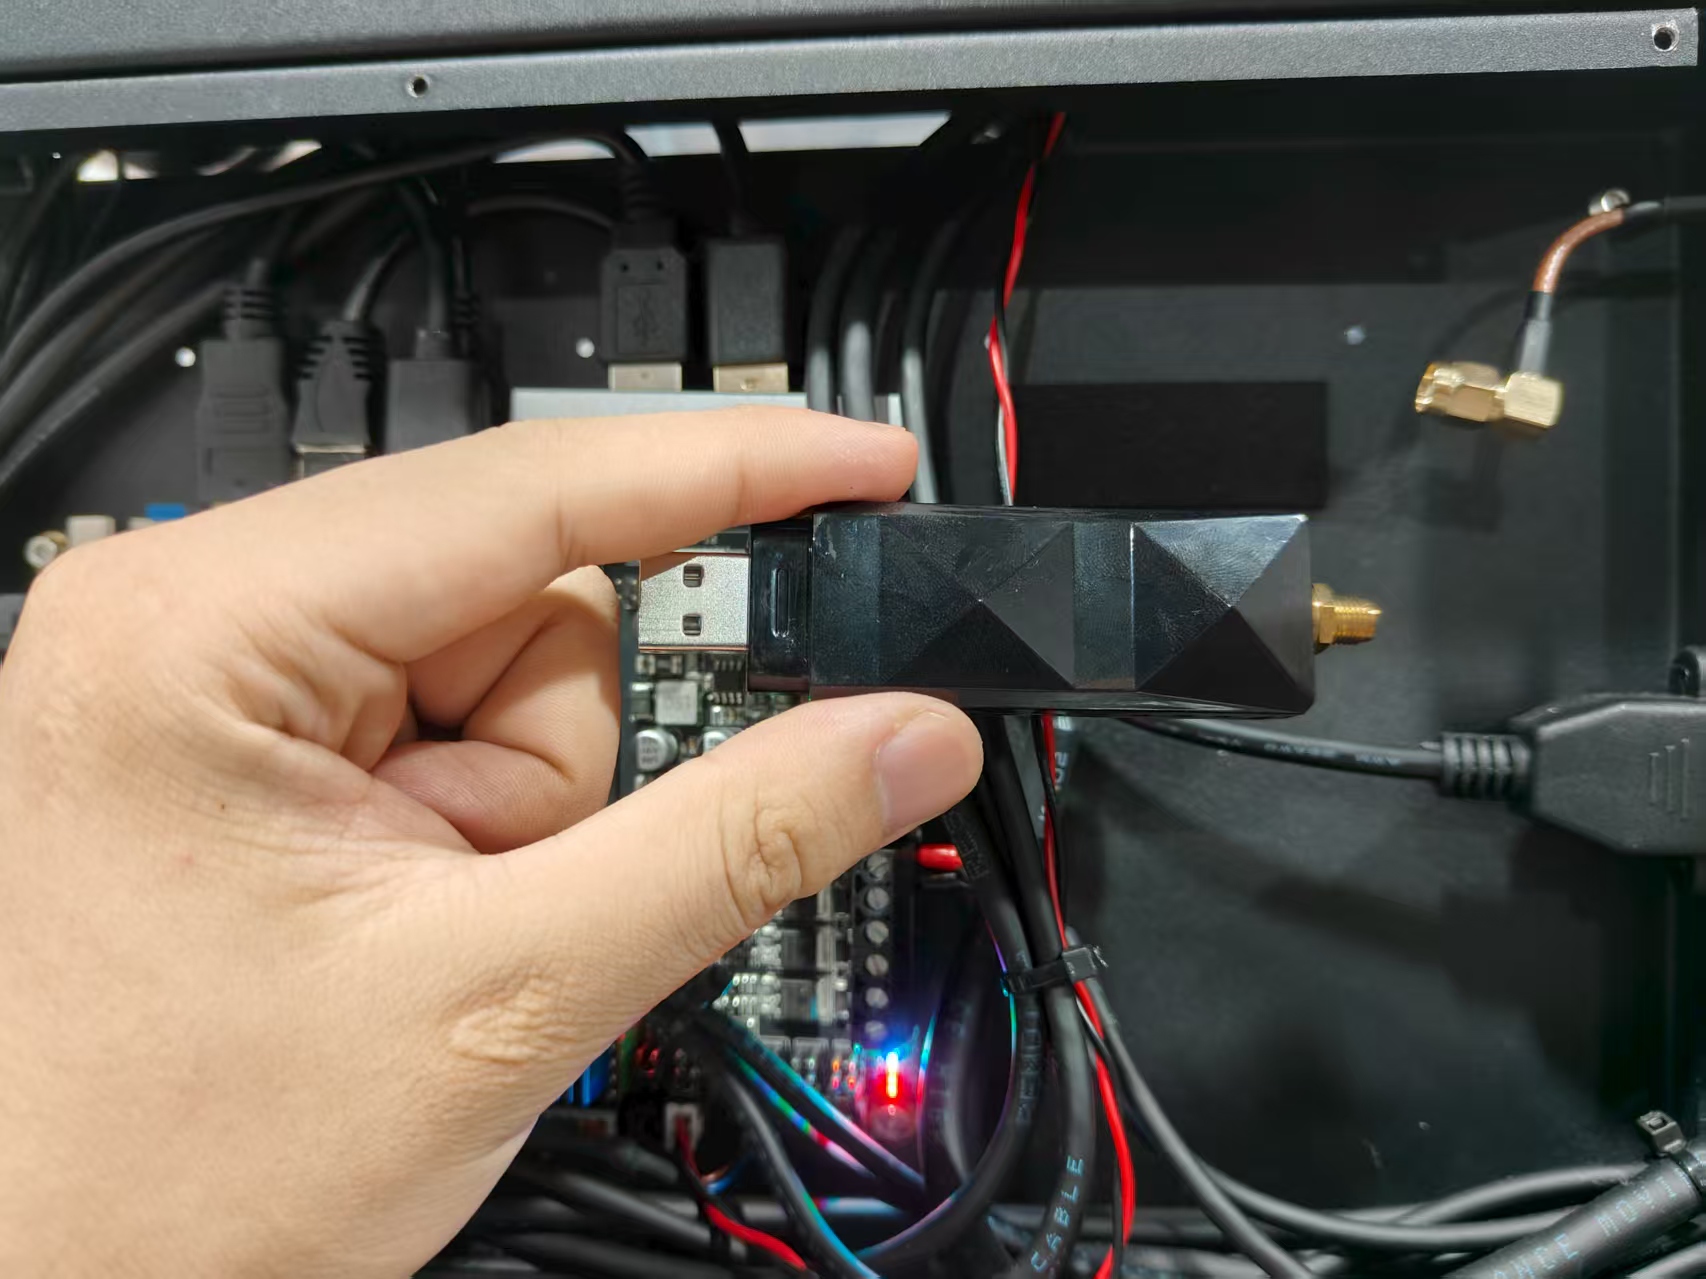
4.Connect the antenna to the WiFi module.
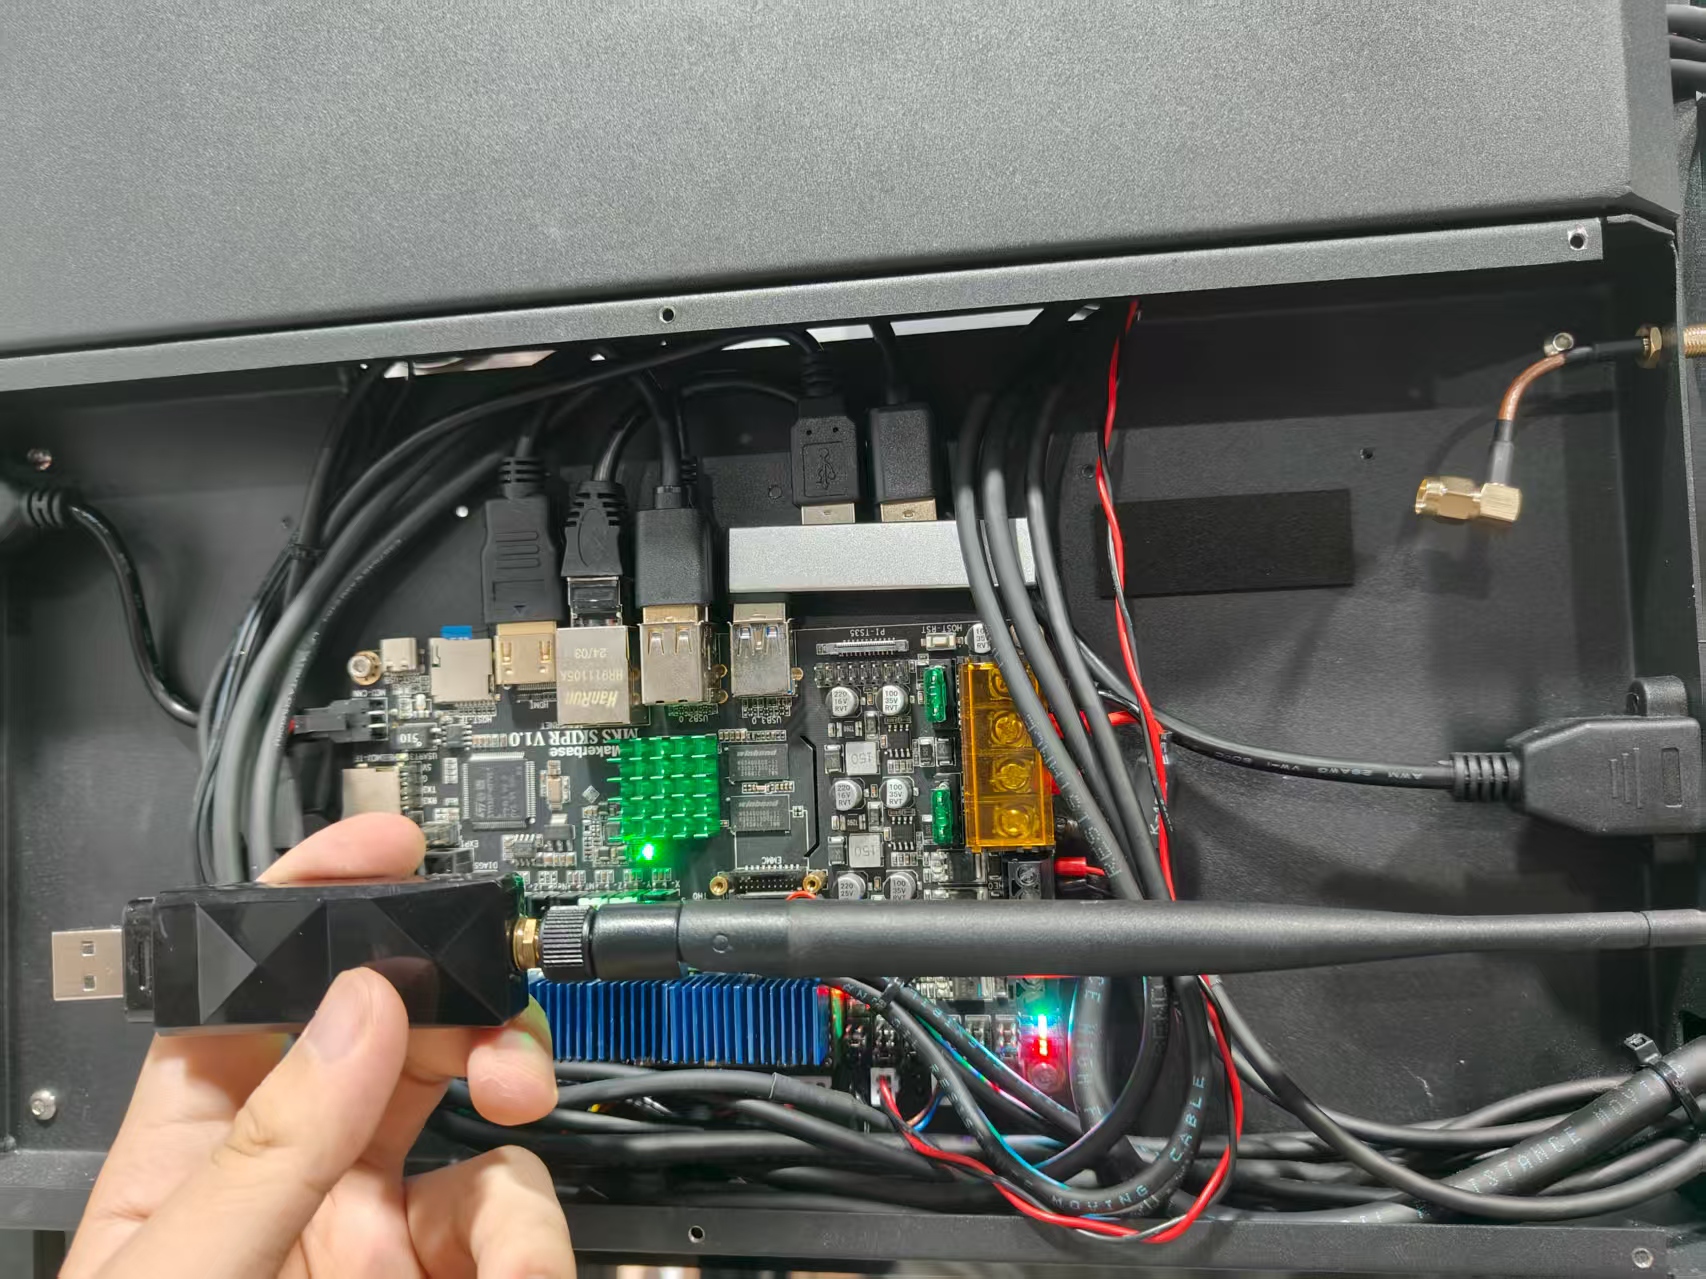
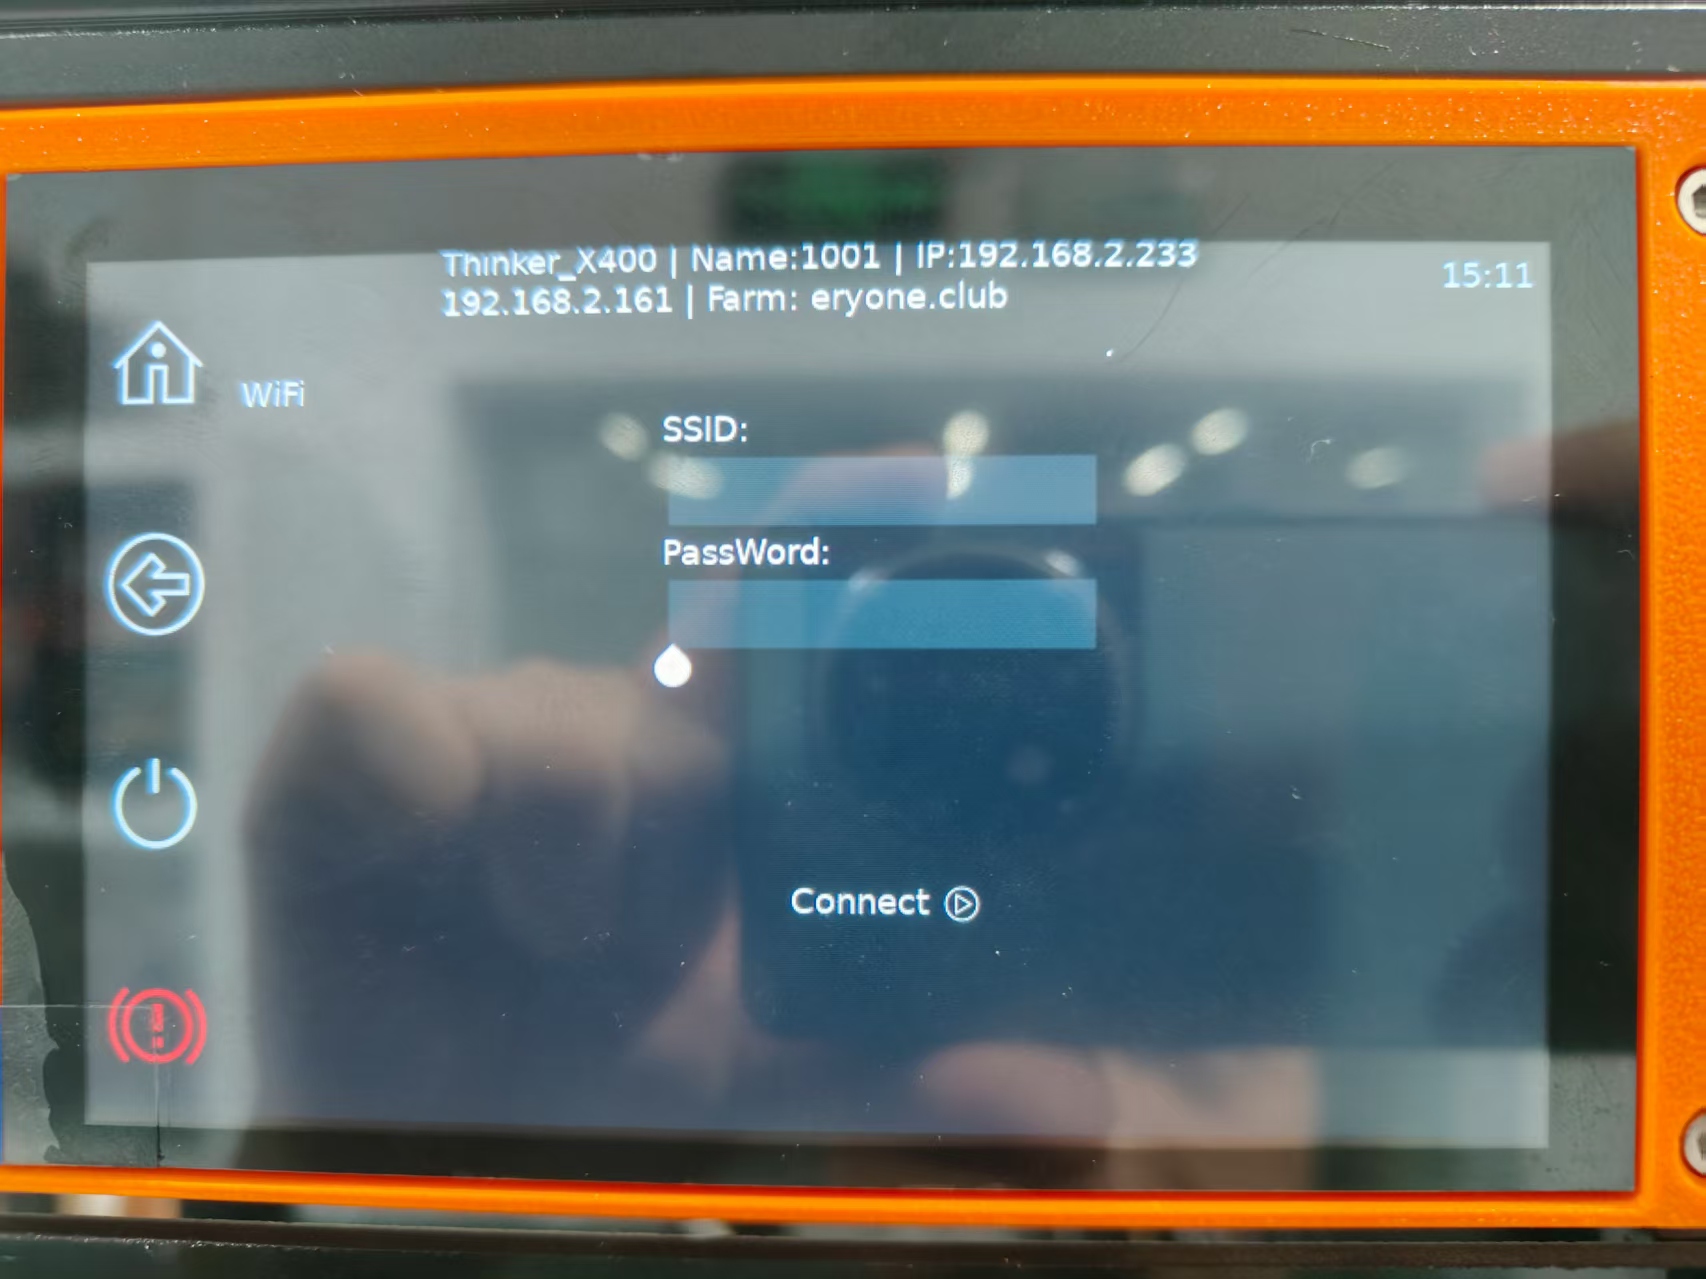
5.Insert the assembled WiFi module into the front USB port and re-enter the WiFi SSID and password.

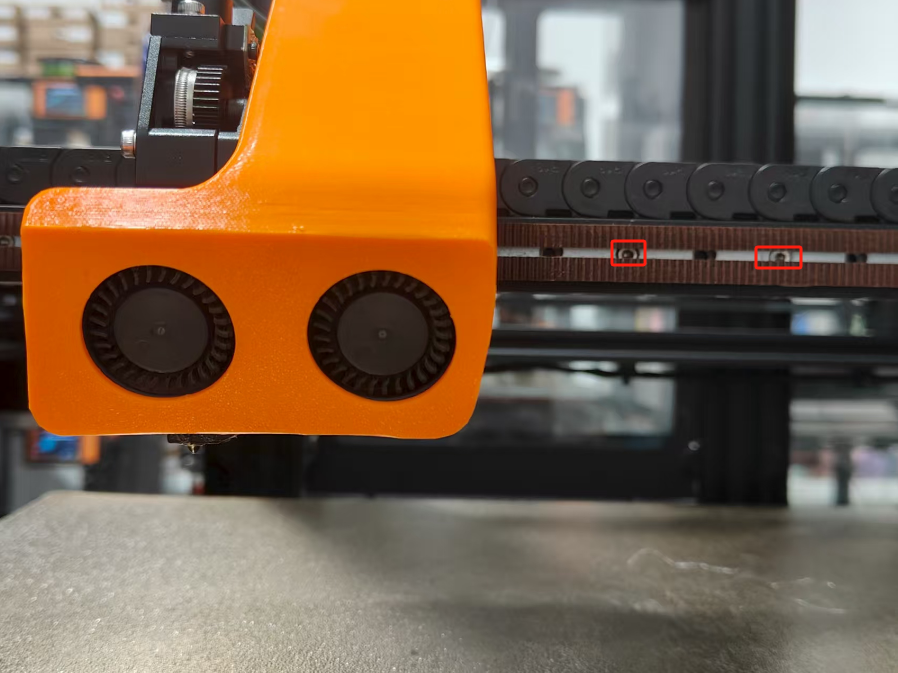
¶ 8.The X-axis limit switch did not trigger.
reason:
1.The cable for the X-axis limit switch board is not securely connected.
2.The cable for the X-axis limit switch board is damaged.
3.A fault exists with the X-axis limit switch board itself.
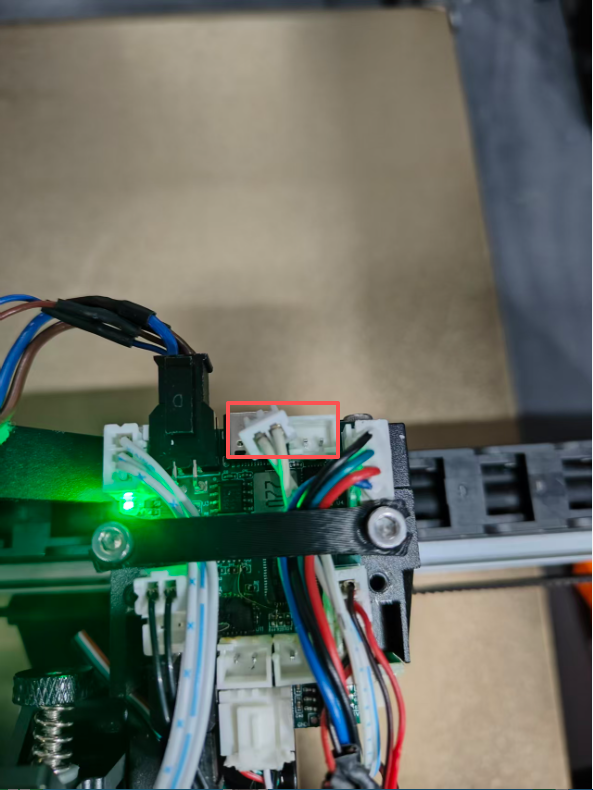
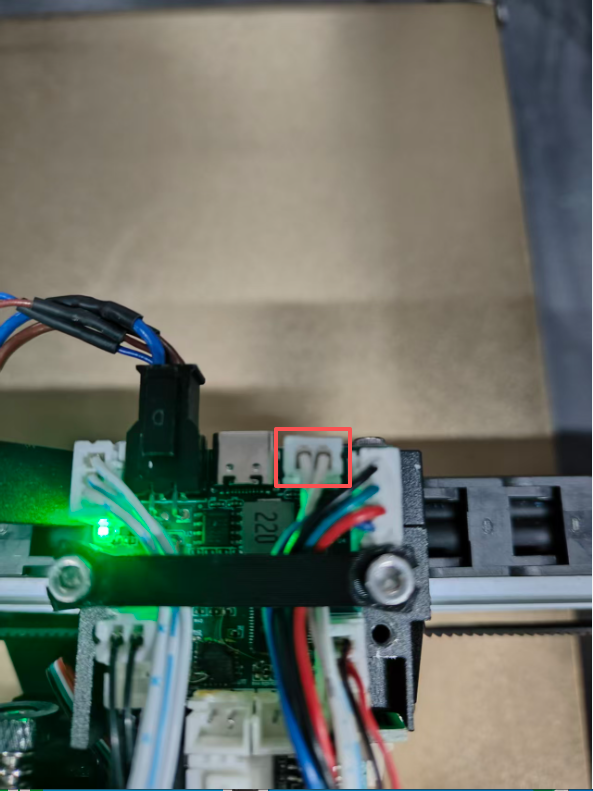
Method 1:
1.Inspect the limit switch cable to ensure it is neither disconnected nor damaged. If it appears intact, reseat the connection by unplugging and then firmly re-plugging it.
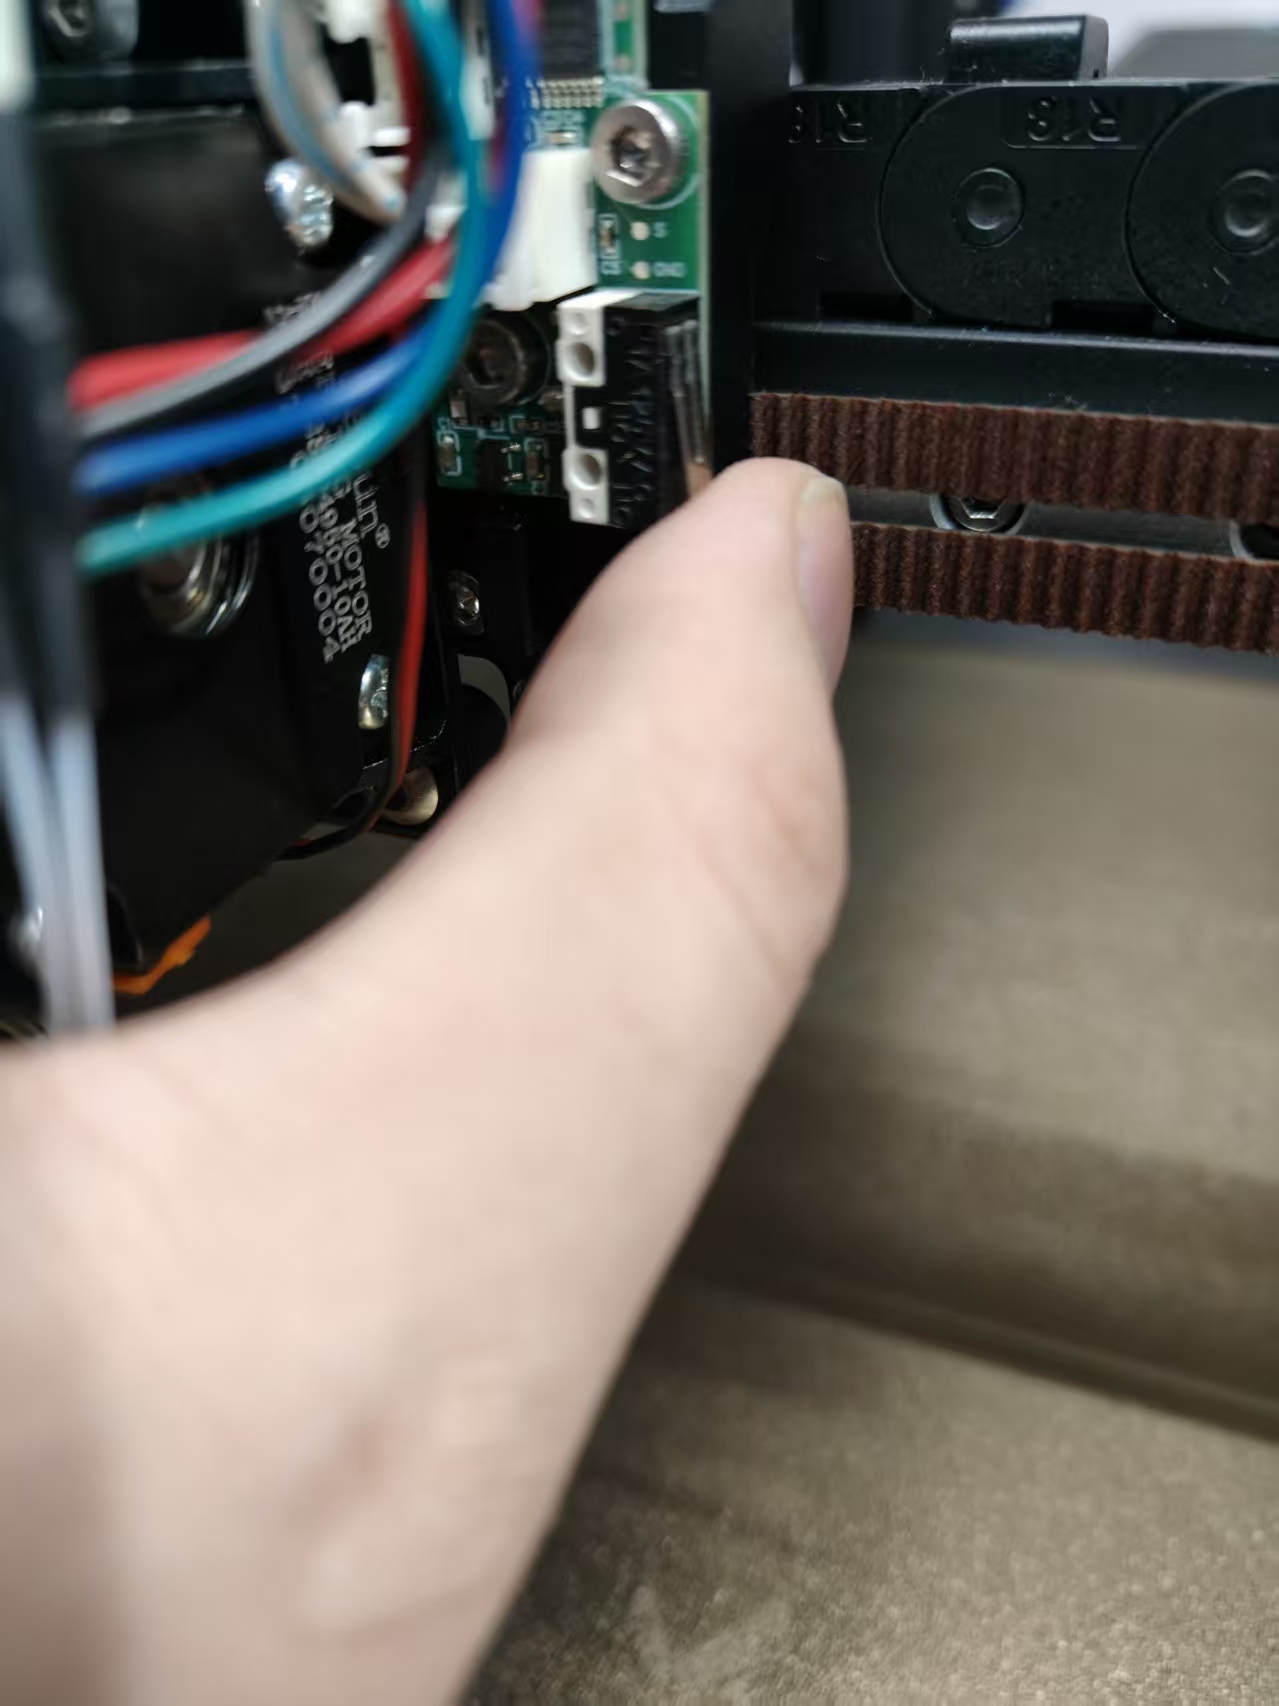
2.Initiate the homing function and manually press the X-axis limit switch. Observe whether it successfully triggers and stops the axis movement.
Method 2:
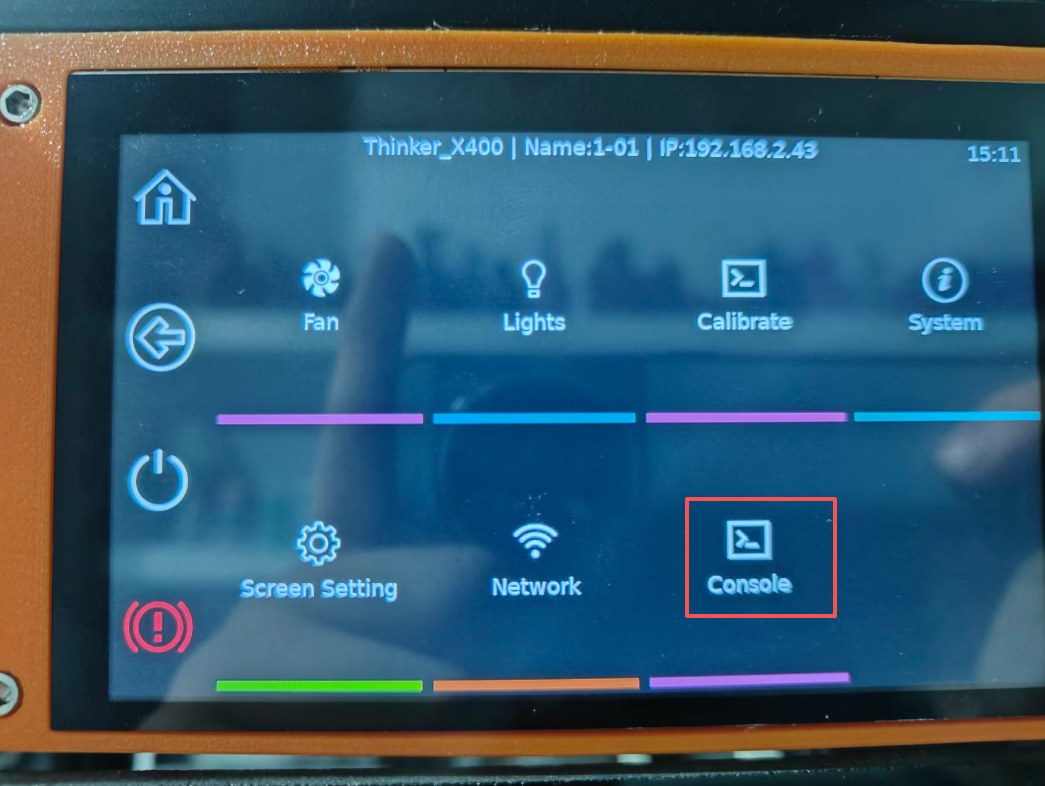
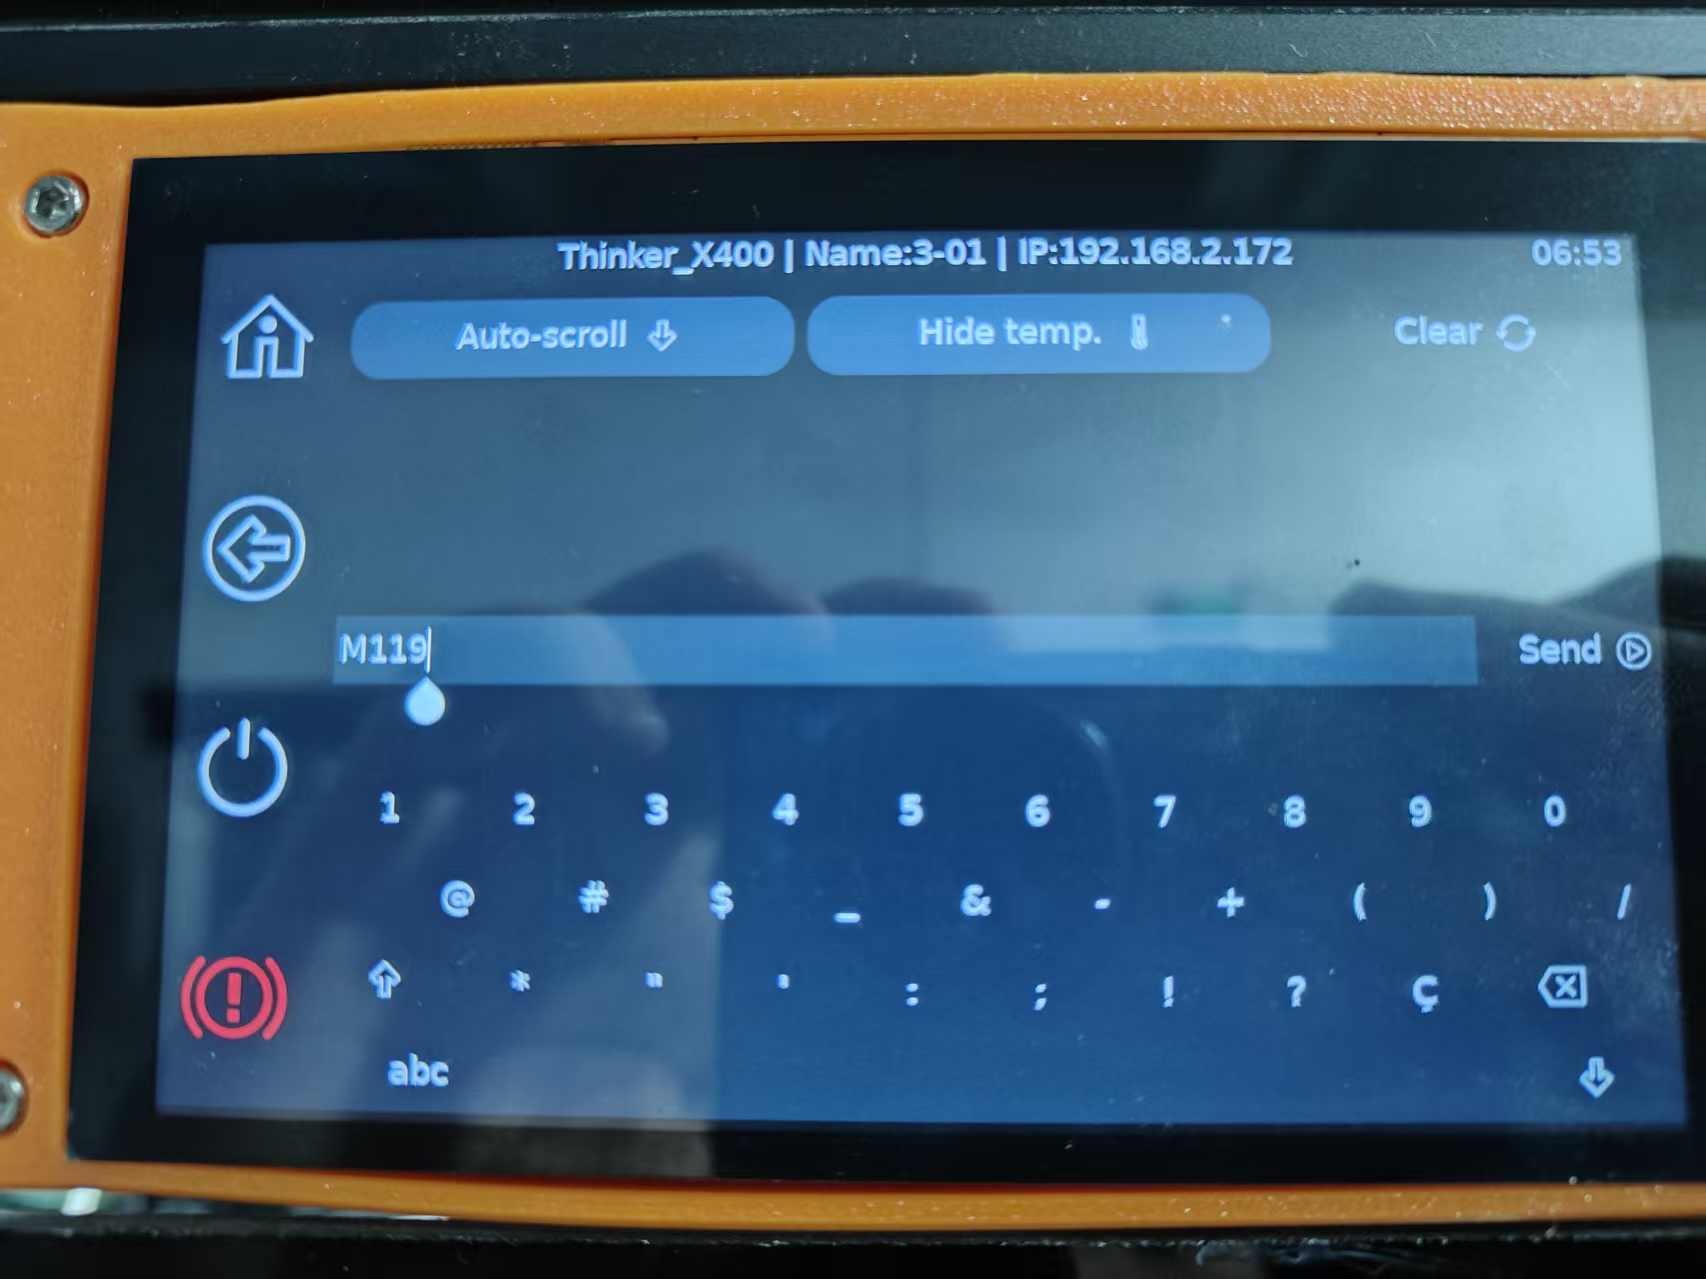
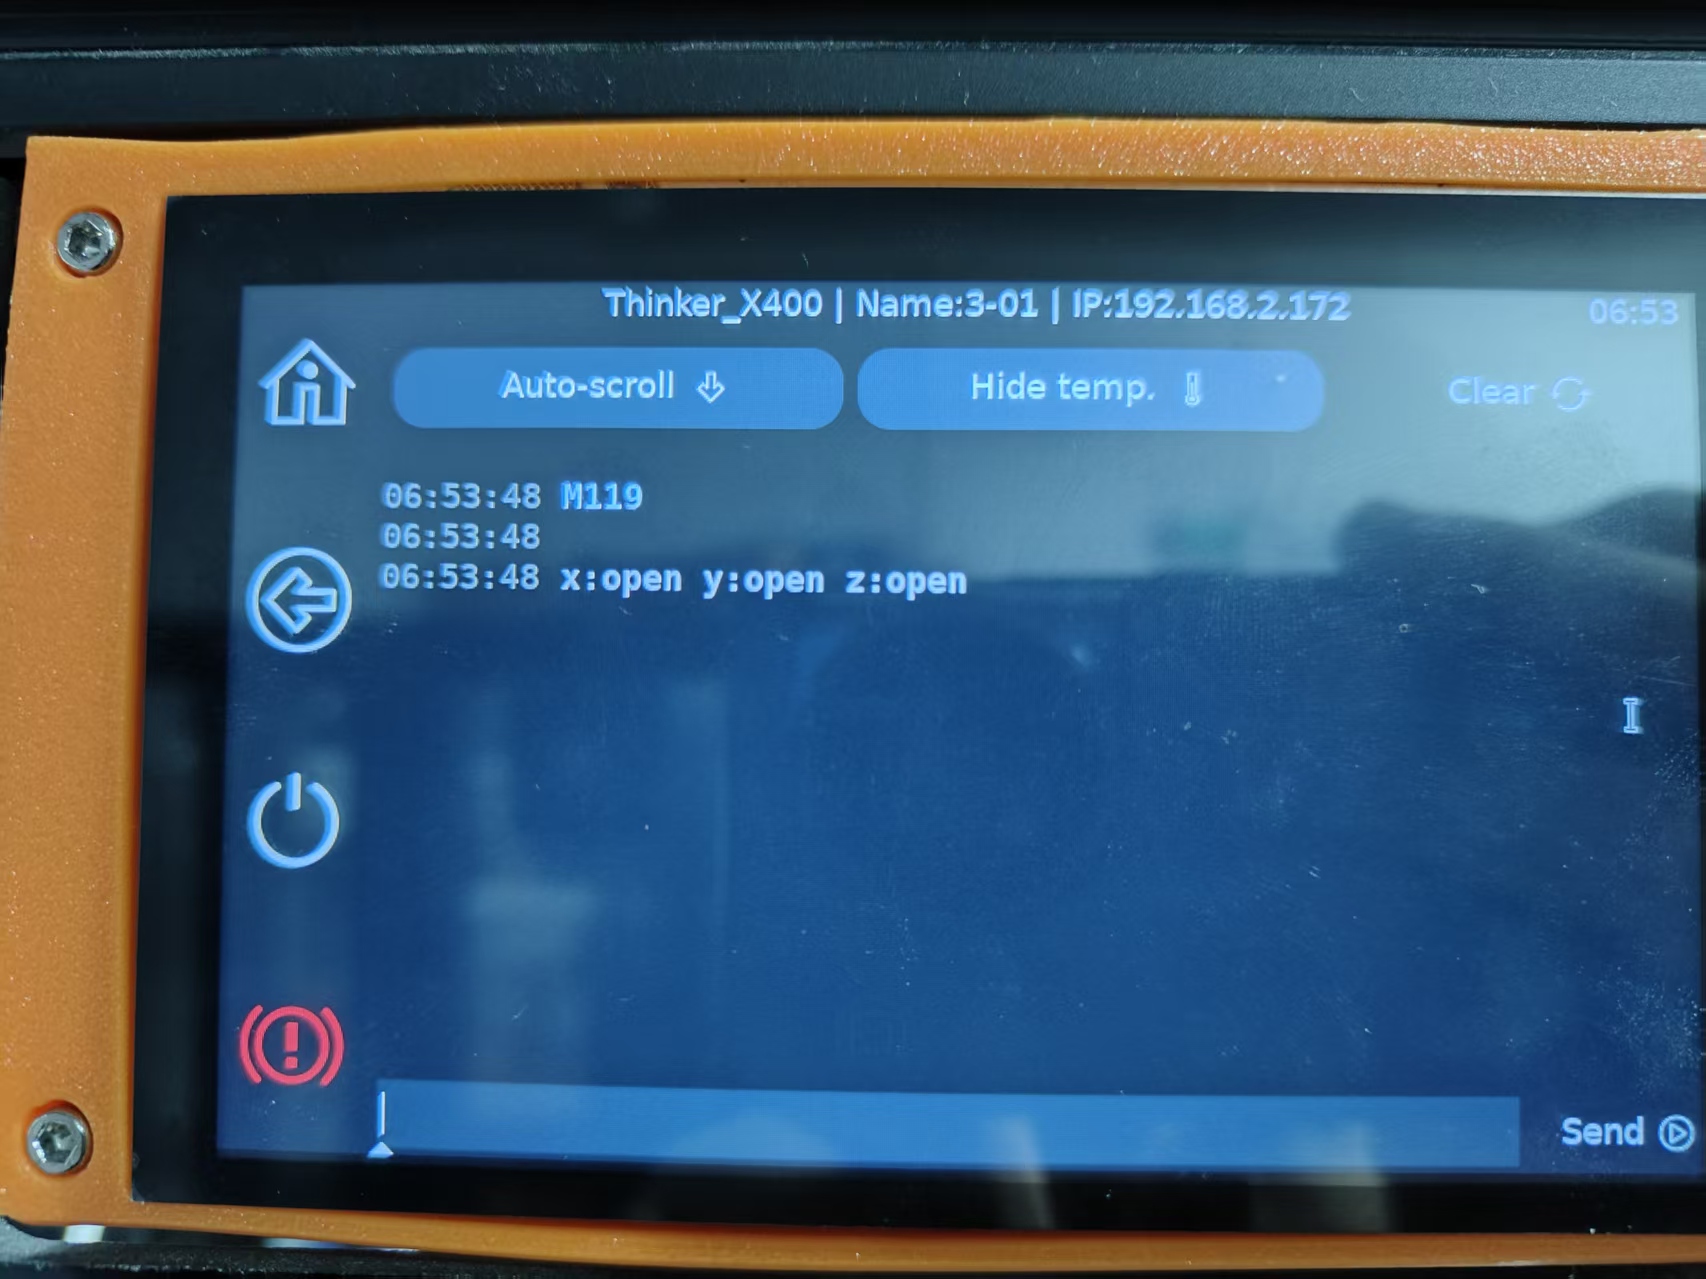
1.Enter the command M119 in the console to check if the X-axis limit switch is in the 'open' state.
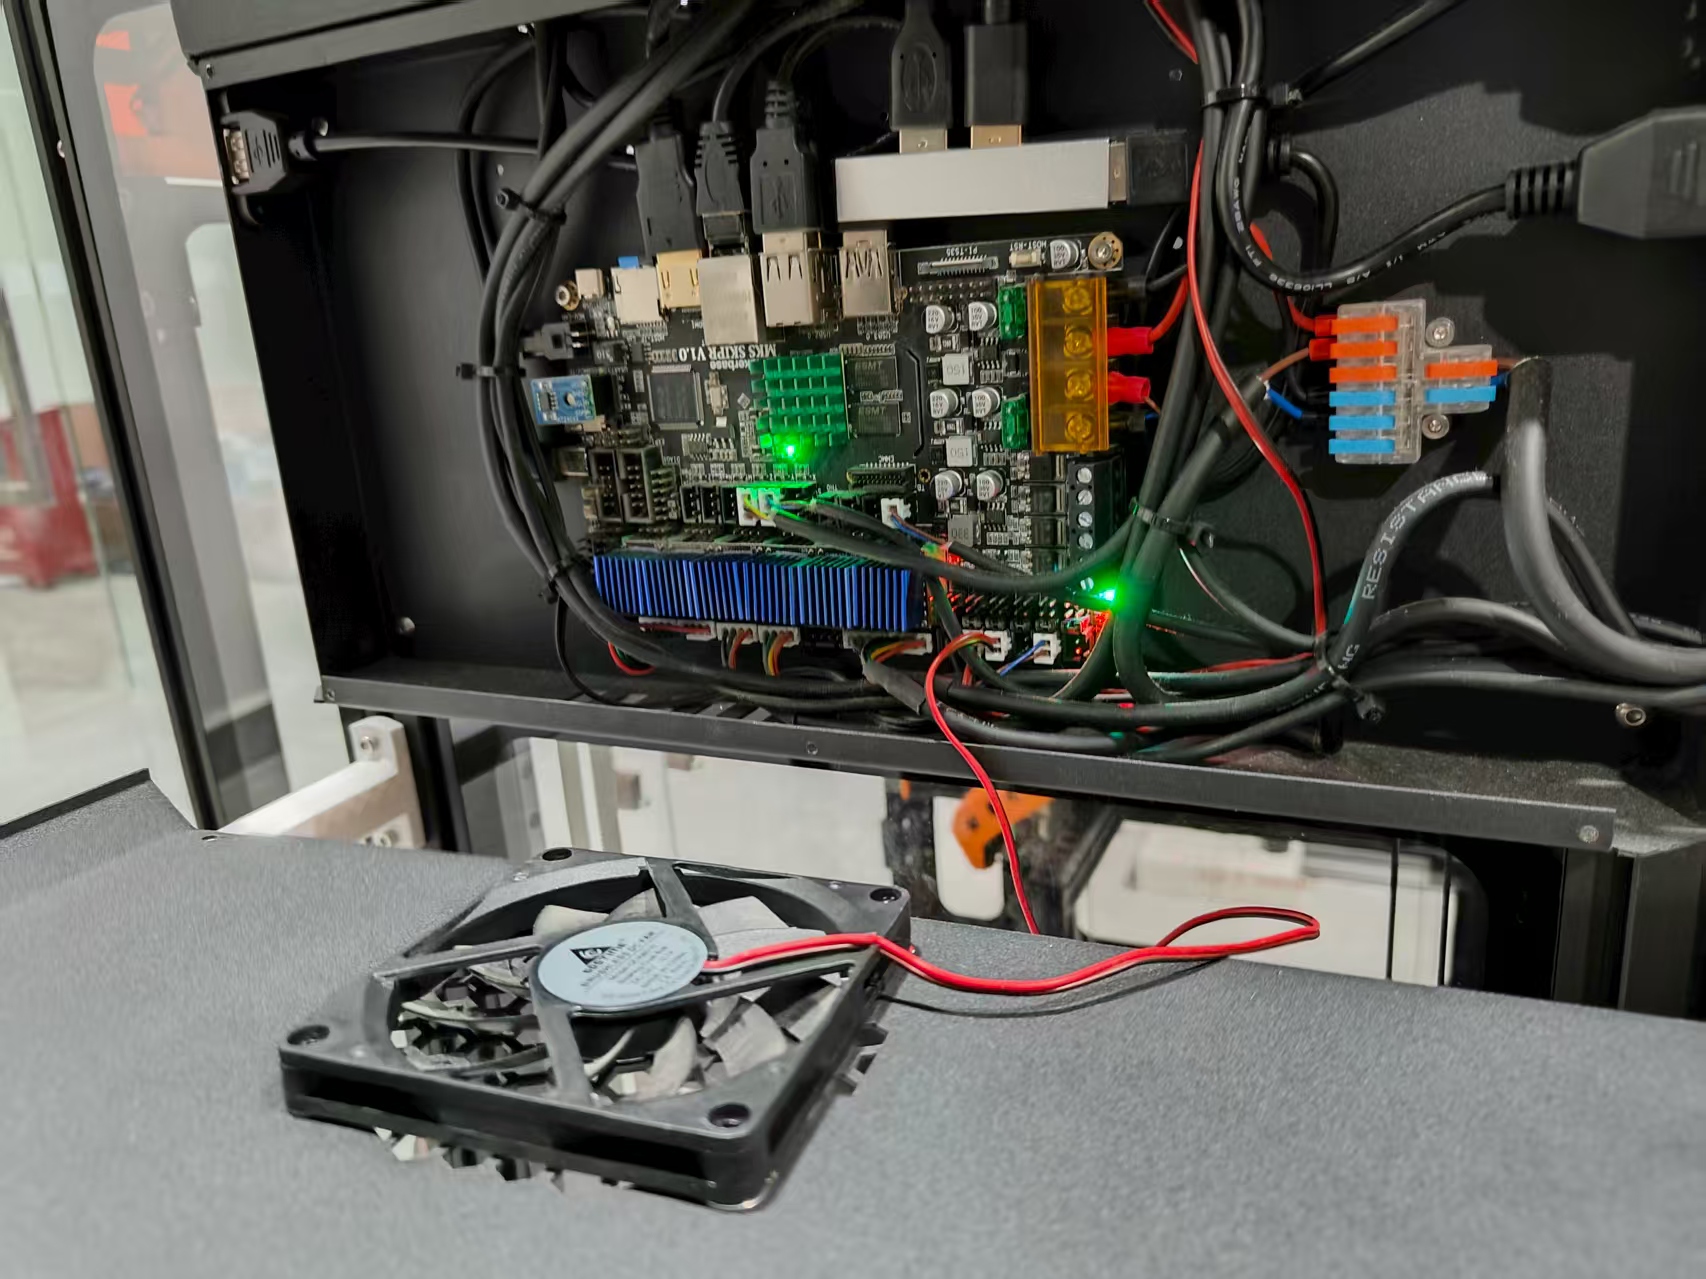
¶ 9.The motor overheated, causing the print to stop.
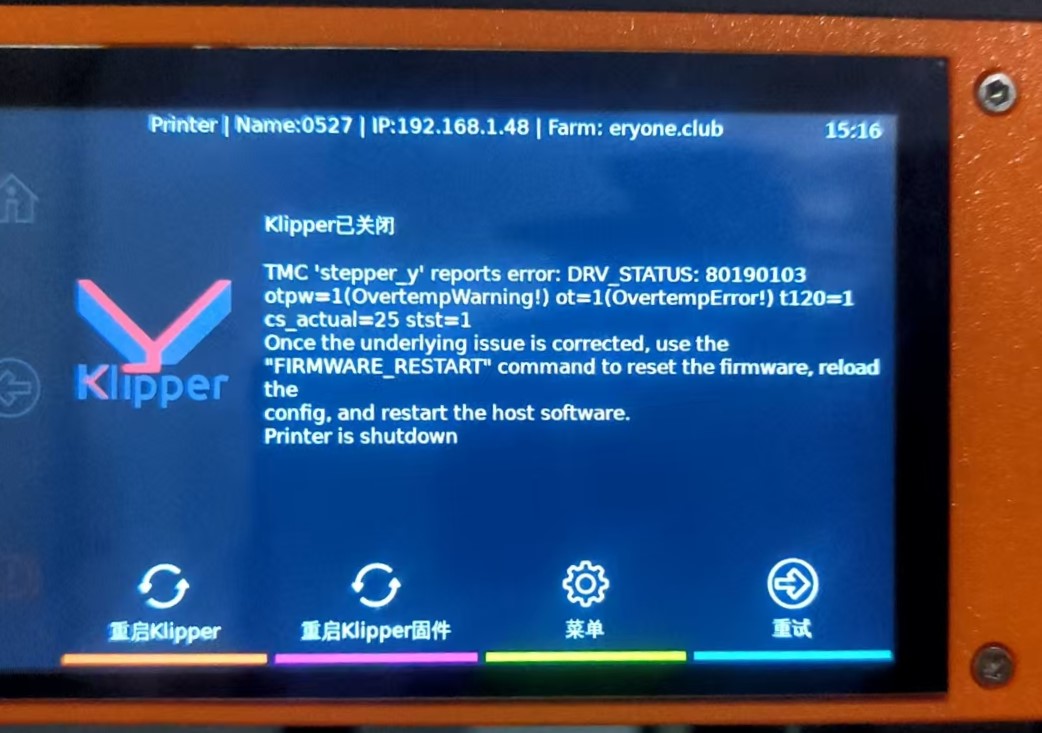
reason:
1.The right mainboard fan has a loose connection.
2.The right mainboard fan is damaged.
3.The right mainboard fan is scraping against the mainboard cover, preventing it from spinning.
Method 1:
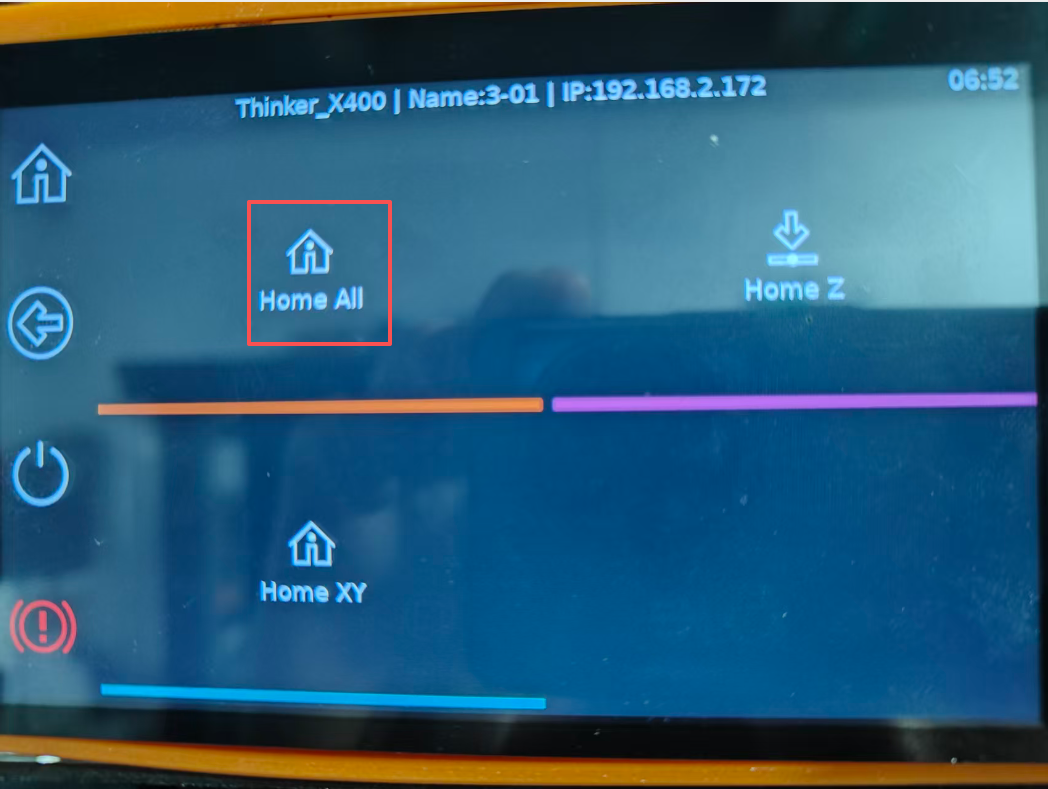
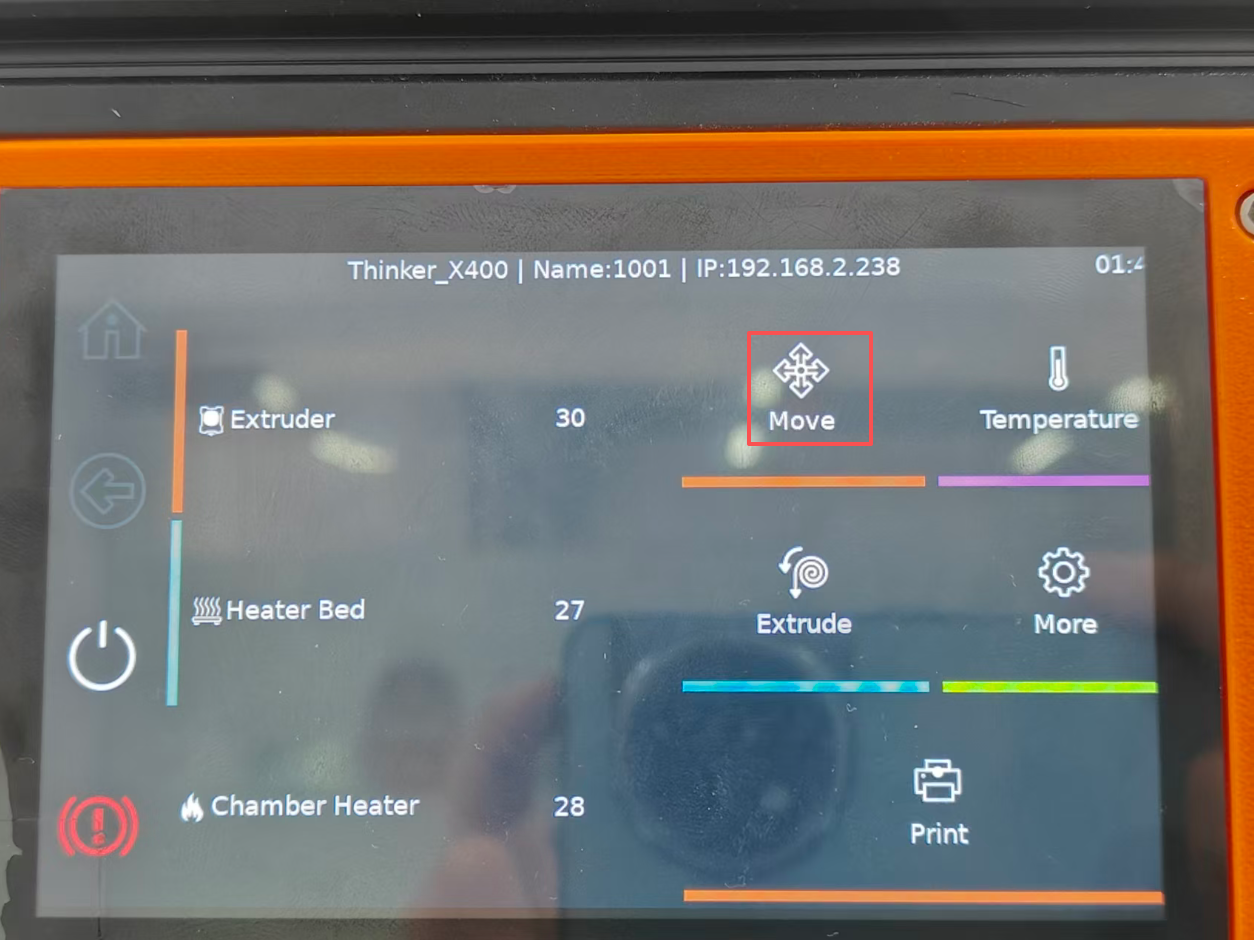
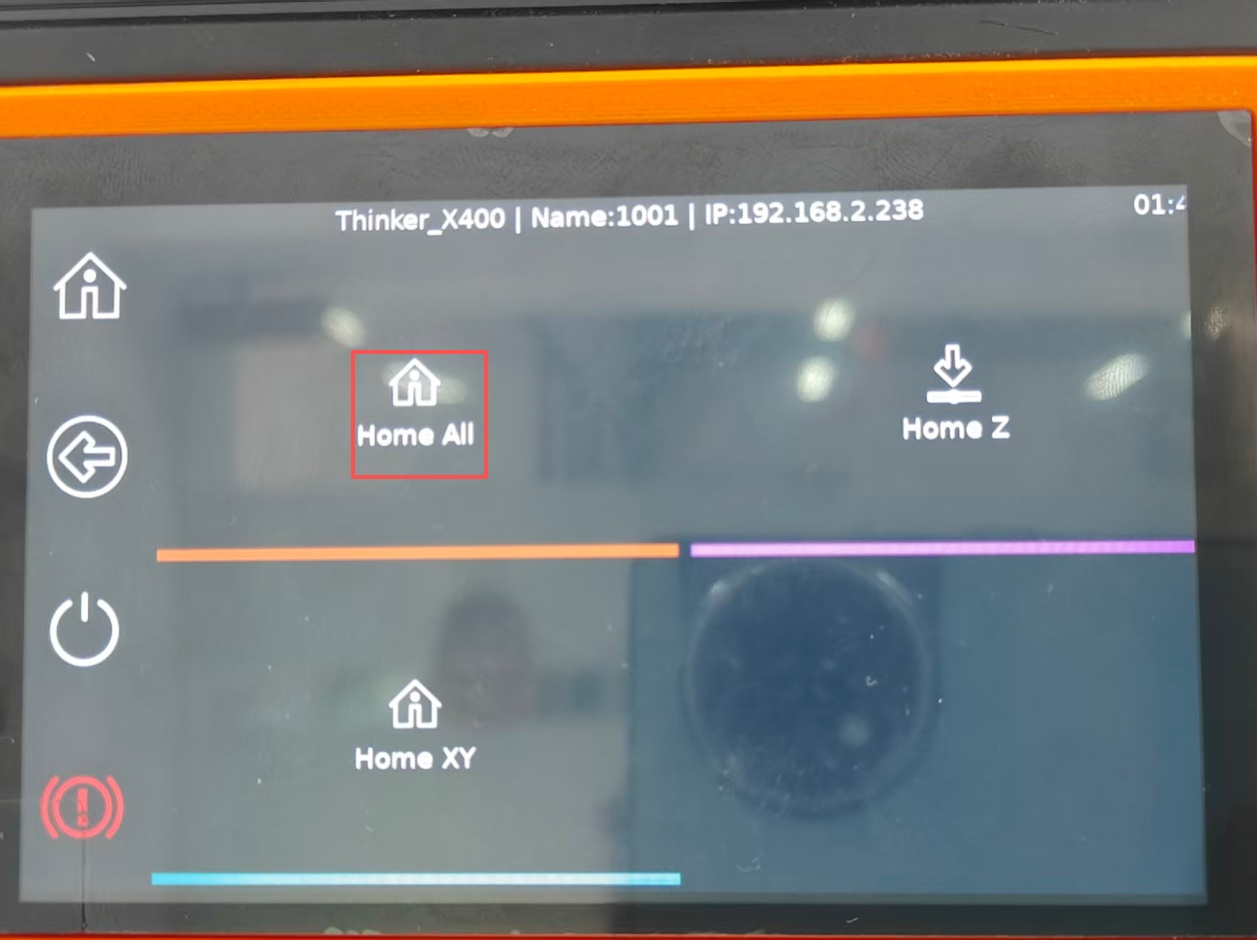
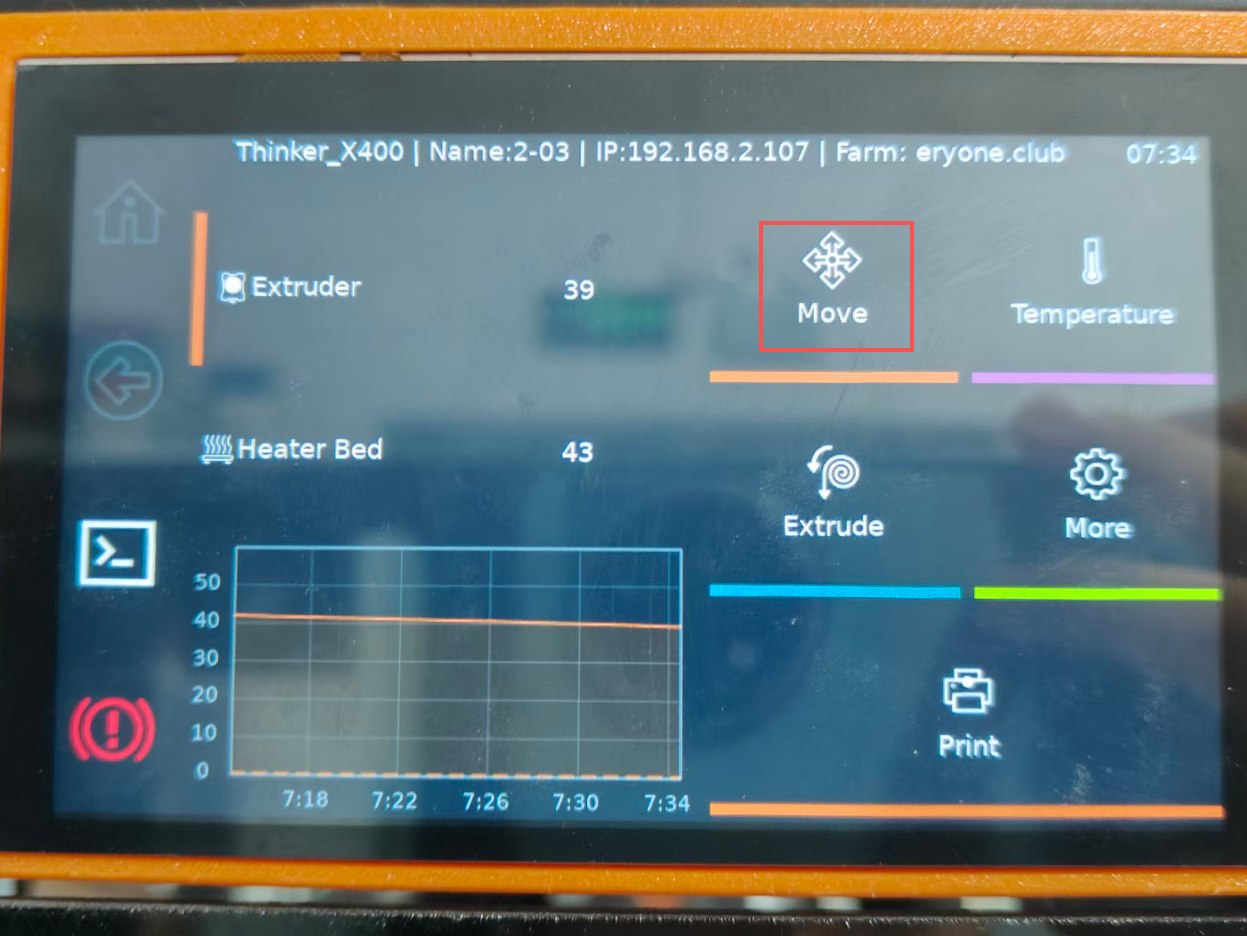
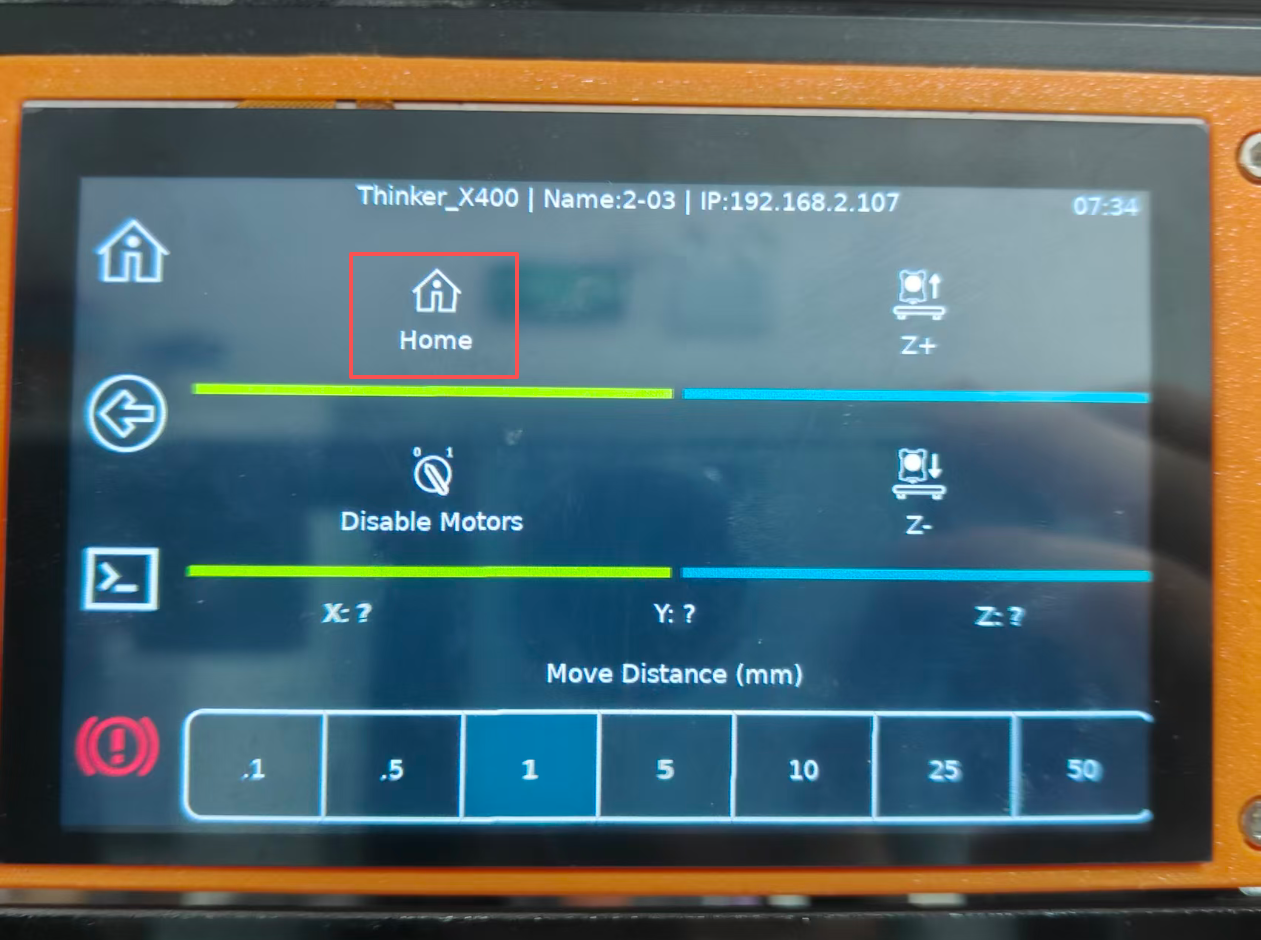
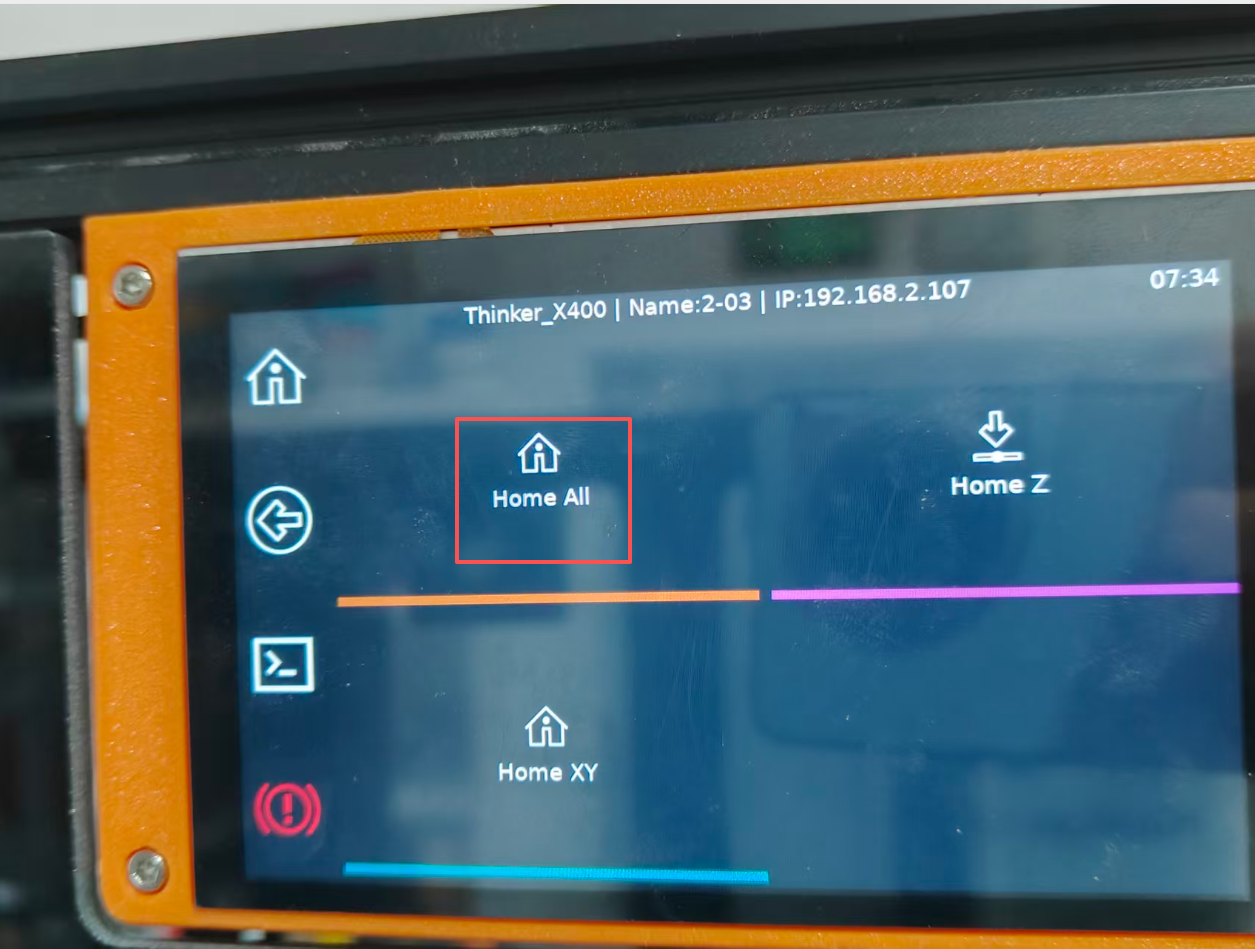
1.Tap "Home All" on the Thinker X400 screen.

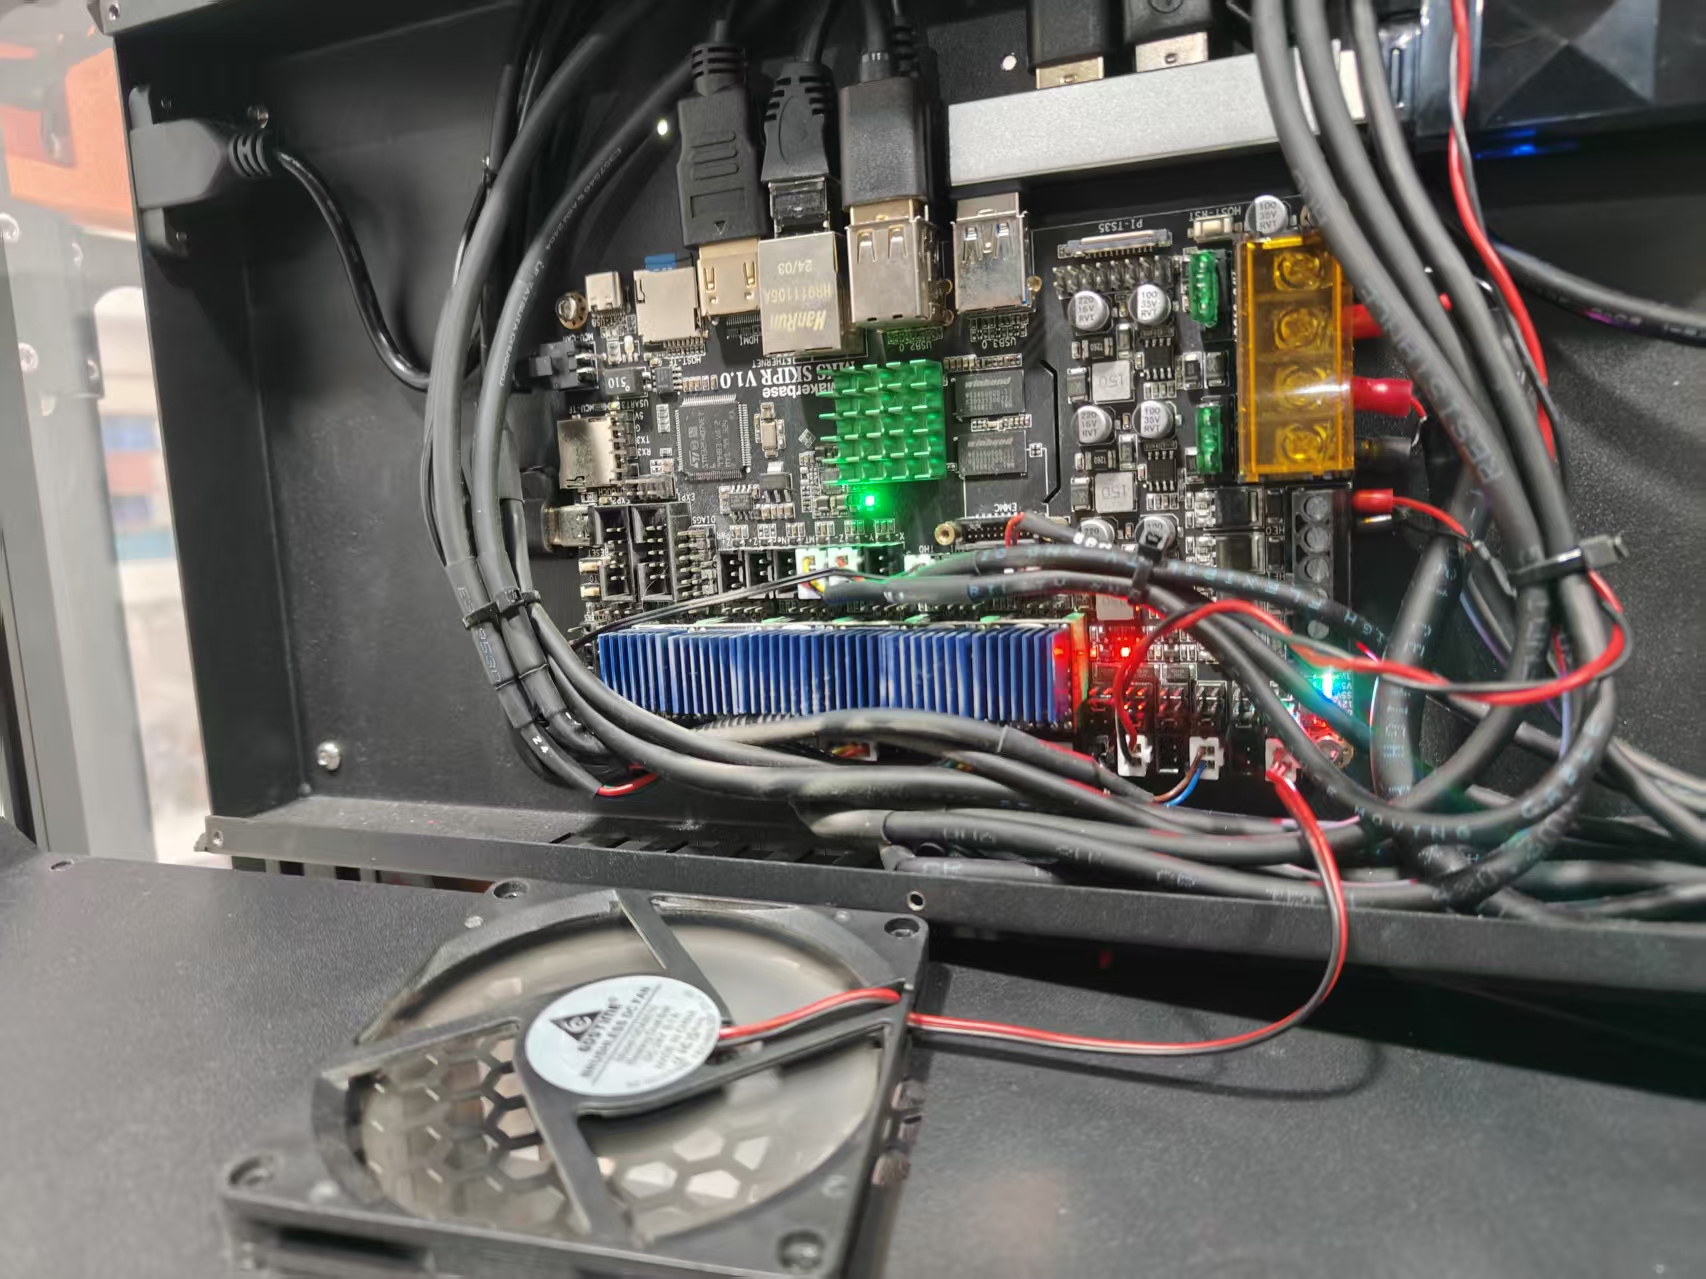
2.Check if the motherboard fan is spinning.
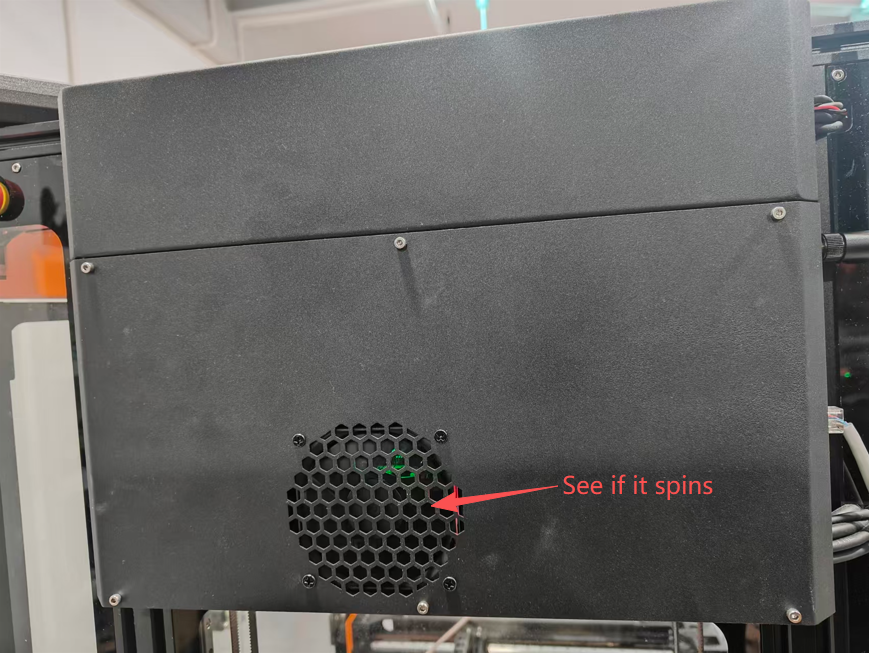
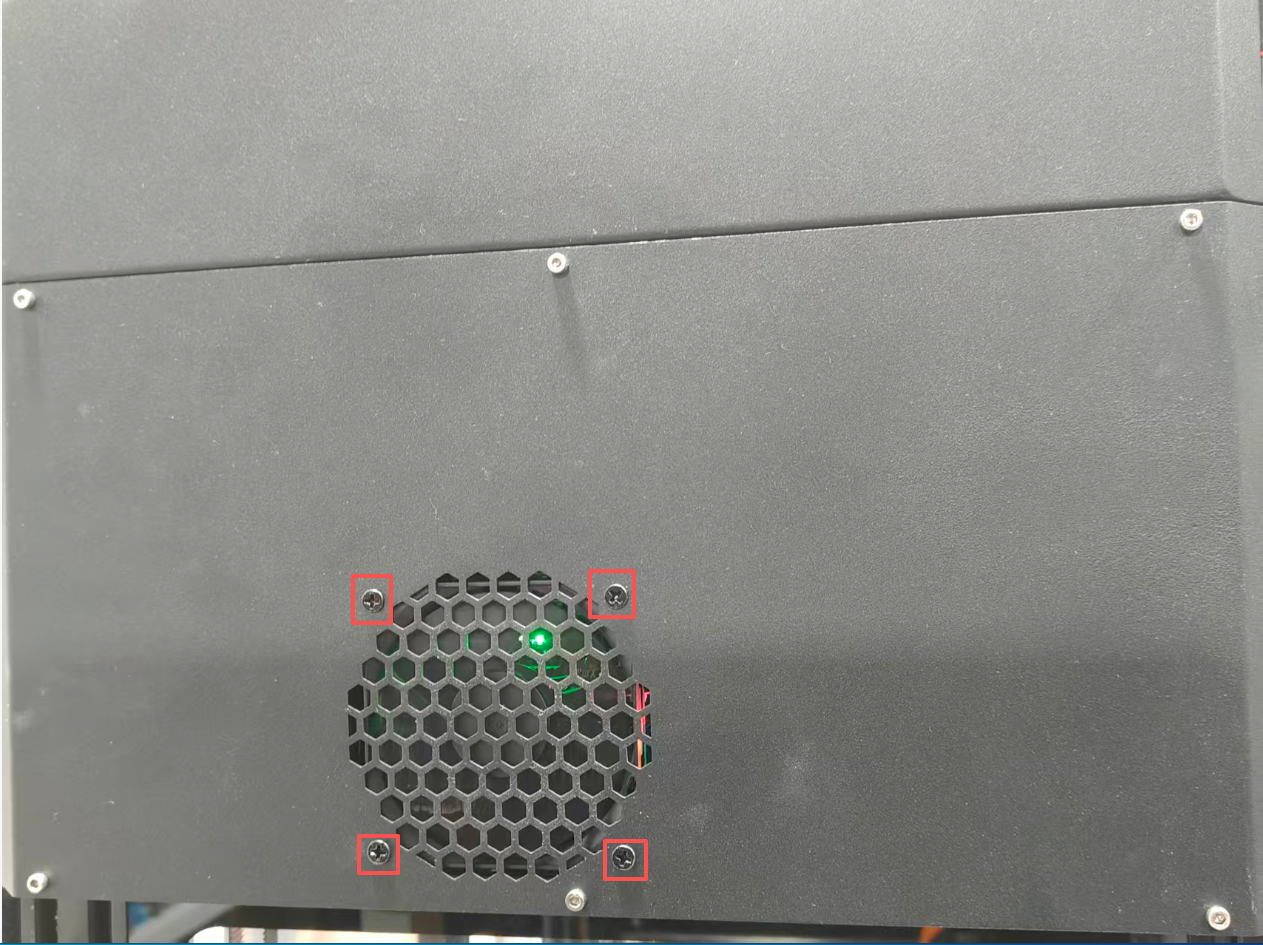
3.If it isn't, use a Phillips screwdriver to slightly loosen the 4 screws securing the motherboard fan.
4.Tap "Home All" again and check if it spins now.
Method 2:
1.Remove the 6 screws from the motherboard cover and take off the right-side cover.
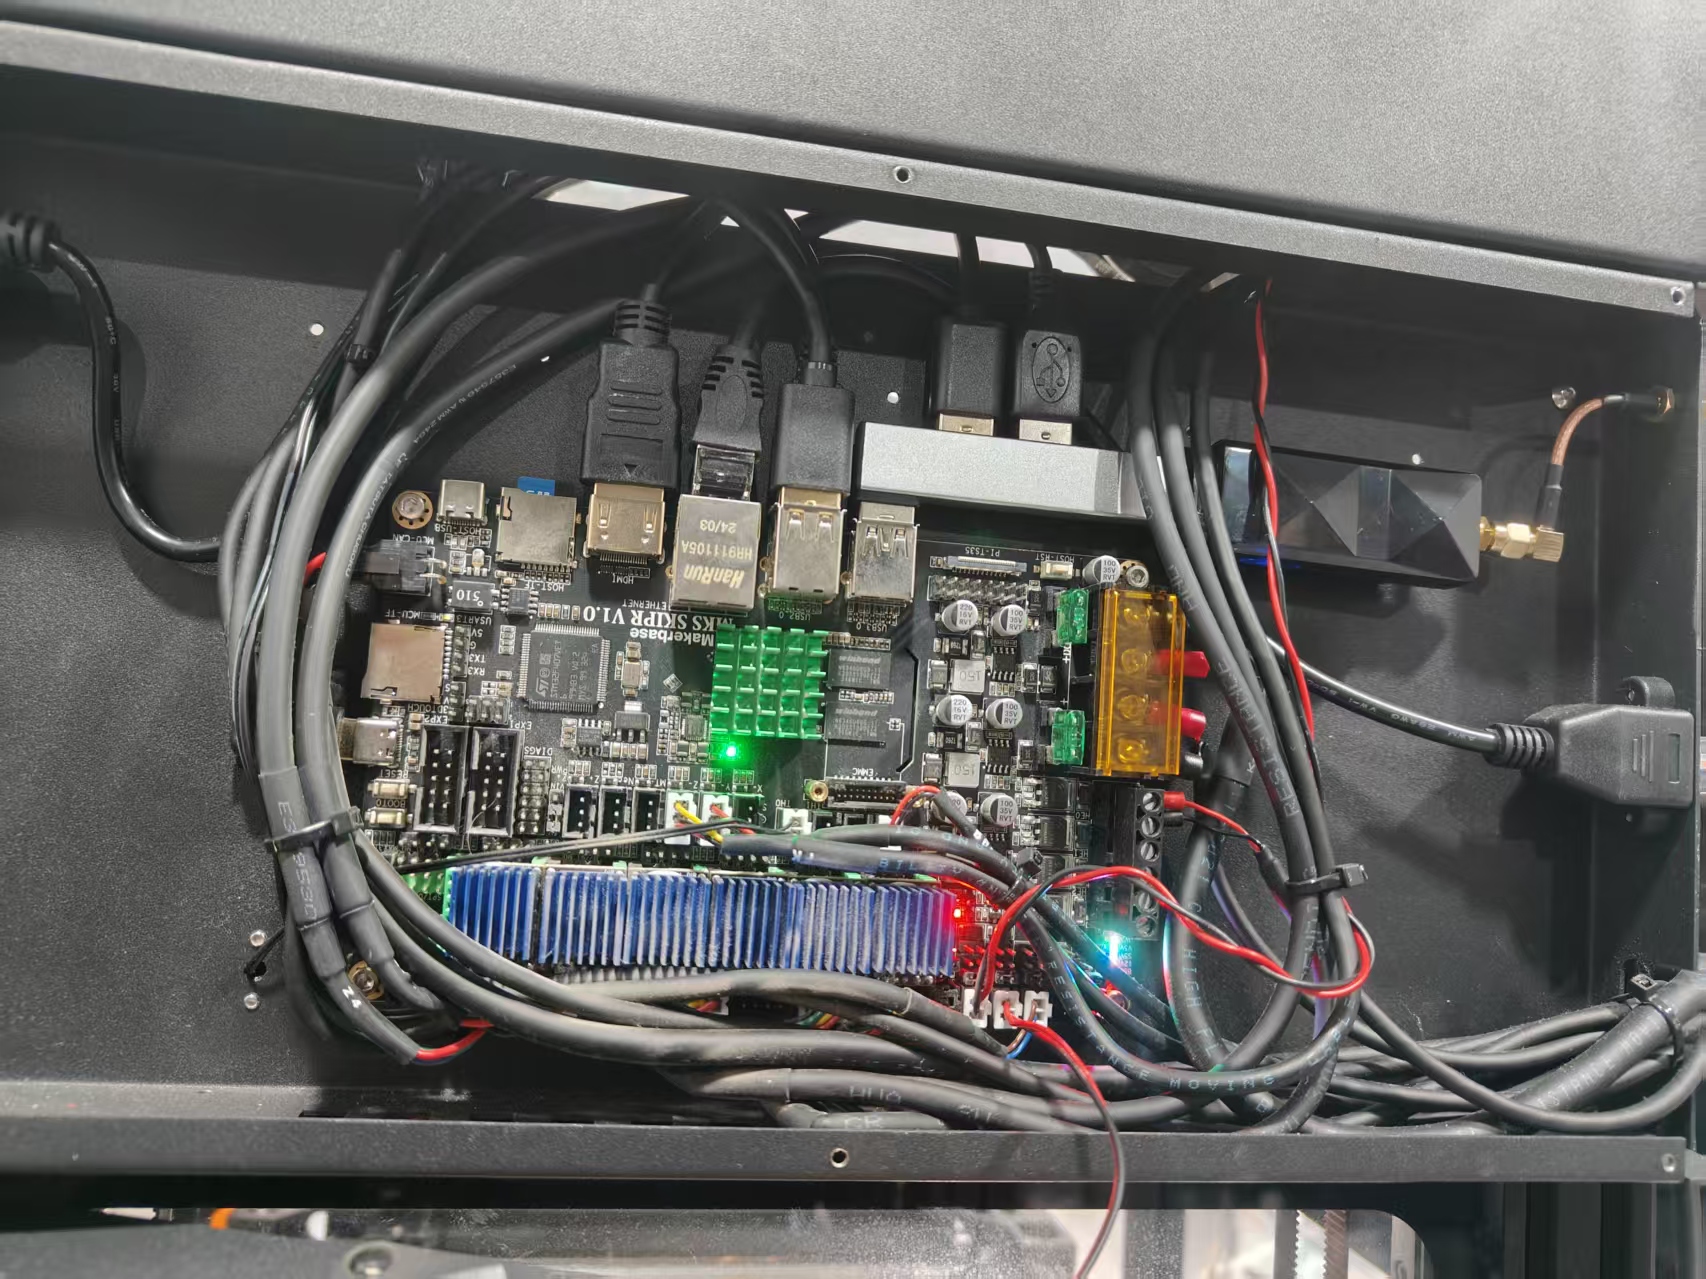

2.Insert the fan connector into the last slot on the motherboard and observe whether the fan rotates (if not, it indicates the fan is damaged).
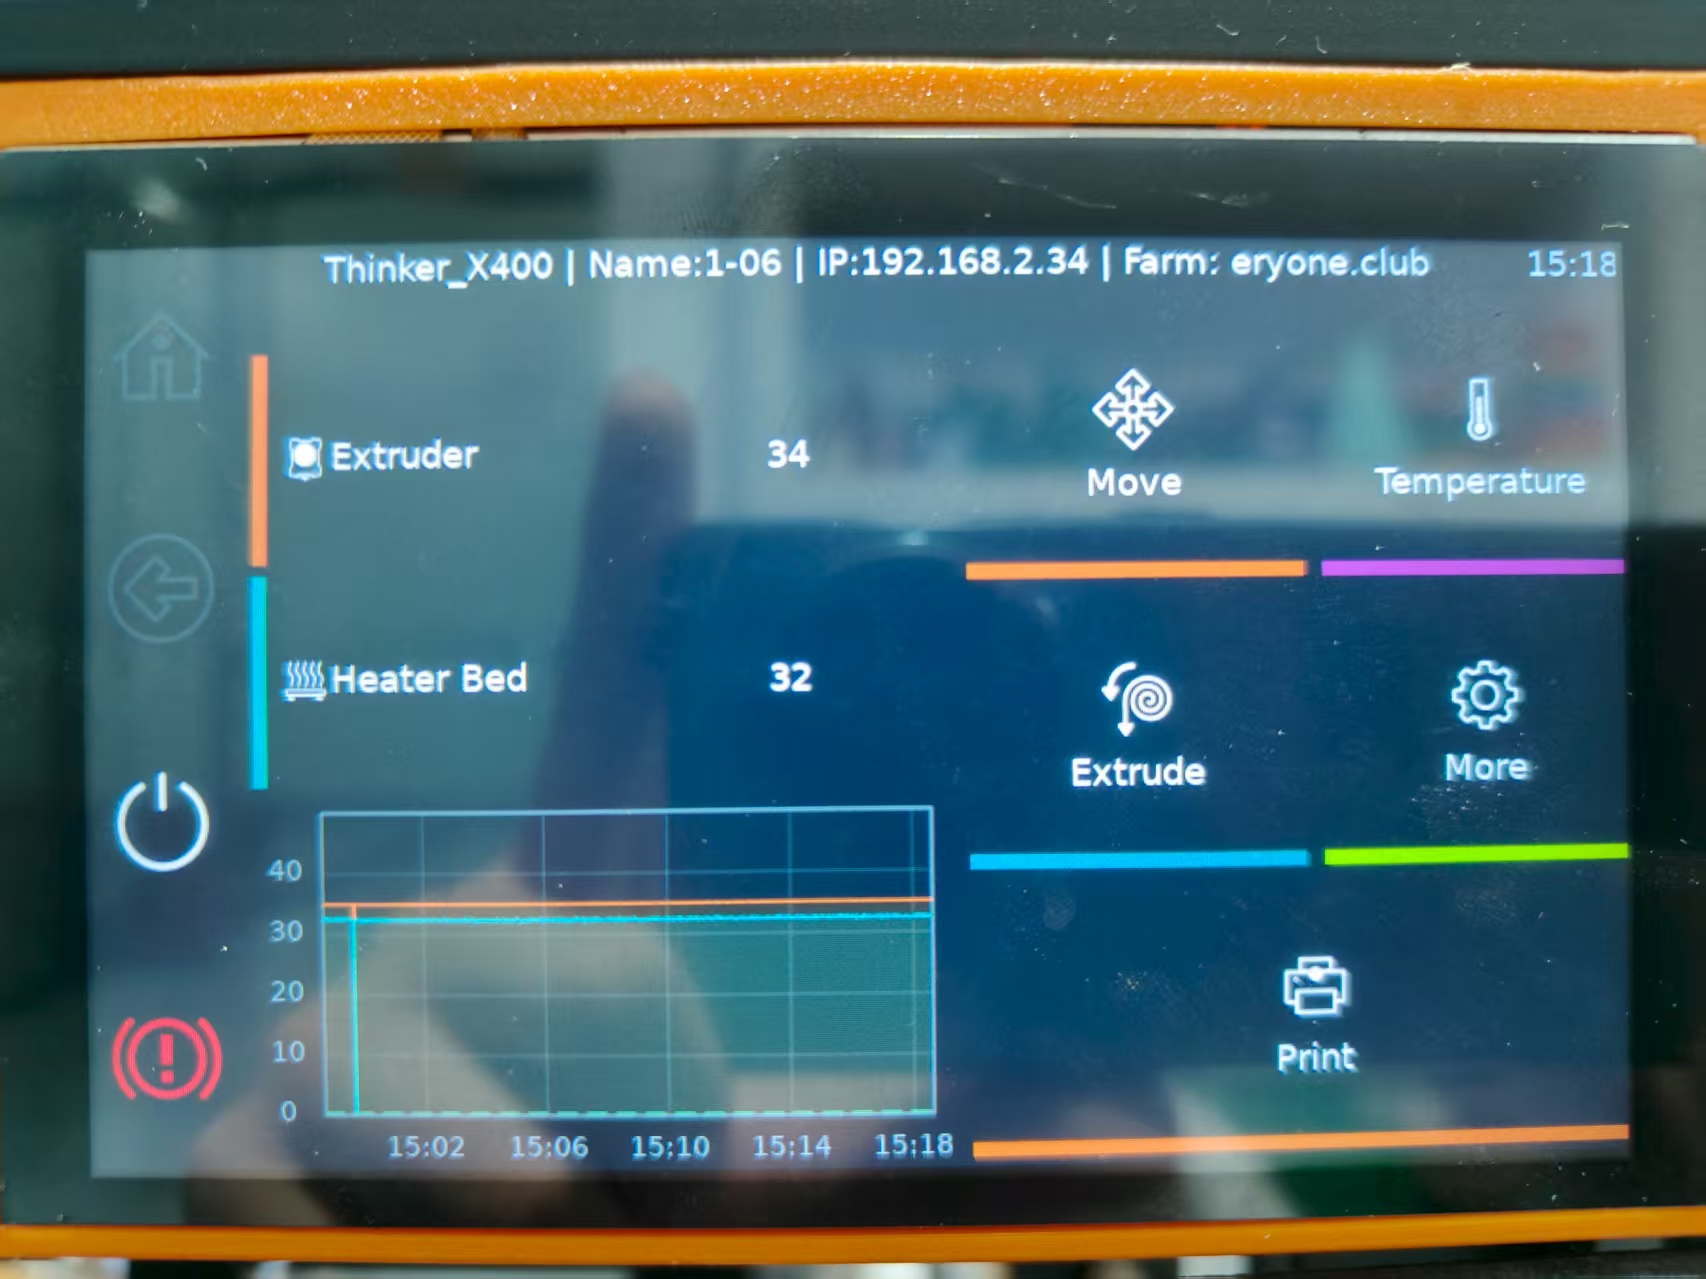
¶ 10.Heater extruder not heating at expected rate
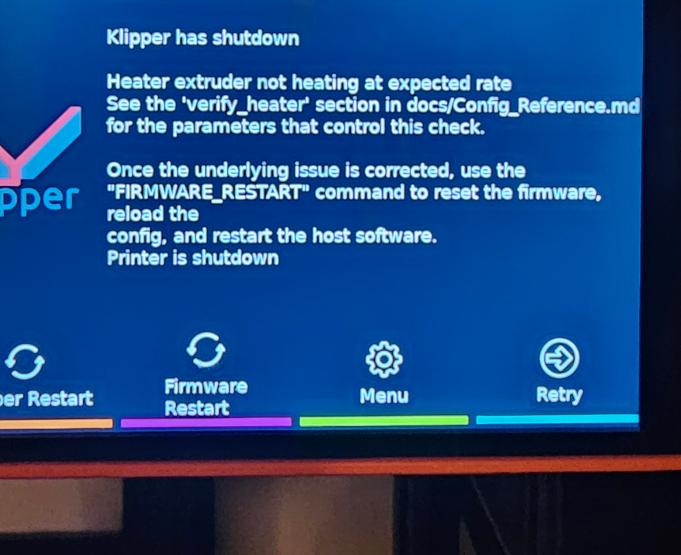
reason:
1.Without a silicone sock, the nozzle fails to maintain the set temperature when the part cooling fan is on, as it dissipates heat too rapidly.
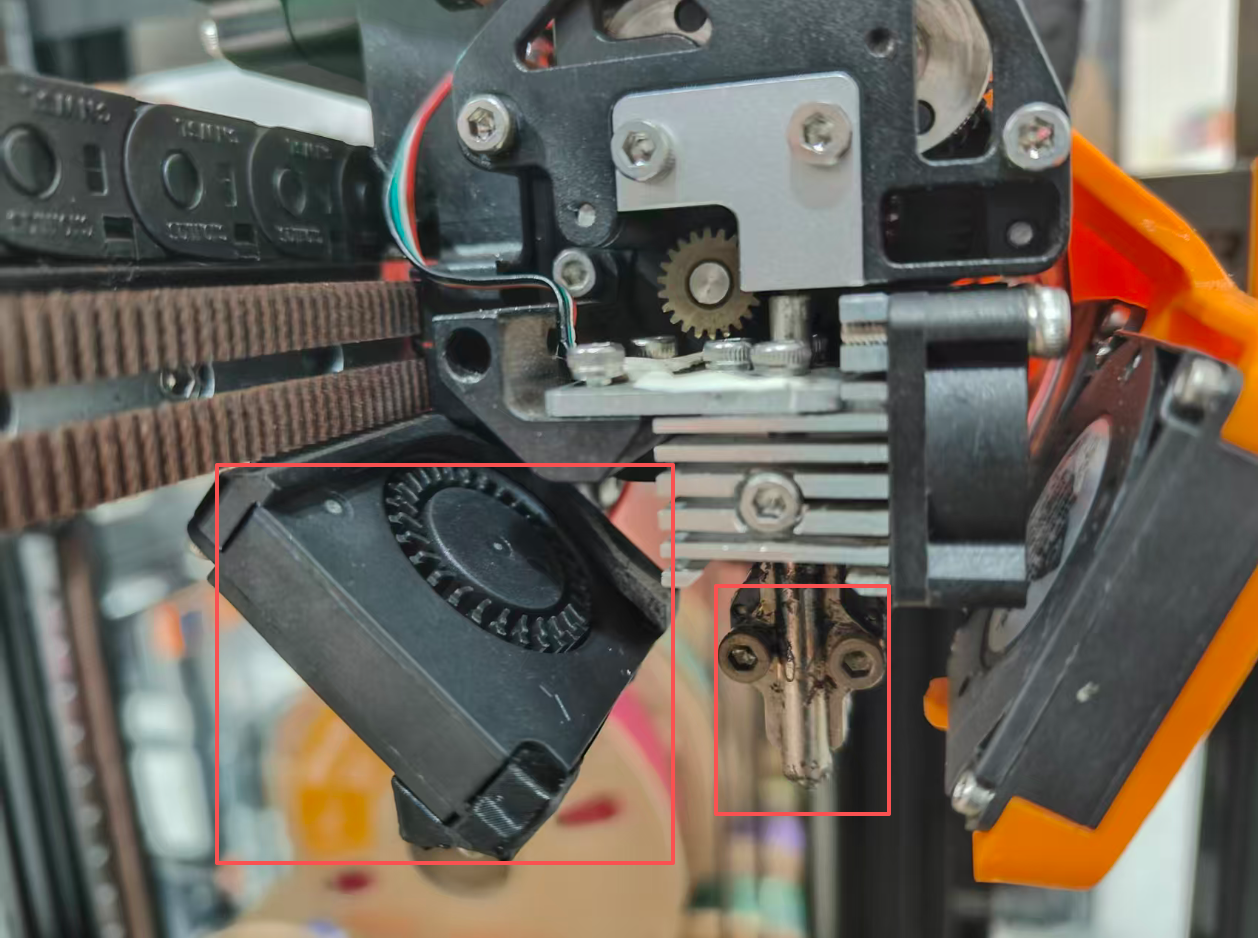
2.The nozzle cannot reach the set temperature due to a defective heating cartridge.
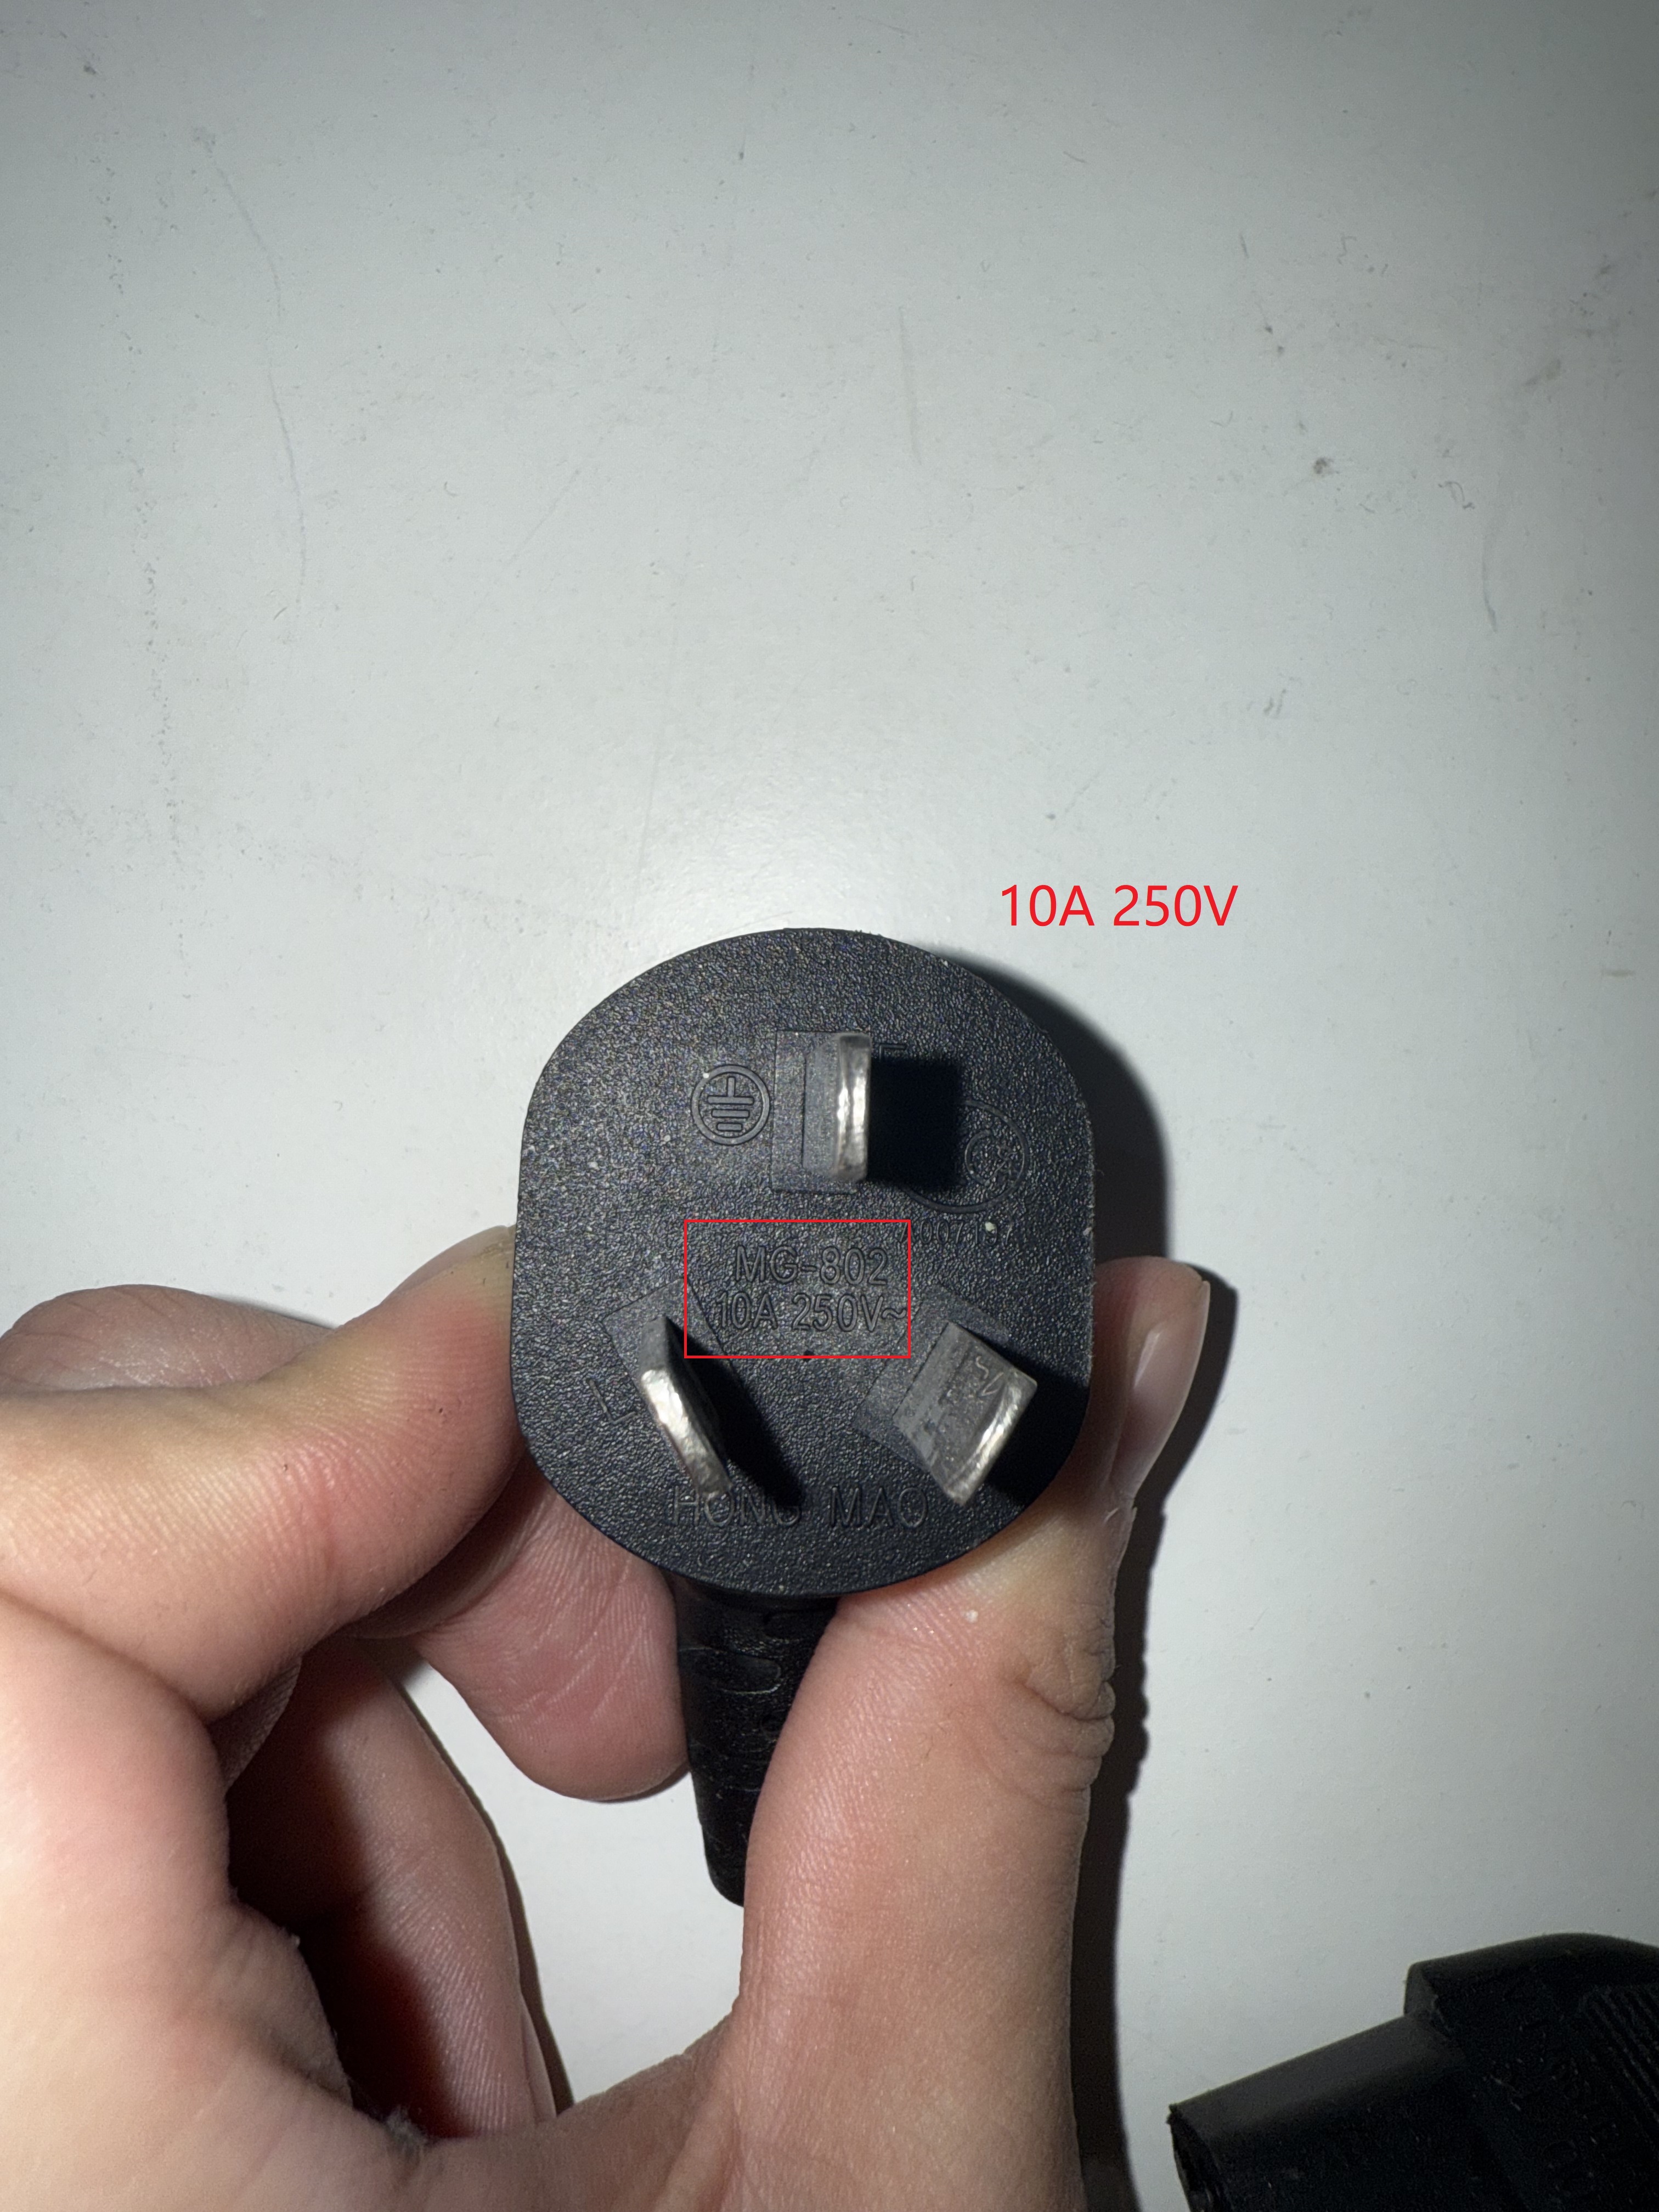
3.Non-original power cord used
Method 1:
Install the silicone sock.
Method 2:
Check if the heating element wiring is loose

Method 3:
Check if the power cord specification is 10A 250V
¶ 11.The first printed part is stuck too tightly to the printing platform and is difficult to remove.
Cause:
After leveling, the nozzle is too close to the printing platform.
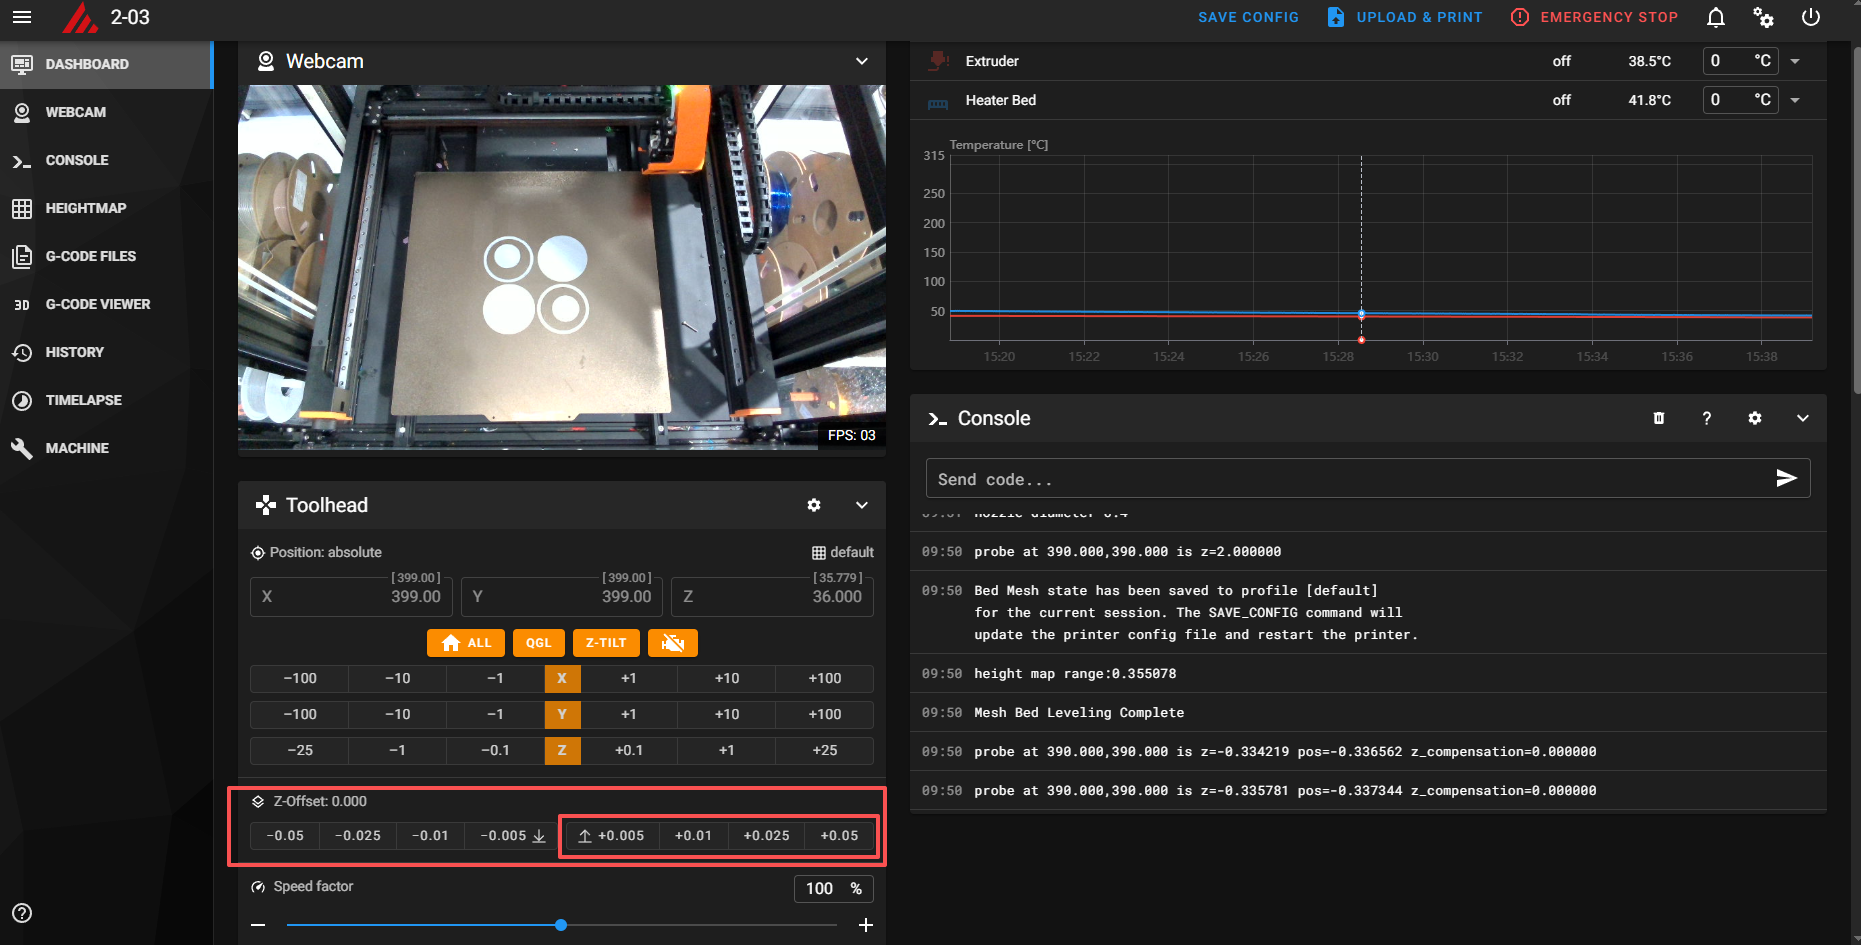
Solution: Adjust the Z_offset value.
Method 1:
1.Leveling machine
2.Enter the machine's IP address in the web browser.
3.Locate Z_offset at the bottom of the control panel.
4.Increase the height of Z_offset appropriately.
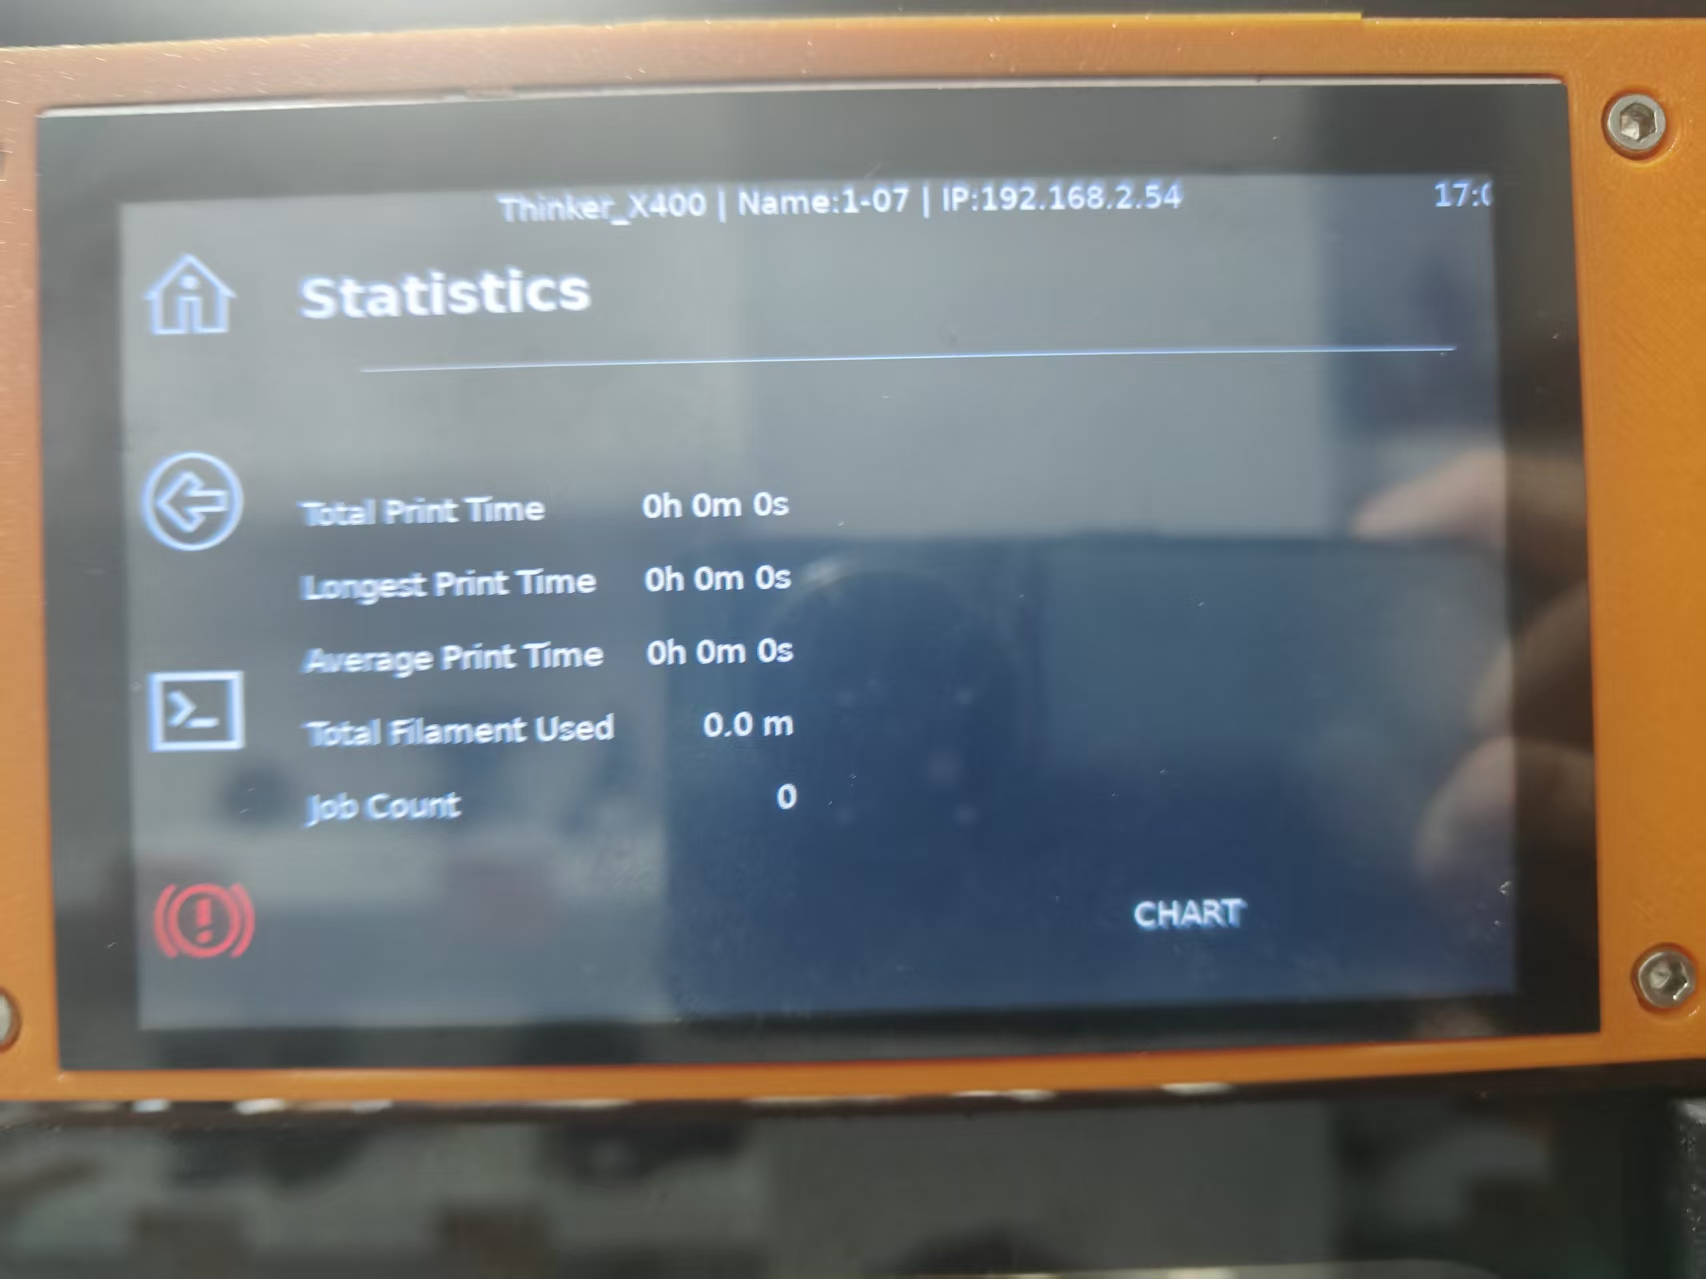
¶ 12.The displayed usage duration on the printer does not match the actual usage duration.
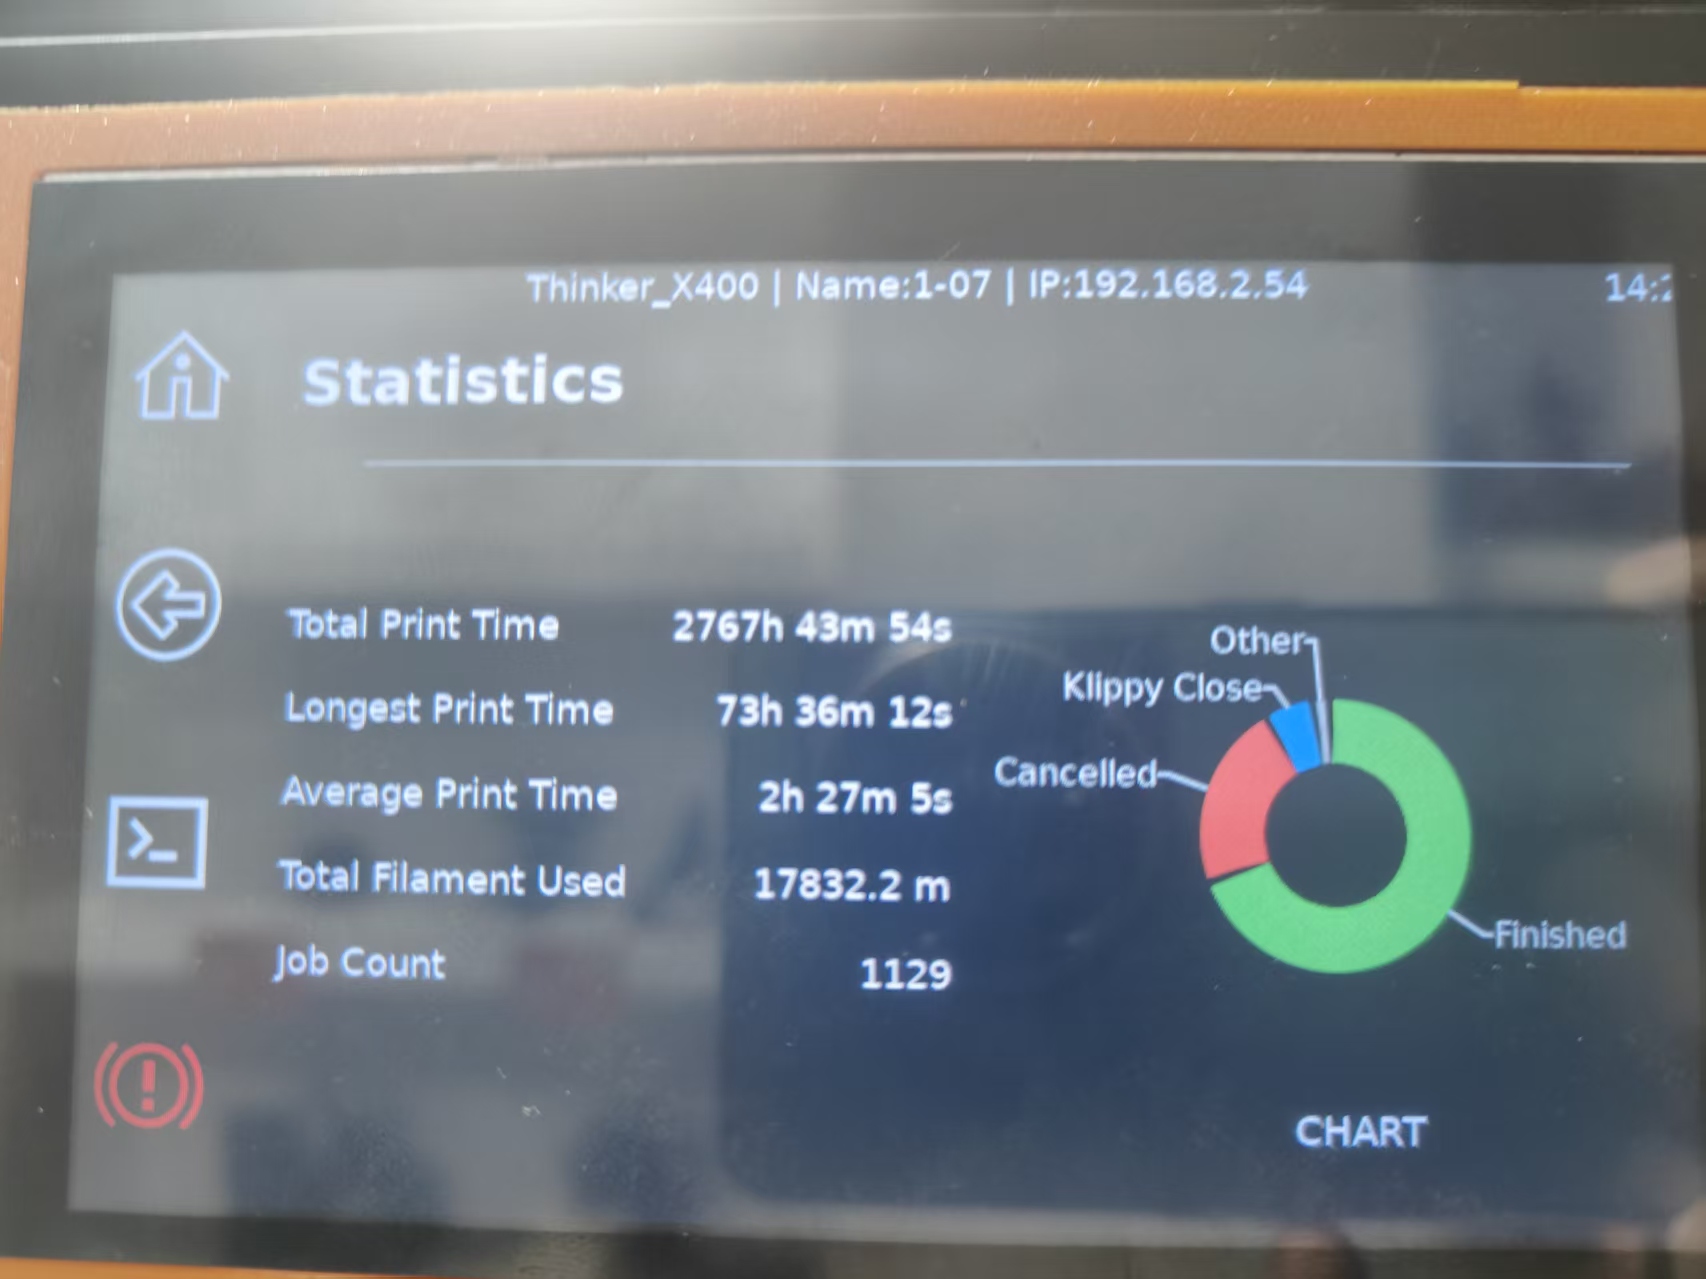
Reason: The data in the printer's database has not been initialized.
Method 1:
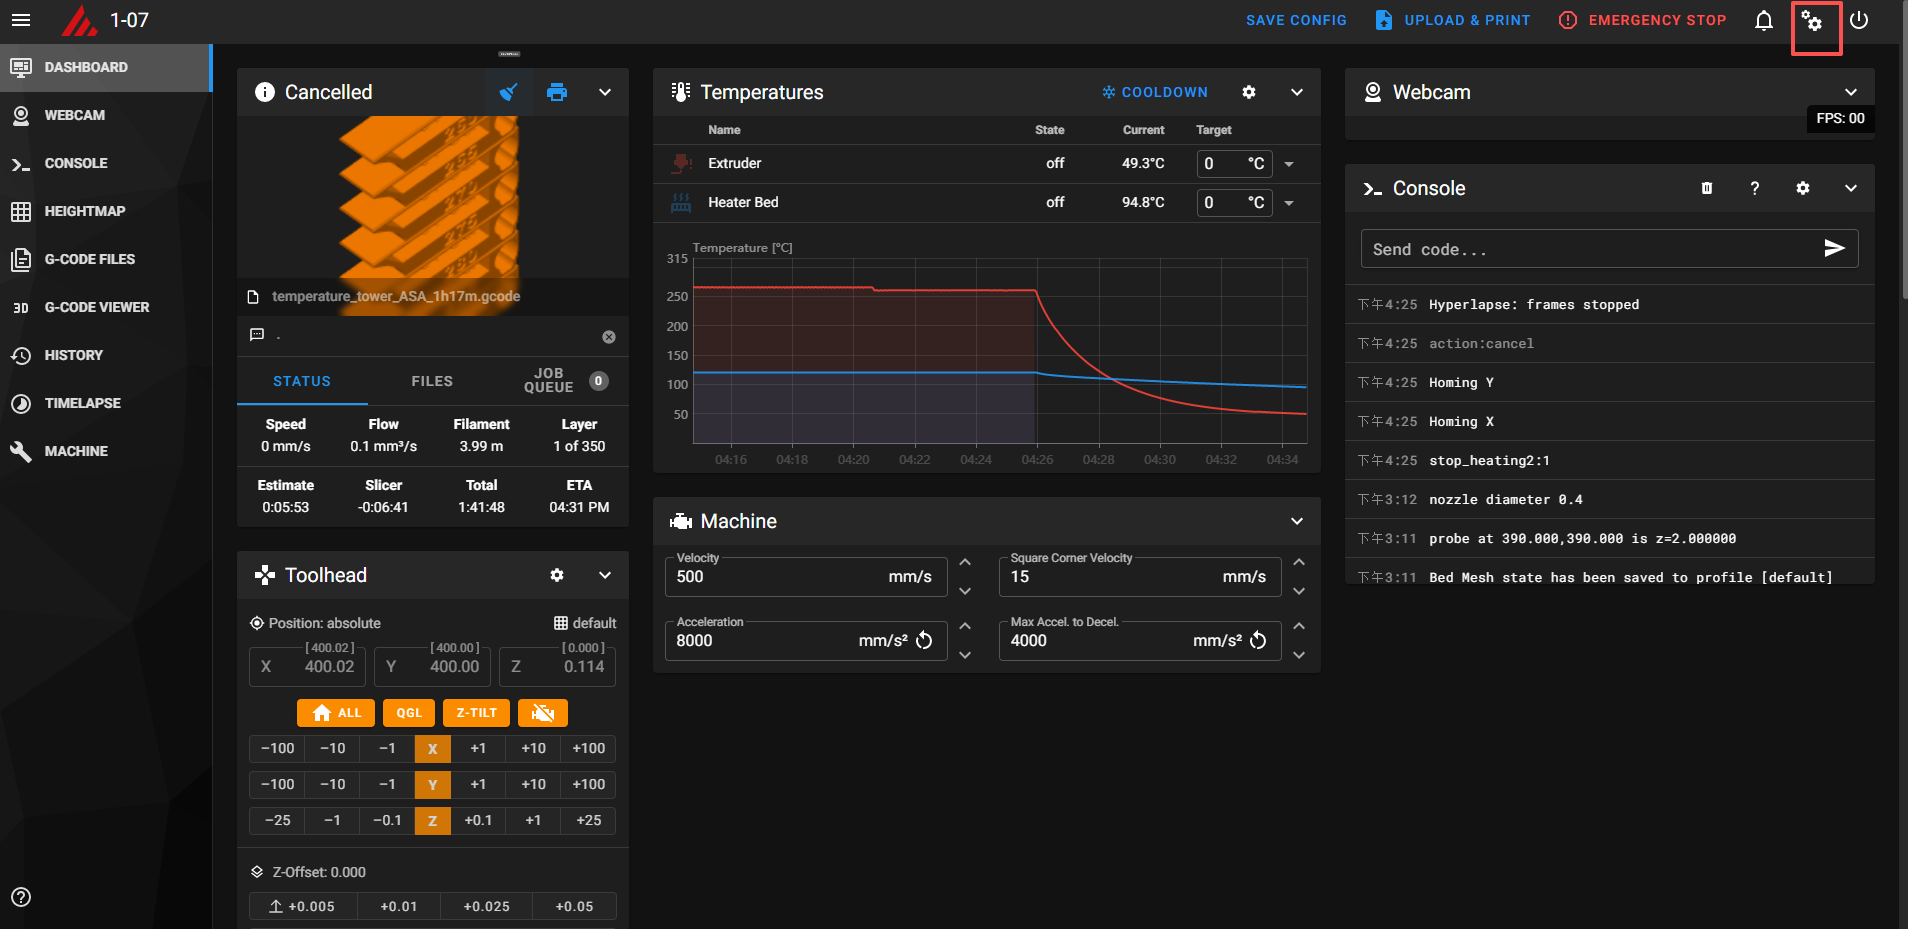
1.Enter the machine's IP address in a web browser.
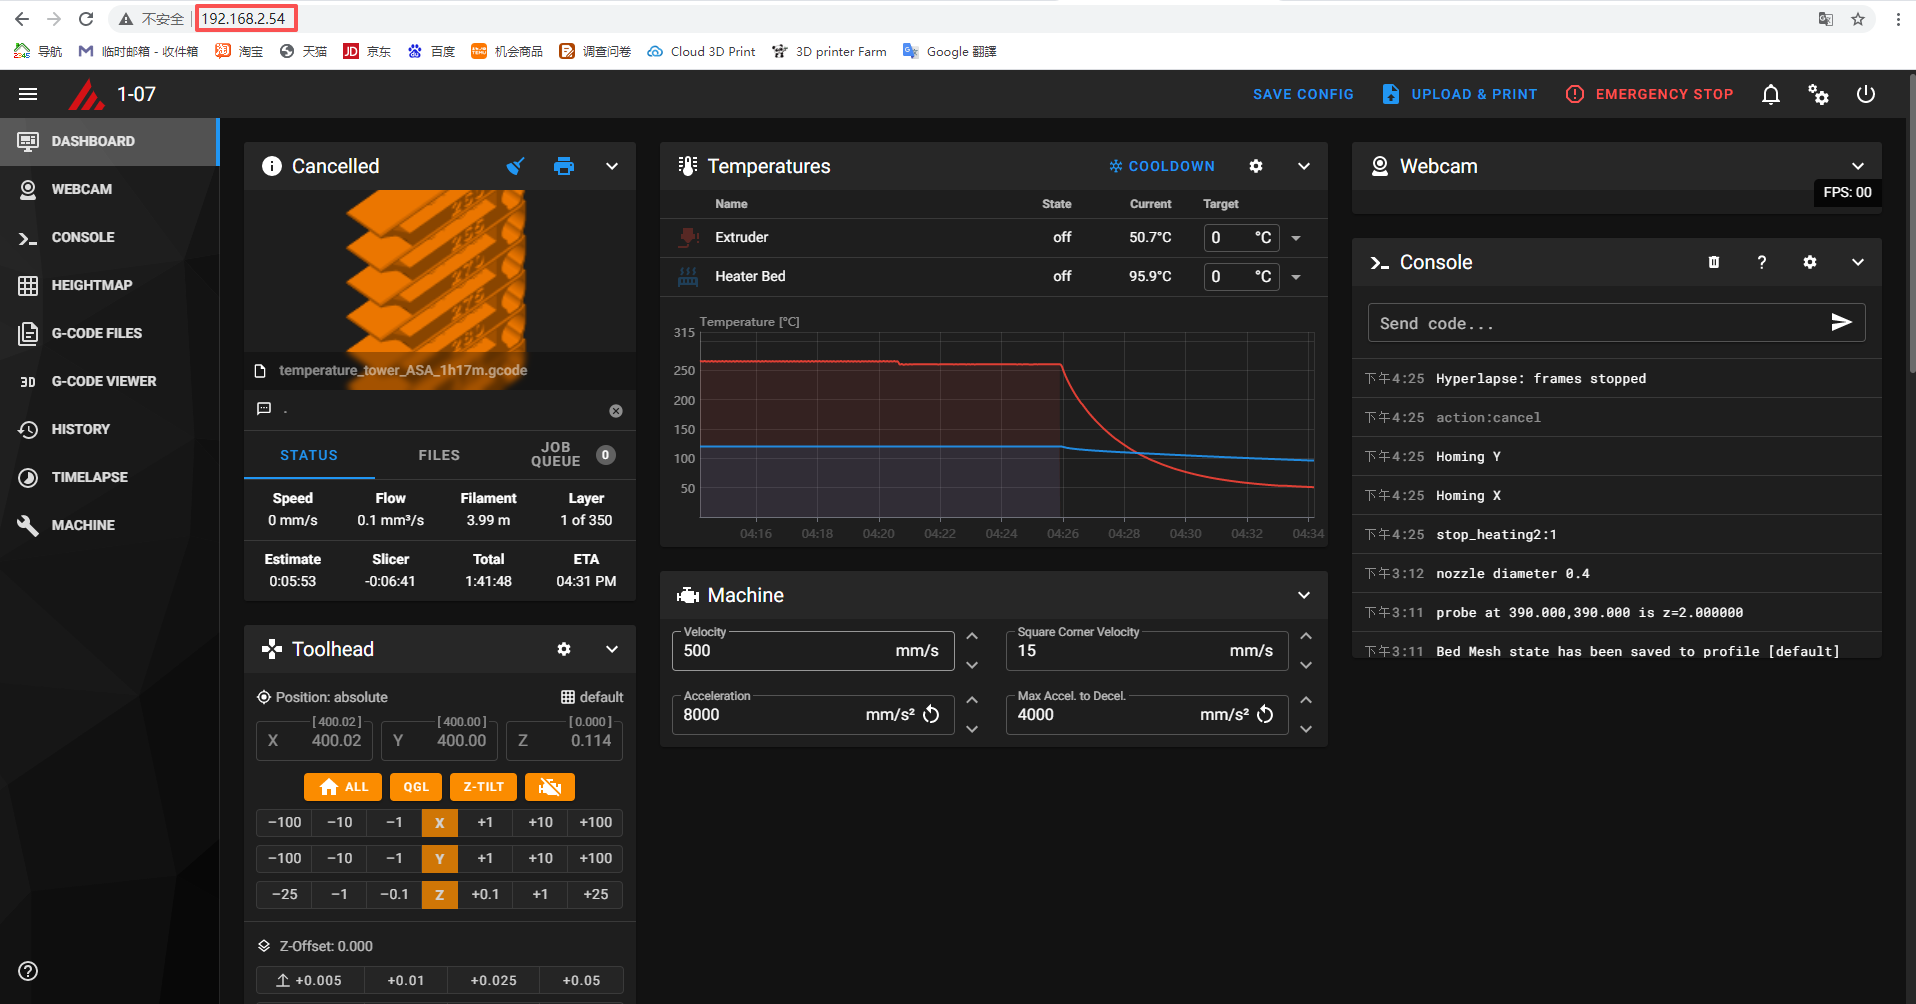
2.Click the settings icon in the upper-right corner.
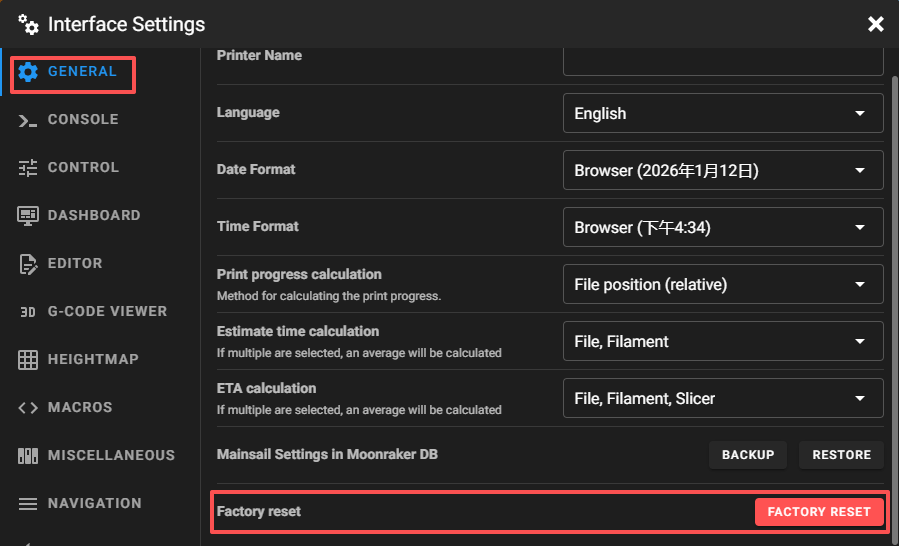
3.Navigate to "Restore Default Settings" within the "General" tab.
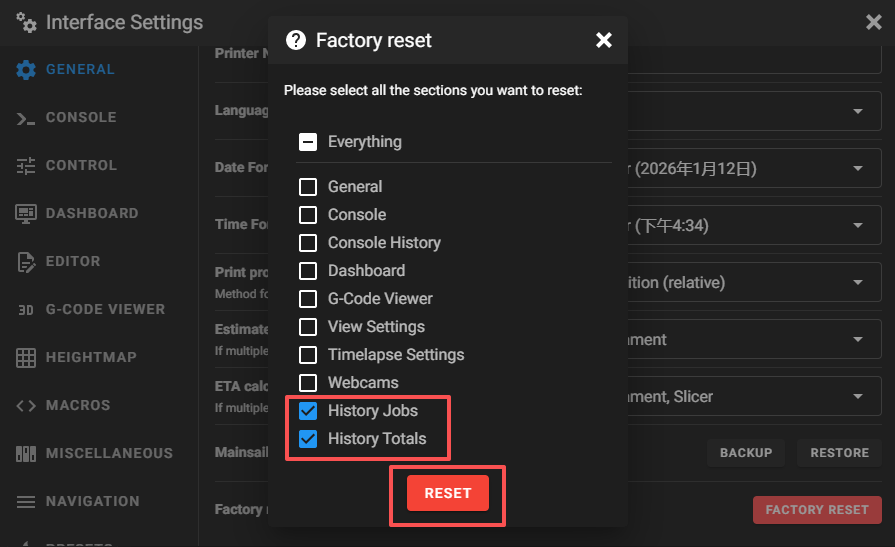
4.Select "History Tasks" and "History Statistics" to initialize them.
¶ 13.Response timeout
Reason:High CPU usage
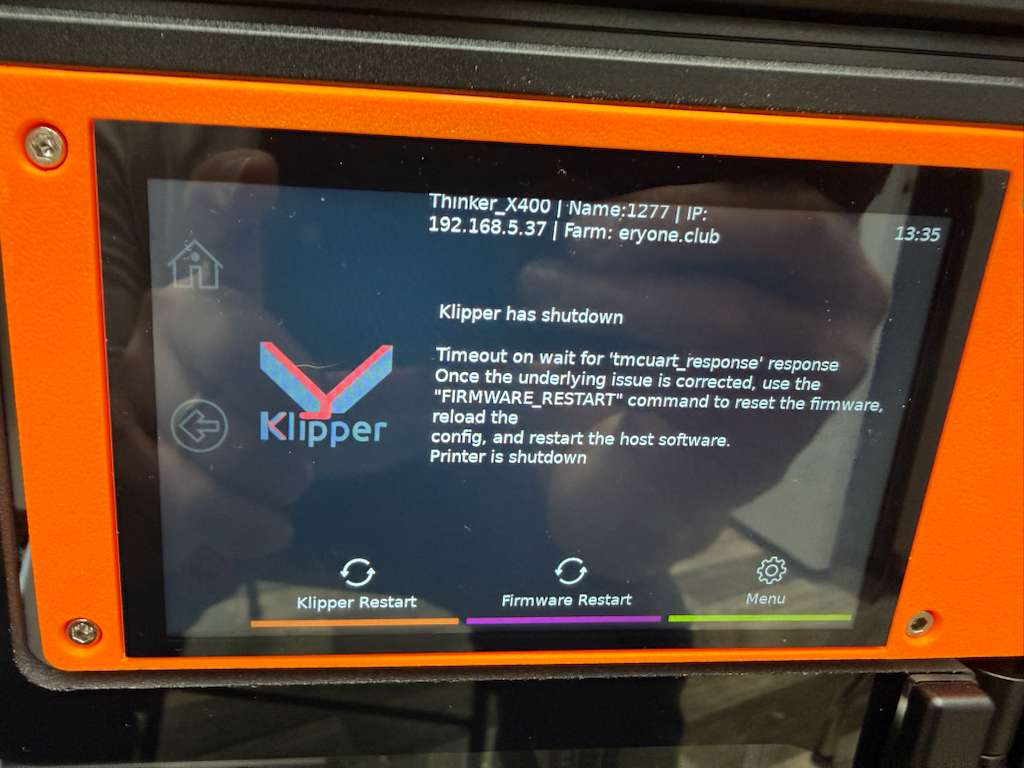
Method:
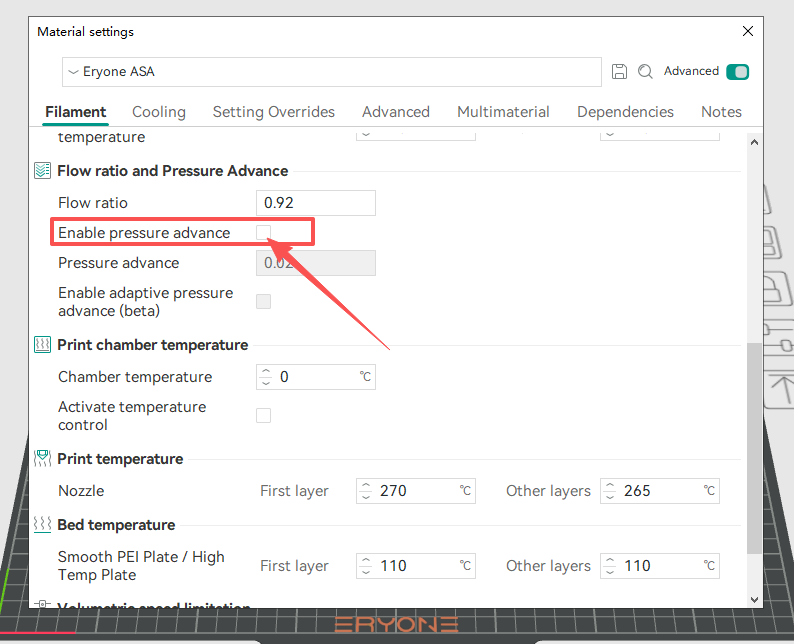
1.Click on Consumables Edit in the slicing software
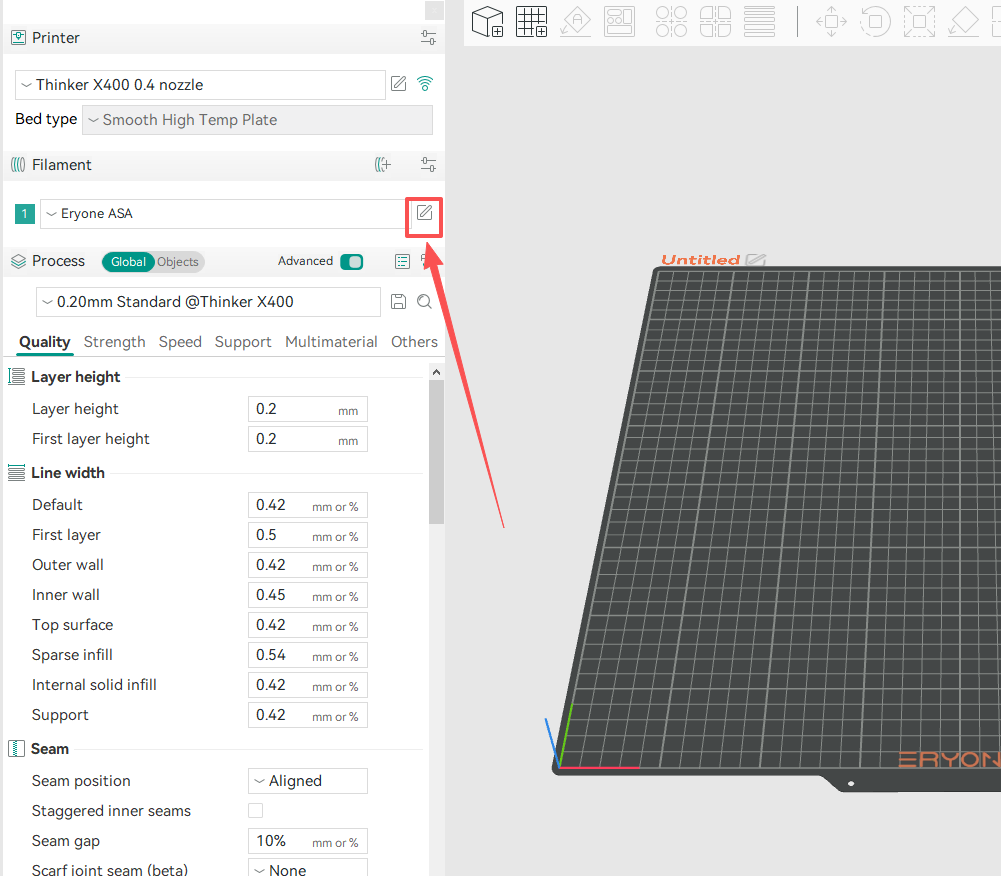
2.Unchecking the box will reduce pressure in advance.
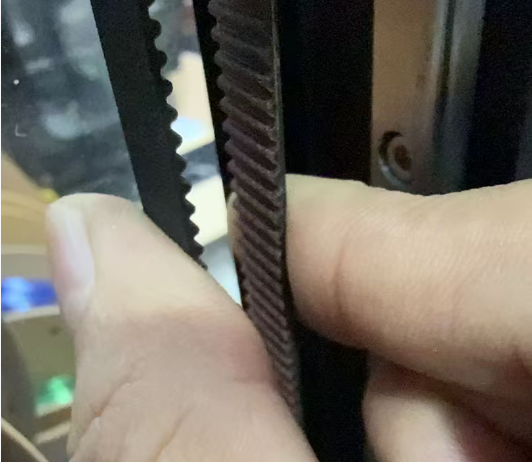
¶ 14.Print model offset
Reason 1: The belt is loose
Solution:
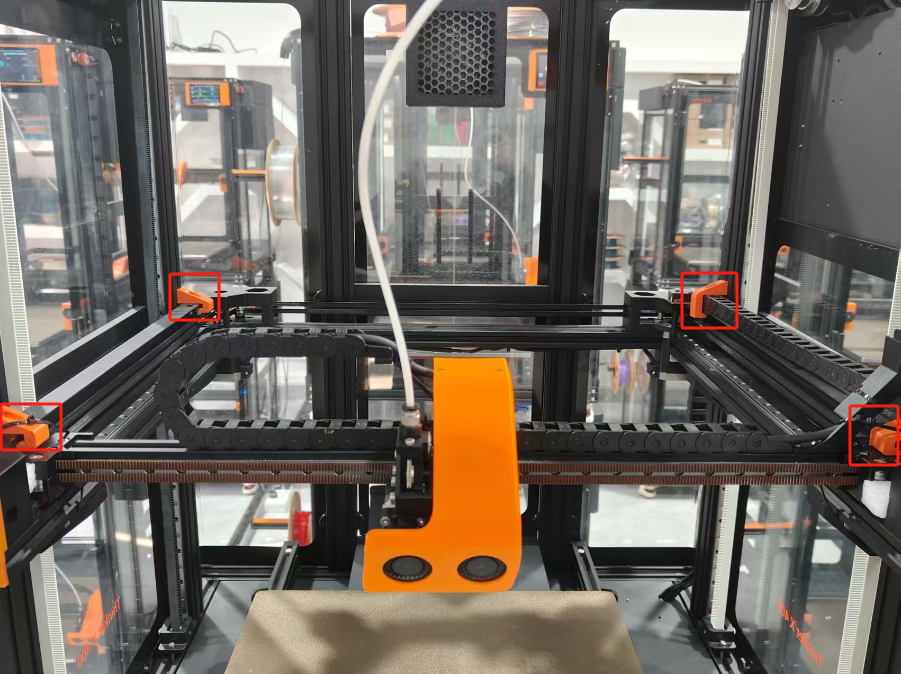
1.Determine the tension of the four belts on the printer's Z-axis.
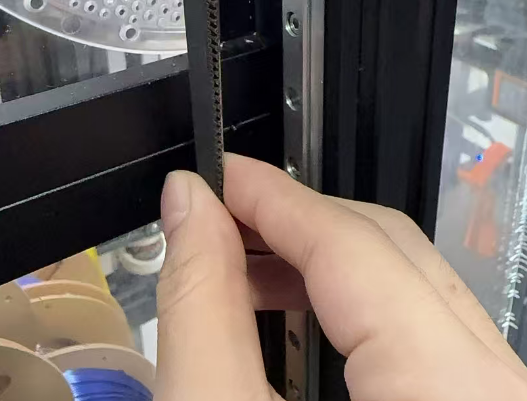
2.Increase the height of the X and Y axes appropriately.
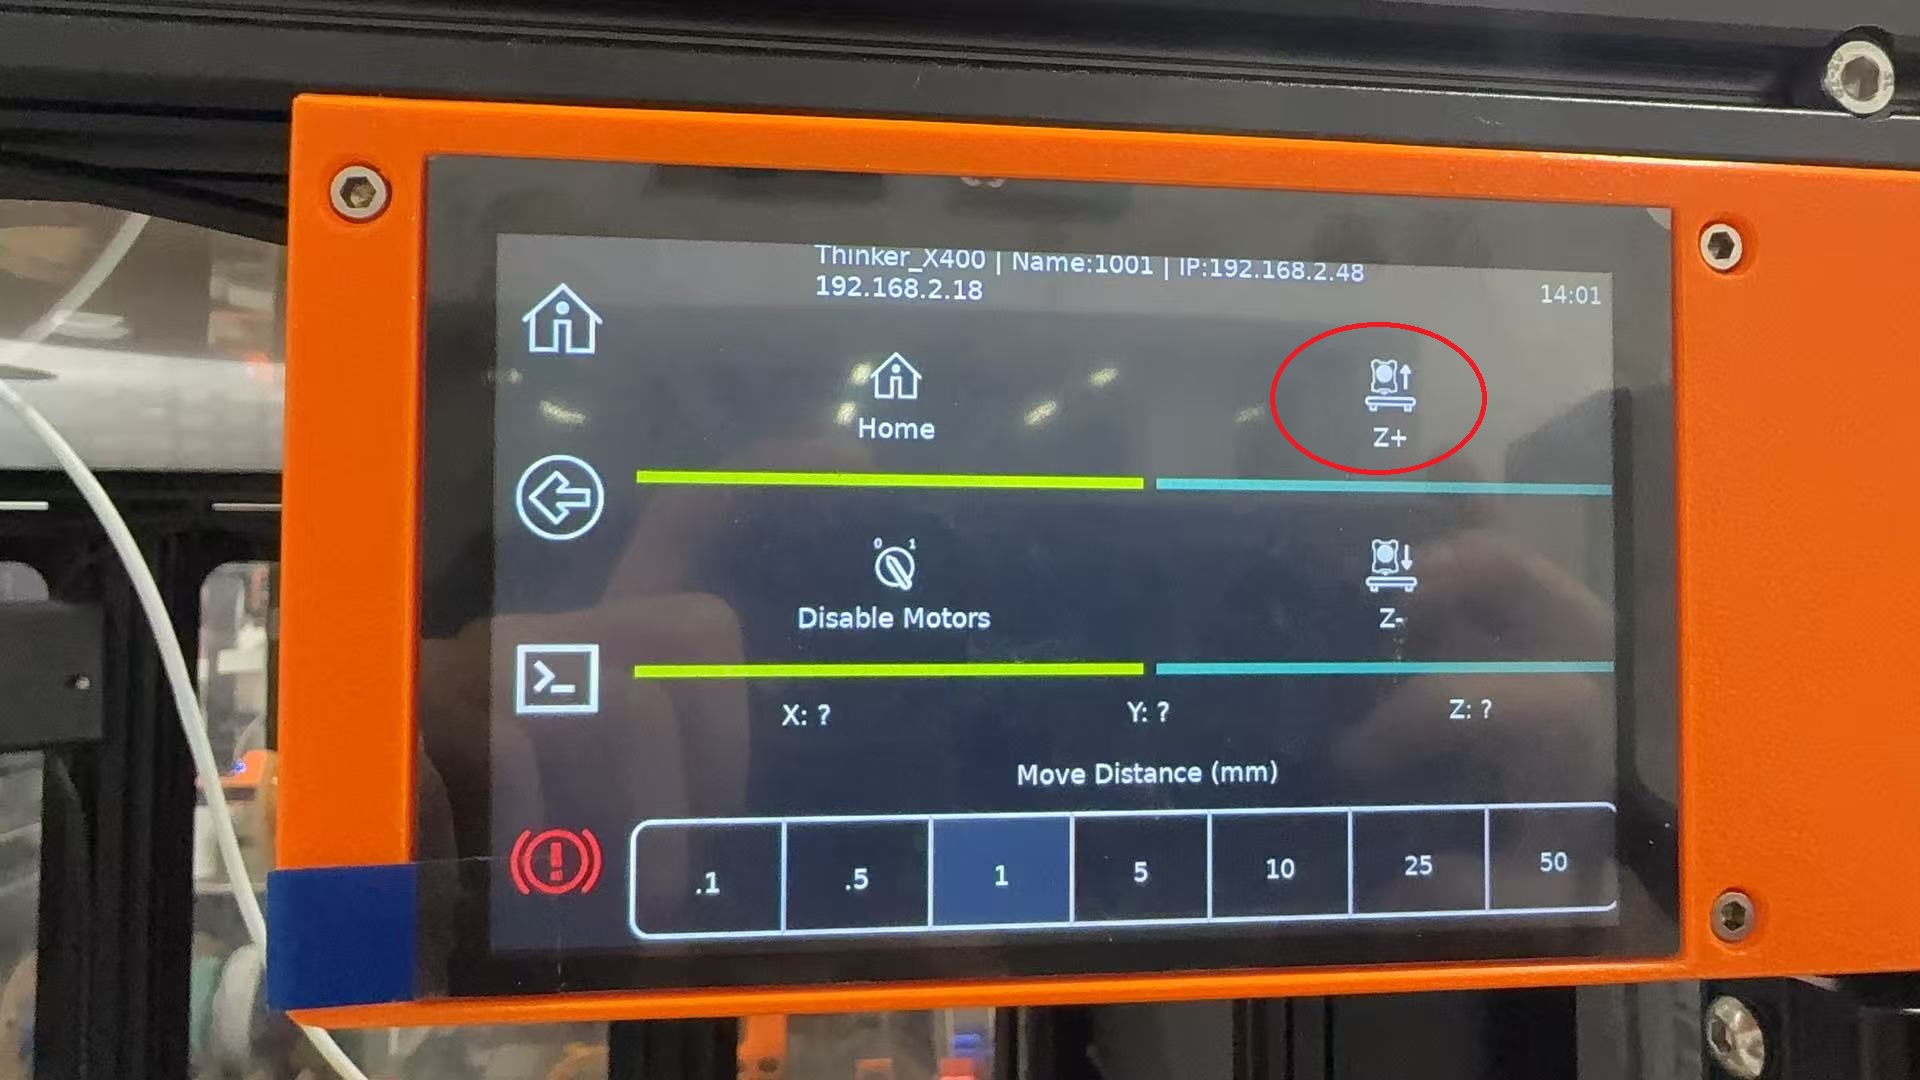
3.For a looser belt, slightly tighten the bottom screw.
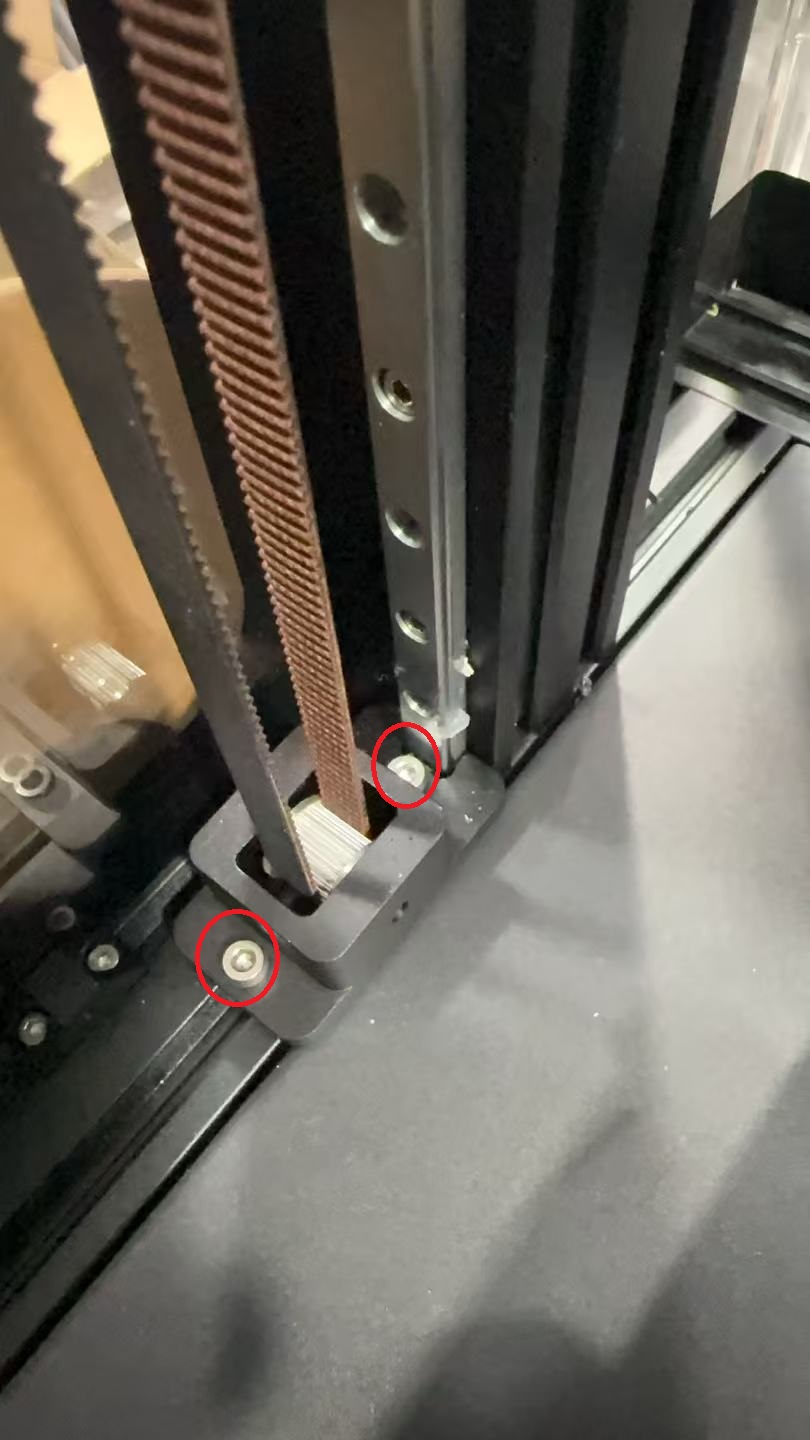
4.Double-check the belt tension; it should be slightly taut.